Category: Skills

  • How to sew on a button

    How to sew on a button

    button

    If you were to look at an American household in the nineteenth century —- let’s say, 1850 — and compare it with the same household of today, there would be many similarities. Oh sure, you’d have to first take out all the electronic gadgets — remove the TV’s, the microwaves, all the handheld gizmos that we walk around with — until you have the base.

    So you here you have two families. A modern one and one from 1850. In both you have beds to sleep on. You have a place to cook, a place to get warm and a place to wash ourselves and wash clothing. There is a method to light the home, a manner to get water, a table to eat on and there are modes of transportation.

    And now that you have the base, there will be one thing missing.

    The modern home will have garbage cans — many garbage cans in various rooms and outside — along with a method to have these cans emptied weekly. The 1850 home will not.

    So what did the people of 1850 do with their garbage?

    Simple. Nothing. Because there was no garbage.

    Food scraps were fed to animals or placed in a compose pile. And there were no milk cartons or takeout containers to get rid of because they didn’t exist. If there were the occasional tin cans of food items they were often reused or repurposed and clothes were simply recycled. When a shirt was outgrown it was handed down, used as a rag, or stripped for quilting.

    Today, each person in the US creates 1,500 pounds of municipal waste a year that will go to a landfill — that’s all our soda cups, plastic bags and takeout containers — and clothing.

    [amazon asin=B002PI751C&template=iframe image][amazon asin=B004RDH7Y8&template=iframe image][amazon asin=1589234340&template=iframe image][amazon asin=B00817DZWO&template=iframe image]

    Yup clothing. Today, only 15% of all clothing goes to thrift stores, used clothing outlets or are recycled. 85% ends up in landfills.

    As a country, we no longer reuse or hand down clothing as we did only a generation before. We throw it away. And one of the most common reasons to throw an article of clothing away, is because of a missing button.

    In our throw-it-away-and-buy-a-new-one culture we will actually throw away a shirt if there is one missing button on it — even though the shirt will have three spare buttons sewn in the tail only a few inches away.

    As a man, something as seemingly unimportant as sewing on a button is kind of a big deal. It’s one of the seemingly insignificant events that add a little bit of control back into our lives.

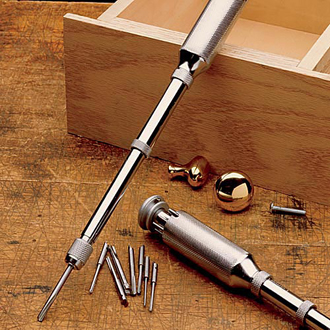
    Sewing a button is extremely easy and small sewing kits can be found in any Dollar Tree in the country — so you don’t need to worry about buying your mother’s flowery sewing box.

    SEWING A BUTTON:

    1. Choose the button and choose the color thread that matches.

    2. Thread the needle. This will take a steady hand, but push the end of the thread through the eye of the needle.

    3. For a button, take out about 16 inches of thread — I know it seems like a lot, but you’ll want that extra length to work with — cut the thread and tie a knot in the end. So now you have a threaded needle.

    4. Place the button where you want it

    5. From the back of the cloth, press the needle through the cloth and the first hole of the button. Pull the thread all the way through tightly.

    6. Now place the needle through the button on the outside of the cloth and back down in. You are now creating your stitch.

    7. Repeat in an X pattern. So the thread is crossing the holes of the button and back on to the cloth.

    8. On the final stitch, push the needle through the button and material and make several small knots on the back of the cloth.

    9. Cut the excess thread.


    Done.

  • The Power of the Nap

    The Power of the Nap


    nap

    There are some really cool jobs in the world.

    For example, there is a guy whose job it is to keep the Stanley Cup until the next hockey season. That’s his job. He picks up the Stanley Cup after the championship game and takes it to his house in Toronto and keeps it safe until the next hockey season.

    Then there’s the guy who flies all over the world testing waterslides. Then there is another guy whose job it is to stack all the gold at Fort Knox. Now add to this all the professional eaters, the guy who puts the dirt on the baseballs, and live mannequins — also known in the trades as human statues — and you have some pretty unique career paths.

    But the one person, the very single person who had the very best — I mean, hands down, nothing even close — best job in the world, was Adam. You know, from the Bible.

    It was Adam’s job to name all the animals in the world. All of them.

    So Adam would get up in the morning — without pants, another bonus — and name all the animals.

    “You get to be an ocelot,” and the ocelot moves on knowing he now has a name.

    “You can be called platypus. And you can be a snorf-latt…no, a dog. Yeah, dog works better. You are a dog.”

    Now after Adam, it becomes a little fuzzy on who picked up the naming stuff franchise. I mean, how did a canoe become a canoe and not an artichoke? Why do we say gesundheit instead of saying Maryland? And who came up with macaroni, cable, papaya, and sanctimonious?

    [amazon asin=B00EKO7FOG&template=iframe image][amazon asin=B000ZK4QH8&template=iframe image][amazon asin=B000VVXT9W&template=iframe image][amazon asin=B003CGJRNK&template=iframe image]

    Not sure.

    But the person who was responsible for the word nap — nailed it.

    Nap. It even sounds like what it is — it only has three letters and you sound like you are going to fall asleep before the end of it.

    Nap.

    And although the product development team who came up with the name nap did very well, the marketing team —not so much.

    Well, they did okay with the baby demographic and with older women, but they missed the true target audience — the sweet spot of nap marketing: working men.

    Now, as men we do still nap. Yes, that’s true, and if you don’t believe me go to any shopping mall in the country in the middle of a work day. Then spot the car parked the very farthest away from everything and in that car you will find a sales guy napping. Then go to a park or scenic overlook and here you will see a few delivery trucks and repair vehicles, and inside of them will be technicians taking a ten-minute power nap.

    So we are napping. We are just in the closet about it.

    Because napping is for children and old ladies. Napping is for the lazy, the unfocused, the weak. And we are men. We are strong. And we don’t nap.

    But by working in a nap you not only get more done, but actually are more creative, energetic, and healthier overall.

    The Advantages of Napping

    1. Acts As a Reset Button

    Because that’s what a nap is. A daily reset button. If you can squeeze in a nap in the middle of the day it’s like starting over. You are now alert, energetic, sharp, and ready to hit it hard again. In fact, napping in the middle of the day is a great productivity trick, because now you are just as energetic and alert as you were in the first part of the day — so you get two mornings for the price of a morning and an afternoon.

    2. Boosts Productivity

    When you are tired you are working on energy reserves. You’re not doing your best work. And if you work around heavy equipment your chance of injury goes way up. Napping changes that and recharges those mental batteries. And the irony is that most men wont nap because “they have too much to do.” But studies have shown that men who nap accomplish more than men who don’t.

    3. You’ll Eat Less

    Talk to any physician that specializes in sleep disorders and they will tell you that the more sleep we get, the better we eat and the less we eat. Sleep deprived people are more restless and anxious. They snack and binge and eat far more than those who are well rested. People who sleep better are thinner and in better shape.

    4. Acts as a Caffeine Replacement

    A recent study has shown that a 20-minute nap is much more effective than a cup of coffee or even a session of exercise. That’s the irony — we can nap for energy.

    5. Contributes to Mental Sharpness and Memory

    Naps improve your working memory. When our mind is recharged we can focus better on complex tasks. We can also multitask and keep multiple mental balls in the air. Napping also improves our memory retention.

    So come out of the closet and embrace the nap.

  • How to Live a Cash Life In a Non-Cash World

    How to Live a Cash Life In a Non-Cash World

    cash

    When we were kids, money was a much simpler entity to manage; in fact it was downright easy back then. The process went like this: if our pockets were empty, and they often were, we went without. And if our pockets had something in it, we could spend what we had. And, here comes the stress-free part, how much we spent was determined by how much we had. Simple.

    So, the decision process went like this. Can I buy a soda? Let’s see, do I have any money? No, I don’t have any money. Then the answer is no. I cannot buy a soda. Done.

    Now, it’s a little more complicated.

    Now our buying decisions are not based on how much we have in our pockets, or how much money we have in the bank, or how much money we can afford to spend, or how much we earn, or how much money is left in our budget, or is the thing that we wish to purchase priced correctly. Nope. It’s only based on — do we want it and do we want it now?

    So, do I want a soda? Well, of course I want a soda. And I’m a grown man and I work hard so I’ll buy whatever I want. Because this is America. And I have three credit cards and a debit card in my wallet that says it’s America. So yes. Yes I can buy a soda.

    And we buy. And it’s easy because we don’t really spend money, we spend numbers. Think about it: with little exceptions, it’s possibly to go a very long time spending, buying, and earning and never seeing the actual money that is flowing in and out. We just see numbers on a screen.

    [amazon asin=B001D07XCO&template=iframe image][amazon asin=B00B3PP5Q0&template=iframe image][amazon asin=B009ANX56O&template=iframe image][amazon asin=B00KECATZU&template=iframe image]

    Using a cash system is the only way to spend only what you have. Because with our credit cards we can spend until we hit our credit limit and with our debit we can clean out our account and push the overdraft limit dry before the red light comes on.

    And the irony is that we’ve been conditioned to not think of these swipes of a card as real money. Yet, take actual cash from our wallet and we feel that psychological loss.

    Using a Cash System

    1. Establish a budget.
    2. Create an envelope system. Create a physical envelope for each budget category. Now there will be budget items that won’t fit in the envelopes — automatic payments, etc. — so you keep those automatic and make categories for all that you normally use your credit and debit card for. These should include: Gas, Entertainment, Groceries, Clothing, Car Maintenance, etc.
    3. After you’ve categorized your cash expenses, fill each envelope with the money allotted for it in your budget — if you allow $100 for clothing, put $100 in cash in your clothing envelope for the month.
    4. Determine what is a weekly or bi-weekly (depending on how you get paid) expense and which is ongoing. So if you allot $50 a week for entertainment, then that will fill each pay period, whereas $25 a week for car maintenance will build until needed.
    5. Tweak. During the first three months or so your system is in beta-test mode. There will be items you forgot, over budgeted for, or simply got wrong. Keep adjusting.
    6. Once you’ve spent all the money in a given envelope, you’re done spending for that category. If you go on a shopping spree and spend the $100 in your clothing envelope, you can’t spend any more on clothes until you budget for that category again. That means no visits to the ATM to withdraw more.
    7. When it’s gone, it’s gone. Don’t be tempted.
    8. Blow money. There’s also no problem in adding a “blow money “category — money to have a little fun with! As long as you and your spouse have agreed on it, you are fine. There should be no lying. Agree on your budget, agree on your fun money, and be open. Fun money can be anything you want it to be. There are no rules on that envelope.
    9. Keep the change. Tossing your spare change in a jar is almost a mini savings account. It’s there for small emergencies and at the end of the year it’s not unusual for your change to equal $400 or more.
  • Becoming the non-passive man

    Becoming the non-passive man

    passive dogThere is this very strange, very weird, social phenomenon that occurs when a man encounters a stranger, that’s very, very interesting — I see women doing a version of this too, but it’s different with them — which makes this particular experience pretty much a guy-thing.

    So, here’s the scenario.

    You are stopping at a store on your way home from work. You locate the store and drive into the lot. You park and turn the car off. You step out of the car, close the door and hit that little button on your key fob to lock the doors; click and beep. The car is safe.

    Now you head towards the store, but as you are walking, you notice that another man is walking out of the store towards you. So unbeknownst to you, some incredibly fast and complicated mental calculations are being made, deep inside your man brain — and most of them you won’t even be aware of. The first thing that occurs is that within milliseconds, your subconscious sends out a probe to determine if the strangers path will be  beyond your personal space  — in other words, will he be three feet away or more, which would place him outside of the danger-zone.

    So the probe comes back and the determination is negative. At the current rate of speed and the space available between the parked cars, the stranger will walk within three feet of you. A full second later we move into prep-mode and this is when we first notice that something is occurring. We see the stranger and we begin to feel just the smallest amount of discomfort; just a tiny bit of unease. We continue walking. We get within four feet of the stranger and he looks up. We look up. Something clicks and we give the stranger — the look. Then we state our greeting — this could be a ‘sup, how ya doin;, hey. The stranger responds, he passes and we continue to the store. Moment over.

    Now what just happened?

    [amazon asin=B007RGCV66&template=iframe image][amazon asin=B00439LBA2&template=iframe image][amazon asin=B00L8MIBC8&template=iframe image][amazon asin=B00IGR1S2I&template=iframe image]

    Well, a lot. Because we just gave the stranger the look and the look is actually a big deal. To describe the look is fairly easy — and once you’ve noticed it, you’ll see it all the time — and it’s simply this. If you press your lips together tightly — as tight as you can — and smile. That’s it. That’s the look.

    So why is it important? Well, what’s interesting about the look is that it’s the — please don’t hurt me, expression. It’s the default passive reaction. It’s the, I don’t want any trouble, I’m just walking here, plea. It’s the human equivalent of lying down to expose our belly to let the bigger dog — the important dog — know that we admit they we are smaller and weaker. Yup, all that in one expression.

    Why do we do this? And why do we care if we do?

    Well first, as we said, it’s a guy thing. Sit in that same parking lot and watch women walk in and out of the store and unless they know someone, they don’t need to acknowledge them. Men do. We travel through life with our social identity constantly on and constantly being updated. And when we acknowledge with the look there is actual damage being done. How?

    In the animal world there are two states; dominant and submissive. A submissive dog — a good dog — will show the dominant dog — the important dog — that they pose no threat. That they don’t want to take anything from them. That they know their place. This is true. But we are not dogs. We are men.

    And that’s where the trick lies because when we were boys we saw men. We admired them and we developed this image of men — this unrealistic, unobtainable, two dimensional image and we told ourselves that when we became men we will be just as strong, just as sure and just as smart as the other men around us. Then we got older. And we were absolutely none of these things. We were frightened and unsure and confused and afraid. And because we knew these were not the traits of the men we saw, we determined that we weren’t men. That we had failed as men. Oh we might be a good person, or a kind friend or a good son, but as men we failed.

    We didn’t.

    Our fathers — our grandfathers, our bosses, our neighbors — those men that we see as the ideal, were just as weak and just as afraid and just as stupid as us. They weren’t always strong and smart and selfless and sometimes they did really dumb things. We can be confident in our career and in our family.

    We can be satisfied with our home and with our finances. We can be in great physical shape and be a good father, a great husband and a sold friend but when it comes to ranking where we believe we fit on the man chart, we will always, always, always, rank ourselves lowly.

    Because the chart is wrong. And the look pushes us down a tiny microscopic step  every time we use it. The stranger in the Kroger parking lot that we pass on the way in to the store, is not going to punch us as we pass by. We know that. But every time we use the look, we have internally just filed away a moment as if we ran from a fight.

    Being courteous is something we give.

    Being passive is something that is taken from us; something that is done to us.

    Because we are not the good dog. And we are not seven years old on a playground. We are strong, thinking men. And there is no place for being passive with strong, thinking men. We either screw up or we don’t. We go or we stay. We decide and we will probably decide wrong — and we do it.

    We are civil.

    We are reasonable.

    We are tolerant.

    And we are rational.

    But we are not passive.

  • The Yankee Drill

    The Yankee Drill

    yankee
    A Yankee drill — also known as a Yankee Screwdriver or a Push-Drill — is not only a must-have for every man  who owns a tool box, but is also one of the best kept secrets of hand tools.

    I say this with some amount of verifiable data because when we had our fire a few years ago, the Yankee Drill was the one item that kept flummoxing the Liberty Insurance computers when it was trying to establish a replacement value.

    A what kind of drill?

    The Yankee Drill has been around since the mid 1800’s and is one of the earliest forms of hand held drills. It is a mechanical tool — it looks like a long stick with a handle on one end that has a rotating end that is flat but when you set it against a flat surface and press against it, the drill rotates in the shaft and into the surface.

    Now you won’t see commercials about Yankee Drills. There will not be huge displays at Lowes, it won’t be a NASCAR sponsor and your neighbor won’t ask you to come over and look at his new Yankee drill that he just got.

    Why? Because there’s nothing really sexy about them and they’ve been around forever.

    Which is the second reason you need to have one. Because it’s simple, time tested, reliable and will last you a lifetime — unless you burn your house down — and will also save you an enormous amount of time.

    But if I have a cordless drill, why would you need a 150 year old hand held drill?

    [amazon asin=B000JRDLVY&template=iframe image][amazon asin=B00C625KVE&template=iframe image][amazon asin=B000NHTG5A&template=iframe image][amazon asin=B002JWSNIS&template=iframe image]

    Great question. And here is one answer. Pilot holes.

    Picture this. You are putting up a set of vertical blinds — I’m using this as an example because I hate putting up vertical blinds.

    So here is the normal process.

    1. You place the little white boxes where you need them on the wall.
    2. You mark the holes with a pencil.
    3. You take your cordless drill and place in a drill bit.
    4. You drill the pilot holes in the pencil marks.
    5. You replace the drill bit with the screwdriver bit.
    6. You use the cordless screwdriver to screw in the hardware.

    or …

    1.  You place the little white boxes where you need them on the wall.

    2. You take your Yankee Drill and drill in pilot holes — skipping the pencil step.

    3. You take your cordless screwdriver and screw in the screws.

    Done.

    Think of every time you need to drill a pilot hole — and every time you try to screw in something without a pilot hole because you don’t feel like changing the bit on your cordless drill again and spend ten minutes trying to get the screw to bite into the wood on its own. And now take the Yankee Drill; light, easy to push and bam. Instant pilot hole.

    Now you can use your Yankee Drill for standard drilling as well and it is great for areas that the cordless can’t fit in or if you just don’t feel like dragging it out. But just in drilling pilot holes alone, this gem will pay for itself the first few times you use it and you’ll end up using it more than you think.

    Yankee drills are usually easier to find online than they are in hardware stores — Sears has them on their online store but I have yet to find one in an actual Sears store. They come with double fluted bits — which work differently than the modern twist because it cuts as you push and they clears as you release — and will run you about thirty bucks.

    You won’t regret getting one of these.

  • How to Make a Real Cup of Coffee

    How to Make a Real Cup of Coffee

    how to make coffee

    Electric coffeemakers are wonderful things. We take cold water and ground coffee and put them in a machine. We push a button and even before we’ve read through our morning emails, there is a fresh pot of coffee waiting for us. Ding! Depending on the brand of coffeemaker, the overall brew time is between 4 and 7 minutes. Not bad. The modern coffeemaker can trace its roots back to 1972 when Mr. Coffee came out with the first commercially successful automatic drip coffeemaker. Before that, every kitchen in America had either an electric coffee percolator or a coffee pot that was placed on the stove.

    The electric coffee percolator is that device you’ve seen in every episode of The Brady Bunch and Leave it to Beaver. It’s a metal pot that you fill with water. Inside, a long stem fits in the bottom of the pot and a basket attaches to the top where you place the ground coffee. As the temperature rises, the water in the bottom of the chamber boils and travels up the stem to the basket. The hot water is distributed over the dry coffee  and leaches back into the pot. Depending on the brand of percolator you use, a full pot of coffee in an electric percolator should take anywhere from 7 to 11 minutes to make.

    The newest coffee innovation is the K-cup style coffee machine. This was created by Keurig — the ‘K’ in K-cup — who in 1998 introduced a single cup coffee maker designed for office use. In this machine, a K-Cup — a sealed plastic cup of coffee, hot chocolate, tea, etc. — is placed in the machine, water is added, you push the button, and you have one cup of the very coffee you want. Then your cubicle mate can get another cup of a different flavored coffee. It was a success and the company branched out into home style units and now everyone from Folgers to Dunkin’ Donuts offers their coffee in a K-cup option. The time for one cup on a Keurig coffeemaker is just a couple minutes.

    [amazon asin=B004978NKY&template=iframe image][amazon asin=B000RK4GNA&template=iframe image][amazon asin=B000IBLBS6&template=iframe image][amazon asin=B00006IV0Q&template=iframe image]

    The average American consumes 19 gallons of coffee a year, which doesn’t seem like much except that it is second only to milk and beats soda and energy drinks by a wide margin. And the coffee market is such that you can now get a mocha latte at McDonald’s and have twelve different types of coffees to choose from when you pump your gas. But real coffee — simple and classic coffee — is easy to make, takes about the same time as the other methods, and costs pennies compared to your $12 Venti triple mocha.

    How to Make a Real Cup of Coffee

    So the rules here are simple. Get yourself a classic coffee pot that sits on the stove — the electric kind won’t work here because you need to get the water to a rolling boil. Also you want a standard coffee pot that is a cylinder, not one that is tapered and larger on the bottom — you’ll see why in a minute.

    1. Take out the coffee stem and basket and set aside — you’ll need these later.
    2. Fill your coffee pot with water and add a pinch of salt — this takes some of the bitterness out of the coffee.
    3. Bring the pot to a rolling boil.
    4. Now, remove the pot from the heat and wait thirty seconds — this is important because if you add the coffee right after its been boiling, it will flash up and the grounds will cling to the inside of the pot and you’ll not only have grounds in your coffee when you pour but you will waste coffee.
    5. Add the coffee directly into the water, stirring it in if needed. This is to allow the coffee to brew in the water and not get burned by the constant boiling if you use the coffee pot as it was intended.
    6. Cover the pot and let sit for 6 minutes — 10 minutes creates this dark, richer coffee many people like, but 6 minutes is where I like it.
    7. Take the basket and drop it into the pot, then take the large stem with the large part down and drop it into the pot — you would think the stem could fit the other way but it is slightly smaller to allow the basket to sit on the stem.
    8. Slowly press the basket down, pressing the coffee and keeping the grounds on the bottom.
    9. Hold the stem down and pour. Now when you try this for the first time the coffee may taste weaker than what you are accustomed to. And this could be because coffee is very easy to burn and often that rich taste we’ve gotten used to at the gas station or the diner is actually burnt coffee. This could also be because  bolder coffees are often perceived as having more caffeine and therefore we want our coffee to be as dark and bold as possible — when in actuality the light roasts coffees have the most caffeine.

    And that’s it. Enjoy.

  • How to use a soldering iron

    How to use a soldering iron

    soldering

    Soldering irons maintain an interesting place in the male world. Mention the fact that you own one and you may be asked what wattage the iron is or what operating temperature it runs at. Mention it to others and you may get the same reaction saved for discussions on stump grinders or engine diagnostic meters — yes, those things exist and I’m sure they are used by perfectly nice people but I prefer to buy my food from a grocery store and to leave my electronics alone, thank you very much.

    But the truth is that there are several good reasons to own a soldering iron and in having a basic knowledge of using one  — which is all you really need — and the first reason is that it will save you money.

    Almost everything we own or use has some sort of a Printed Circuit Board in it — from toys, to coffeemakers, to exercise bikes, to toaster-ovens. If it has a display or even an on/off switch, it most likely it contains some kind of small PC board. And when these items fail, it’s often due to a loose wire or faulty lead which can easily be repaired with an inexpensive weld.

    The second reason is that there is this, well, inert value in fixing something. It’s true. It’s built in our man DNA. When we can take our kids broken remote control car — lifeless and dead — and come up from the basement with the wheels turning and us smelling of flux and solder, it’s the same as throwing the musk oxen into the cave fire. This isn’t a cheap thrill, it’s not a false sense of accomplishment, but a well-deserved triumph.

    [amazon asin=B0029N70WM&template=iframe image][amazon asin=B000RB38X8&template=iframe image][amazon asin=B00030AP48&template=iframe image][amazon asin=B000IN1B8E&template=iframe image]

    And the third reason is that in our throw it away quick and go buy another one society, we are losing the skills of using a soldering iron — oh sure an electronics guy or someone who repairs ham radios as a hobby can use one, but the average homeowner cannot.

    What’s ironic about this is that our fathers and grandfathers — whose world contained a fraction of the lights and beeps and switches that ours do — owned a soldering iron and knew how to use it. What was different back then was when something broke, you fixed it. And only when you couldn’t fix it — and when your friends or your brother-in-law couldn’t help you fix it — did you buy a new one. In those days having to buy a new one was not a sign of success but one of defeat.

    In our world — where owning a two year old cell phone is a sign that they may be foreclosing on your home — buying a replacement when something breaks is the norm.  But a large part of being a man is that ability to be self-reliant; to take care of you and yours. And being able to fix something when it breaks gives you the option of buying something new because you want to, not because you have to.


    HOW TO USE A SOLDERING IRON.


    DEFINITIONS:

    Soldering iron — a soldering iron is a tool with a metal tip that gets very hot — up to 800 degrees Fahrenheit. You touch the tip on solder and it melts. That’s it. Like anything prices vary but for the once-in-a-while use a $30 soldering iron will probably do you good for years.

    Solder — solder is a silvery metal thread that is made of metal alloys and contains a high content of lead. What the solder does is melt and holds individual components or wire together.

    Flux — flux is a peanut buttery type substance that gets rid of oxidation and helps clean the surfaces of the solder.


    SAFETY:

    The number one fear of using a soldering iron is that you’ll damage the equipment you are working on. But the actual concern should be getting burned —- as mentioned, that tip get up to 800 degrees so take precautions and wear safety glasses and keep all loose fitting clothes and hair away.


    1. Prepare a work space. Lay down a mat or piece of cardboard over your bench — anything that will catch any loose solder.
    2. Warm your soldering iron.
    3. Clean your soldering iron. Because soldering irons get so hot, they oxidize and become dirty quickly. They key to reliable connections is clean components so make sure that your soldering tip and parts you are joining are clean. So heat the tip up and wipe it into a wet sponge — most soldering irons come with one — until the tip is shiny.
    4. Tin. This seems a little ironic, but right after you clean the tip, you get it dirty again. Apply a thin layer of solder to the tip — this is called ‘tinning’— which allows the heat transfer from the tip to the solder.
    5. Apply flux. Flux melts at a temperature lower than solder so that the solder can do its job.
    6. Solder. Using two hands — one hand holding the rolled out solder and the other holding the soldering iron — hold the iron like a pen — place the solder end on the board where you want it and place the tip on top of it. For one or two seconds. Then remove the solder but leave the tip there for an additional second.
    7. Inspect. You want a shiny even joint. If it isn’t what you want feed more solder and do it again. Or if you made a mistake, remove the old solder completely — just place the tip on it until it melts and start over.

    So rescue some piece of electronics that beyond repair from the trash and remove the PC board. Take it down to your workbench and just spend some time desoldering the welds and pulling the various components off — even solder a few back on. By the time you’re done, you’ll be a pro.

    And your grandfather would be proud.

  • How to make homemade soup

    How to make homemade soup

    soup

    The concept of soup is as old and established as the act of cooking itself. In fact, the very first item cooked — and I’m not referring to tossing pieces of a raw buffalo or venison over a fire but the first meal — was most likely some kind of soup.

    Soup dates back to primitive man and there is evidence of soup as far back as  6,000 BC. Now, this was the days long before waterproof pots were around to boil liquid in, so rocks would be heated in a fire and then dropped into a hollow log, goard or reed basket full of water. Then meats and vegetables were added. And boom. You have soup.

    Now, the word soup comes from either the French word for broth, or the German word for soak — no one is really sure. But the experts do agree that the word restaurant is from another French word, originally meaning a place to buy soup.

    In the hobo jungles of the 1930’s there was always a pot of soup simmering over the fire. There, the hobos could jump on and off the freight trains and add whatever they found along their travels — a few carrots, an onion, some potato — into the communal pot.

    To us men, knowing how to make homemade soup is crucial. First of all, it gives us a low cost food source. We can make soup for pennies and in fact the cost to make a pot of homemade soup is roughly half the cost of canned soup —- http://juliemcm.blogspot.com/2010/11/canned-soup-vs-homemade-cost-comparison.html . Soup is also a great way to reuse leftovers as well as a method to stretch food farther. And if you hunt, soup is the perfect way to mellow the gaminess of meats. And like all peasant dishes — chili, ratatouille, shepherds pie — homemade soup is easy, hearty, fun to make and feeds many.

    HOW TO MAKE HOMEMADE SOUP

    There are many methods to make homemade soup but this is the method that I have been using for years. It’s simple, basic and allows you to add or change anything along the way.

    The trinity. Onions, garlic, celery. In a pan with some butter and olive oil, fry some sliced onion, garlic and green pepper. You want to sweat these bit — soften them up — but not brown them.

    Into the pot. Place the Onions, garlic and green pepper into a stock pot and set aside.

    Meat. It’s not required to use meat or chicken in soup. In fact, I often think the meat takes away from the flavor of a really hearty soup. If you do not want to use meat, potato is a great substitute because it is so dense but a little known secret is rutabaga. Rutabaga is extremely dense and cooked over long times in a soup it softens up but still remains firm — it also gives the soup a strong flavor. But if you are going to use it, this is where you do. Brown your chicken or you beef in a pan. Once they are browned place them in the stock pot.

    Vegetables. Now you want to add in your core vegetables in — carrots, green beans, peas, whatever you want. The only rule is, fresh not canned. I know it may seem like an extra step but fresh vegetables are actually less then canned and the flavor will be noticed.

    Liquid. Add your liquid to the stock pot, completely covering everything and there is only one rule here. No water. You can use anything — and I mean anything — but water. Beer or wine works great and so does apple or tomato juice — I even know one guy who saves the leftover coffee as his soup stock. And of course, you can use beef, vegetable or chicken stock. Now store bought stock is okay — and I mean just, okay — but nothing beats stock from scratch — the next time you cook a chicken or a ham, save the bone. Toss it in the freezer and make your own stock — and remember, stock can be frozen and saved and thawed out when needed.

    Here is a great stock recipe —-

    http://southsidermagazine.com/2012/10/homemade-stock-is-the-backbone-for-any-soup/y that saves

    Spices. Remember to spice in layers, not all at once. And keep tasting until you get where you want to be.

    Simmer. Once everything is mixed in let the soup simmer. How long is up to you but the longer it simmers the more the flavors marry.

    Experiment and enjoy.


  • How to cook on a charcoal grill

    How to cook on a charcoal grill

    grill

    Ten thousand years ago —- I think it was on a Tuesday — our collective ancestors had a great hunt. A huge hunt.

    For days, the tribe carried their spears and bows and moved along with a herd of antelope. They would follow the herd and then thin off a few of them — forcing them to run from the group and create a smaller herd. Then they would follow that smaller herd and thin that off making yet another smaller group. And then a few more off from that one.

    Eventually, the tribe had a single antelope — a large one — trapped in a cavern. They faced the animal. They surrounded it. And they brought the great beast down.

    The tribe was very happy.

    They carried the prize back to their camp. They sang songs and butchered the game and began to cook the meat on the fire and as they rejoiced and enjoyed the thrill of the hunt — as they talked and joked and listened to the meat sizzle on the open flame — one of the hunters began to think. He pondered and worried until he eventually spoke.

    “You know,” he turned to his friends. “If we ever start living inside,” he paused. “If we ever start wearing clothes and cooking in metal boxes and sleeping in beds. If they ever invent jobs and bills and stress.”

    His friends watched as he pointed to the meat sizzling over the flame.

    [amazon asin=B00004RALU&template=iframe image][amazon asin=B002Y0KA1S&template=iframe image][amazon asin=B00008DHPA&template=iframe image][amazon asin=B002UKPTRM&template=iframe image]

    “If that ever happens,” he stated. “Then I’m going to miss this.”

    There was a silence for a moment as they all thought. Then they consoled their friend. They explained that he was simply tired. Exhausted from the hunt and that there was nothing to worry about. This would never happen.

    And they cooked and talked and ate.

    HOW TO COOK ON A CHARCOAL GRILL

    Cooking on a charcoal grill is amazing. Its part cooking, part camping. It not only creates a cooking surface of high and steady heat but it seals in juices and adds that great smoky flavor.

    And it’s a great way to tap into that hard wired need we males have for the tribal outside campfire.

    Gas grills are great for convenience — and I use ours at least twice a week, year round — but nothing compares to cooking on a charcoal grill — unless it’s cooking over a campfire.

    Charcoal grills come in all shapes in sizes. There are inexpensive, portable grills that are great for tailgating and picnics. Then there are the mid sized grills that you roll out when needed — we have a twenty dollar charcoal grill I bought for my mom six years ago that we use every time we go to her house that works great. And then there are the great permanent charcoal grills such as Weber and Char-Griller.

    But no matter what grill you use, here are the basics.

    Choose good charcoal. For the small amount of money you’ll save, it’s not worth buying a no brand charcoal. I have tried all of them — in grills and in smokers — and I buy name brand every time and just watch for sales — Kingsford charcoal is the brand I like. But experiment and find the one that works for you.

    Place your charcoal on one side of the grill. This is important because it will give you a hot side and a cold side of your grill. By placing charcoal on one side you’ll be able to control the heat. You can move what you’re grilling around the grill and monitor it.

    Light the charcoal. Many charcoal-purists object to using lighter fluid; preferring a wax charcoal brick or some other device. But the truth is, as long as you allow the charcoal to get to get to heat, any lighter fluid has been burnt off. And I have found that many self lighting charcoals retain that lighter fluid taste.

    When the charcoal is white hot, start cooking. But watch the time. Depending on the amount of charcoal you’re cooking, you usually have about forty minutes of prime cooking time before it begins to cool.

    A chimney. A charcoal chimney is a great device to get backup charcoal going. If you have to cook for a large group, or need to keep the coals hot for an extended time, get a chimney going on the side. After about thirty minutes or so, you’ll have red hot coals to add to the grill.

    Here’s a tip. When you think the coals are hot enough, wait another fifteen minutes. It’s not unusual to struggle with the grill until everything is cooked only to come back and notice that now, the grill is where you want it.

    Enjoy.


  • How to tie a bow tie

    How to tie a bow tie

    tie

    Somewhere during the 1990’s a change occurred on the landscape of American business. For hundreds of years, business men — doctors, salesmen, accountants, hotel clerks — all woke up in the morning and put on a dress shirt, jacket, tie and headed out for the day. The business suit — or at least the dress shirt and tie — were the staple of American business and had been for two hundred years.

    Then the hi-tech world exploded. With software companies, engineering firms and hardware designers starting up, many of these had extremely loose dress codes. In fact, the recruiting pitch was often, good salary, stock options and you can wear jeans and a t-shirt to work.

    In order to attract the same technical talent, larger firms began to relax their dress requirements in specific departments, allowing their engineering, IT and technical people to wear chinos and golf shirts. But now a paradox was forming. Because the salesmen of these companies were wearing the traditional shirt and tie, but their customers — the engineers, the software designers, the technical supervisors — were all wearing polo shirts, there was a rift. Before this, the salesman was always seen as a problem solver, a team mate, one of us. But now, just from the act of wearing a shirt and tie, he stuck out. He was an outsider. So sales departments began to match their dress codes to their customers.

    And from this, business casual was born.

    [amazon asin=B00EO4THO8&template=iframe image][amazon asin=B00936UHEG&template=iframe image][amazon asin=B00ATM2UW0&template=iframe image][amazon asin=B00FR6NCDE&template=iframe image]

    Now there are very few industries — outside of banking, law and politics — where the entire industry is required to wear a shirt and tie. There are a small number of individual companies that still do, but not many. Which means that men who would have normally had a closet full of dress shirts and neckties, now have a closet full of golf pants and dress shirts. Which also means that when the occasional wedding, Christmas party, Easter service or graduation comes up, there is less formal wear to quickly choose from.

    Many men purchase what they call their wedding and funeral suit. Often a dark blue suit — black suits are too formal for anything other than a funeral —  white shirt and a few ties. This is pulled out when needed and then placed back in the closet until the next time.

    Which brings us to the bow tie.

    The aspect of the bow tie is that on those formal occasions when you need to wear a tie, you don’t need to wear a bow tie. You choose to wear a bow tie. Sometimes a tie is required but a bow tie — with the exception of it being part of a tuxedo — is always a choice.

    A bow tie is that classic, standout, in your face formal attire that will always atract attention. Which is why it is only for those men who have the sand to wear one. You will be noticed and you will be seen.

    And don’t think that the clip-on or a wrap around bow tie counts. It doesn’t. If you’re going to wear a clip on bow tie then just wear a traditional tie instead. Because you’ve just taken all the class out of it. The only reason to wear a clip on bow tie is because you don’t know how to tie one.

    But now you will.

    HOW TO TIE A BOW TIE.

    The first thing you’ll need is the tie itself. Bow ties are pretty rare at department store men’s departments anymore, but you can find them at specialized men’s formal shops and they are all over the internet.

    The top of the line for high quality bowties is The Brooks Brothers website — although these are very pricey, with each tie being just over $50.00 each. A much more reasonable selection can be found on a website called the-perfect-necktie.com. They have a great selection and each bow tie is around $12.00.

    So tying the bowtie is not a complicated thing and is one of those skills where a diagram makes it easier than a video. I’ve looked at many videos and diagrams for tying a bow tie and by far the best one that I’ve seen is from Jasper at folds.net who gave me permission to use it here. What’s great about this one is that not only is it very easy to follow, but it is designed to be taped to a mirror so you can practice.

    Using this diagram you’ll be able to tie a bowtie in minutes. Then keep the diagram. Because like any other skill, you’ll only be as good as how often you use it.

    http://www.folds.net/bowtie/


  • The need for one good thermos

    The need for one good thermos

    thermos

    There are a handful of items that every man needs to own — not should own, but needs to own. These objects are not a suggestion; not simply a list that would be nice once we get around to it but are the gear that is part of the required inventory of man-law — the unwritten rules that define the masculine system of life.

    And since these objects need to be part of our possessions, they should be a part of sons and grandson’s inventory as they grow up — our children may not remember what video game they received on their twelfth birthday but they will remember who gave them their first pocket knife, their first wallet and their first toolbox.

    Now this list — the required man-inventory list — includes the following items:

    One good pocket knife. A decent one, in the forty dollar range.

    One silver money clip —- yes, you can still keep your wallet but every man needs a good money clip.

    [amazon asin=B0017IHRNM&template=iframe image][amazon asin=B0037SNATU&template=iframe image][amazon asin=B008JC76XA&template=iframe image][amazon asin=B00FS2AJ42&template=iframe image]

    One set of inexpensive but reliable hand tools.

    One reliable wrist watch.

    And one, high quality, thermos.

    Now in this brand conscious world, you may think that the word thermos is a misnomer because it describes the company and not the product — just like Kleenex or Xerox — because the actual item is called a vacuum bottle or vacuum flask. But in 1963 the U.S. declared Thermos to be “genericized trademark” and is actually now synonymous with vacuum bottles.

    So feel free to use the word thermos as much as you want.

    The first thermos was invented in 1892 by a German physicist named James Dewar who came up with the idea of a bottle within a bottle and was at first referred to as the Dewar flask or Dewar bottle. Between the outside of the thermos and the inside is a vacuum of air that prohibits the heat from the inside bottle to migrate to the outside. So the heat — or cold — of the liquid becomes trapped inside the thermos.

    Now, because of the popularity of the thermos, you would think that James Dewar became a very wealthy man. But Dewar never registered a patent for his invention and it was subsequently patented and produced by — yup, Thermos, who in 1907 rolled it out for commercial use by the truck load.

    The thermos changed everything. In a time when commercial refrigeration was still decades away and microwaves were pure science fiction, a thermos could transport hot or cold liquids and soups for hours. In fact, when World War II broke out in Europe, thermos turned all its English production to the war effort and every time a British bombing run went out, the men were equipped with a thermos full of hot coffee or soup.

    Now, in our modern world a good thermos is more important than ever for several reasons. By taking a thermos full of coffee to work every day instead of stopping at Starbucks, you save over a thousand dollars a year. Also the waste is drastically reduced — how many half cups of cold coffee do you throw out every year? With a thermos, a cap full of coffee is exposed and the remaining stays warm in the bottle — there are many times I am drinking my morning coffee from my thermos in the afternoon. And a thermos can be used for more than just coffee or tea. A wide mouth thermos is great for carrying soups — homemade soups; see the post on how to make homemade soups — and stews. And how can you compare a lunch of a bologna and cheese sandwich to one of a piping hot cup of homemade soup with crackers?

    For the outdoorsman, sitting in a tree stand or standing in a cold trout stream, a thermos of hot coffee is mandatory. And for those of us who spend most of their time in a car, a thermos is not only financially attractive, but drastically cuts down on the number of coffee stops we need to make — where the number of bathroom breaks remain the same.

    Now there is a world of difference between a thermos and a good thermos.

    A simple thermos can be purchased from a dollar store and is actually just a glorified travel mug; a thick plastic bottle with a cap. And will keep your liquids warm for an hour at best — the stainless steel bottles aren’t much better.

    The use of a thermos only has one rule. Prime it. Before you pour in the hot coffee, fill it with hot water first and let the inside bottle warm up. With a good thermos, the heat of your priming water will drastically increase the length of time the liquid will stay warm. I know several guys who microwave a few cups of water until it boils and prime the thermos. These are the guys who can actually get the coffee to stay warm for 24 hours —- my limit is about eight.

    A good thermos will run you about thirty bucks and will last forever. The big brand names are obviously Thermos and Stanley and they each make several good models.

  • How to build a bugout bag

    How to build a bugout bag

    doom

    A few years ago, The National Geographic Channel introduced a new reality series entitled, Doomsday Preppers; a show that focused on individuals who are actively preparing to survive a possible global disaster. With each episode, we are allowed an inside look at the lives of a few preppers who have a specific disaster scenario that he or she believes will occur — worldwide economic collapse, pandemic, megaquake, nuclear war, etc. We spend a few days with these folks, see how they prepare and view the eminent end of the world and then experts determine if their plan is solid enough to survive in that specific scenario.

    When the show’s first season was aired it was met with mixed reviews.

    While some critics saw the series as an accurate portrayal of a worldwide movement, there were others who claimed it was simply another exploitive reality series — a vehicle to ridicule these individuals rather than educate on their beliefs and lifestyles. Also, many viewers objected to what they called the show’s anti-life format — as most preppers have large cashes of firearms and ammunition set aside to protect their food and rations from those who were not as prepared as they were. In fact, most preppers are very open on their intent to kill anyone and anything that plans on stealing from them if said disaster occurs — because in a world where society has broken down and there are no longer laws to protect, it becomes kill or be killed.

    But regardless of your opinion, millions of us tuned in — and 60% of the Doomsday Preppers audience were men.

    Now it’s important to note that this is not a piece on doomsday prepping and I am not a prepper. I am not concerned about the collapse of our banking system, a worldwide virus, or the takeover from the walking dead. I’m not mocking those individuals who are actively preparing for these events — well, maybe a little — but I am simply stating that I’m not worried about it. But just because I don’t believe in the collapse of modern civilization doesn’t mean I don’t believe in disaster.

    In my life, I have had one house burn and another one flood. I have had cars break down on back country roads. I have been lost in the woods. I have been knocked unconscious and I’ve been trapped in the snow.

    These things I do believe in. These things I try to prepare for.

    [amazon asin=B008HHX15Y&template=iframe image][amazon asin=B00K5AH8T6&template=iframe image][amazon asin=B002PEZH3O&template=iframe image][amazon asin=B00H4JDHRS&template=iframe image]

    HOW TO BUILD A BUGOUT BAG

    A bugout bag — or 72 hour bag — has taken on a prepper reputation  because it often refers to that bag when civilization collapses — usually a handgun is the first item in it — but it’s simply a bag that will allow you to survive for three days. 72 hours. Because if you are lost in the woods, stranded in your car, caught in a freak snowstorm, your odds of rescue increase if you can make it through those first three days.

    The bag itself.

    A bugout bag is often kept in a small day backpack. Nothing too large or  too heavy because you want it to be something you will grab for a hike and not think about — if the bag is too bulky you may not take it with you.

    Food.

    Food is the first thing that people think about when putting together a 72 hour bag but in fact it’s the last thing you’ll need.

    Remember …

    You can survive three minutes without air.

    You can survive three hours without shelter — in extreme temperatures.

    You can survive three days without water.

    But you can survive three weeks without food.

    Food is actually the last of the four survival basics that you will need if caught in a survival situation. However, you will need to keep up your strength, your morale and your health. So you will need some food.

    A few Cliff bars are a good idea, or some dried fruit, or trail mix. And you can cover your food needs is by having a few military MRE’s — Meals Ready to Eat. These are simple food kits that the military uses when in  the field. They can be purchased online, at any Military Surplus Store, or civilian versions can be found in camping or outdoor stores. These meals are high in protean — they are broken down into entree’s, snacks and even have coffee and drink mixes inside — and contain a manner to flamelessly cook that require simply a little bit of water to activate. So you can have a hot meal anywhere. One Military MRE — in a survival situation —- is enough protein to get you through a full day.

    But I think the easiest way to take care of food in your bugout bag is simply a small jar of peanut butter — high in protean and high in fat.

    After that here are some basic ideas for your bugout bag …

    Tarp — for shelter

    First aid kit

    Knife

    A few bottles of water — you’ll need a gallon of water per day but since you can’t carry three gallons in a pack you’ll need a way to purify and/or boil water when you find it.

    Cooking kit

    Matches/lighter/way to make fire

    Fire starter — I have one of those fireplace starter bricks in my pack. A small piece of this will get even the wettest wood going

    Space blanket or light blanket

    Water purification tablets

    Rope or cordage

    Whistle – a great way to signal. Screaming will hurt your throat and take up energy.

    Plastic garbage bags — bring a few, these can be used as ponchos, bags, to carry water, etc.

    Emergency literature — books on survival, first aid, distilling water, edible plants, etc.

    Some cash

    Crank radio

    Compass

    Crank flashlight

    Fishing line and hooks — when the food runs out, you’ll have a way to catch additional food

    Additional socks — things go easier if you can keep your feet dry

        There are no set rules to a bugout bag and you can make it as simple or complicated as you want. But for thirty dollars or less — I know some guys who have purchased every item in their bag from The Dollar Tree and done it for much less —  you can have a bag that will allow you to survive for three days.