Category: Tools and Supplies

  • How to change your spark plugs

    How to change your spark plugs

    plug

    History

    Believe it or not, there is actually a great deal of controversy surrounding who actually invented the spark plug — pretty funny, huh?

    In one camp, there are those that believe the credit should go to a man named Edmond Berger, who supposedly created the first device on February 2, 1839. But since Berger didn’t patent this invention and there is very little to document it — or provide verification on why the February 2nd date is always used — the title can’t officially go here.

    Then there are others that give the credit to a Frenchman named Jean Lenoir in 1860, who used an electric spark plug in a gas engine that he had created — but again, no patents were filed and there is little documentation.

    The actual paper trail begins in 1898, when the famed Mr. Nikola Tesla — the creator of the modern AC electrical system — filed a patent for a sparking plug within his ignition timing system. And then another patent was filed in 1902 when Robert Bosch designed a plug for his magneto-based system.

    But there is little doubt that the development of what is today the modern spark plug came from an engineer named Gottlob Honold who was working for Bosch in 1902, and took the plug closer to what it is today. And from there, manufacturing developments were made by Albert Champion in creating the insulator and completing the task in 1930.

    What is a spark plug?

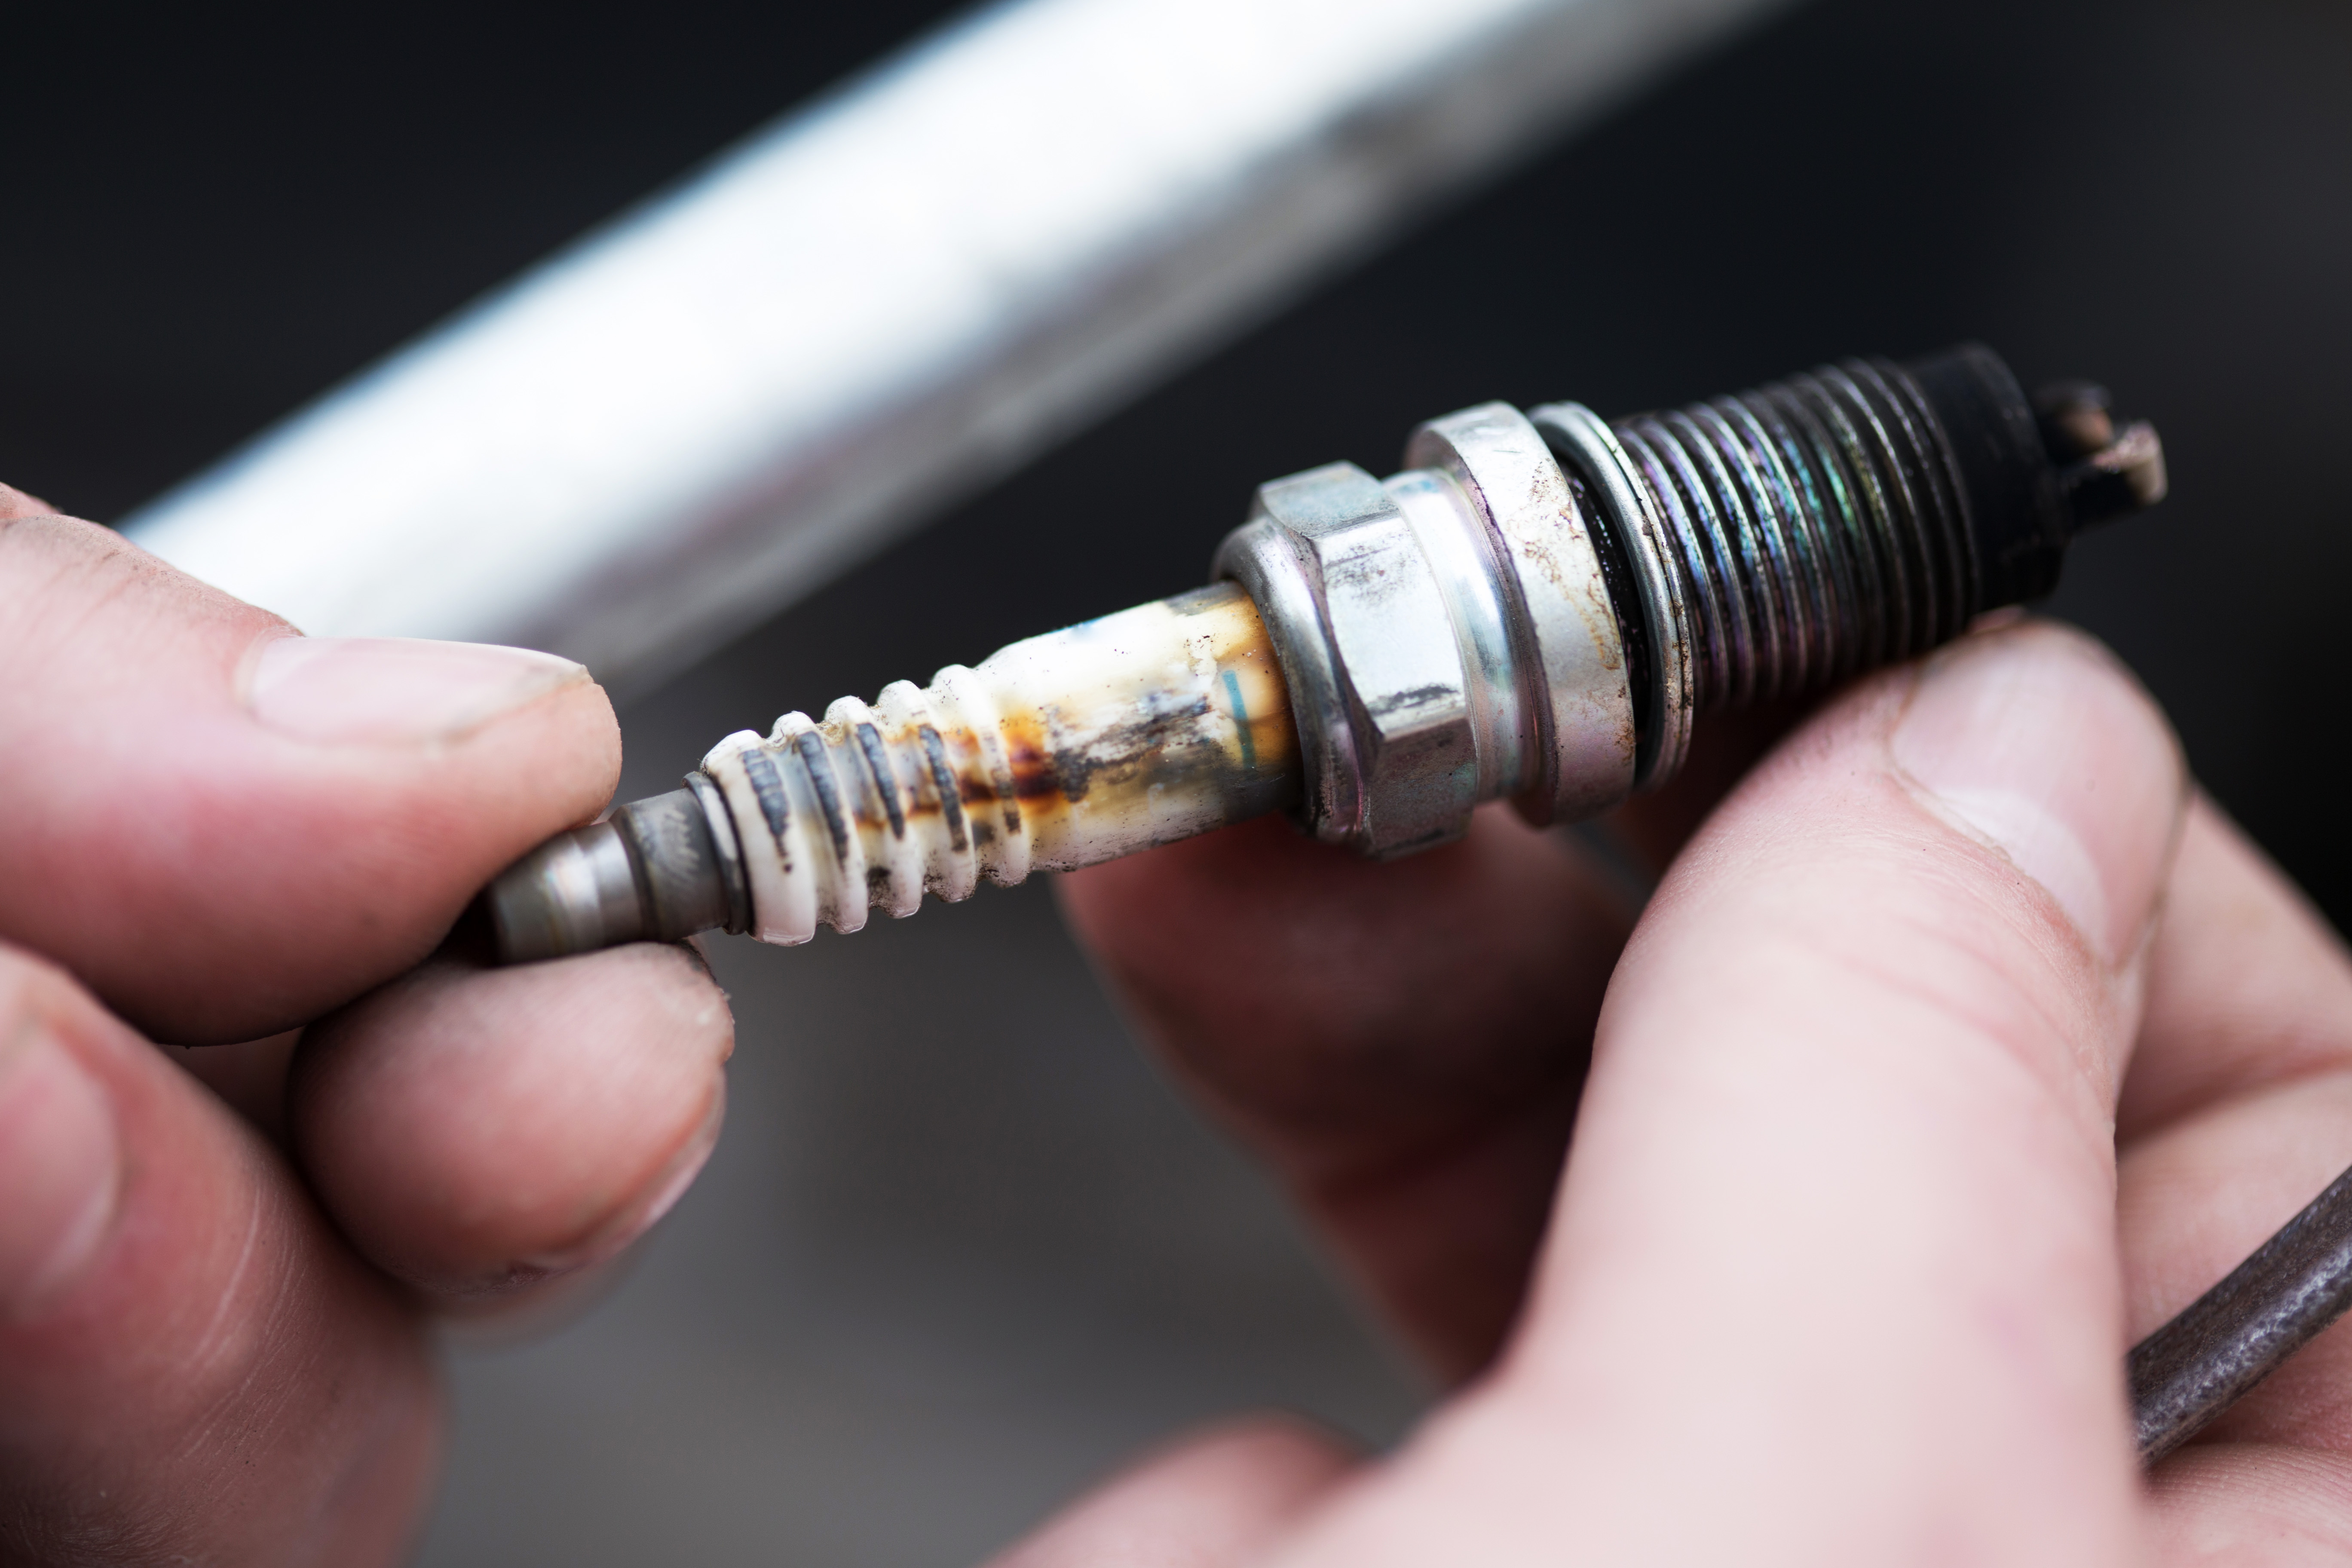
    A spark plug is device that has a metal threaded shell surrounded by a porcelain insulator. It is screwed into the cylinder head of an engine and forces electricity to arc across a gap in order to deliver electric current from an ignition system to the combustion chamber of an engine. That’s it. It provides a consistent spark to keep the combustion going and the cylinders moving so the engine keeps moving.

    Maintenance

    When a spark jumps the gap between two electrodes, it actually burns off small amounts of metal each time. As this continues, the gap widens to a point where the spark cannot make the jump any longer. This is when the engine begins to misfire, your mileage goes done, you have trouble accelerating and the horrible CHECK ENGINE light comes on.

    Which means that it’s time to change your plugs.

    Now if you’re intimidated by changing your own spark plugs, don’t be. If you can change your oil filter and oil — and even if you have never done this, you can — then you can replace your spark plugs. And remember, each time you do yourself, you pocket the hundred dollars in labor that it would cost you to have it done in a shop. And that adds up pretty quickly.

    HOW TO CHANGE YOUR SPARK PLUGS

    So here you go. Nine easy steps to go through to replace the spark plugs in your vehicle.

    1. Buy the correct plugs for the vehicle. At your auto parts store there will be cross reference material for your vehicles make and model and the appropriate spark plug size.
    2. Gently, disconnect one spark plug, from one spark plug wire. There are two important points here; the first is the word, gently — not yanking, but disconnecting — and the second is the quantity of one. By changing one plug at a time you will always get the right plug back with the right wire.
    3. Clean the spark plug area with an air canister. This is important because it will prevent any dirt and crud from falling into the cylinder — which as far an engine is concerned is the same as a human getting a germ.
    4. Unscrew one plug. Using a spark plug ratchet, or the spark plug socket that comes with most socket sets, unscrew the plug by turning counterclockwise. Once the plug is loose enough, just finish by removing it by hand.
    5. Determine the plug gap. Each engine will have a determined gap that the plug point will need to be. You can get this gap from the vehicles owner’s manual, or it’s included in the decal under the car’s hood. Creating the correct gap is important because it will set it at the exact distance it needs for ideal performance and fuel efficiency.
    6. Gap the plug. Take your gap gauge, insert it between the bottom of the plug — the inner electrode — and the hook on top — the outer electrode. With the determined gap, bend the hook lower or higher to match the specific gap
    7. Insert plug. Slowly screw in the spark plug by hand until it’s firmly secure. Finish by tightening with the ratchet.
    8. Reattach the plug wire. Using a twisting motion, position the boot above the plug. When you hear a click, you’ll know the wire is connected to the spark plug.
    9. Repeat these steps with the other plugs.


    That’s it.

  • The versatile toolbox

    The versatile toolbox

    tool

    My mother was born in 1922. My dad in 1924. So, if you calculate and then add forward you would think that my age would be — what? 72? Late sixties?

    Well, I guess that makes sense since my brother would have been 70 this year and my sister 66, but no. I’m 52. My mother had me when she was 40 and she had my younger sister when she was 42.

    So I was born in the sixties and my parents were born in the twenties. This is not a generation gap but two generations apart which created some interesting paradoxes. The first was that my brother and sister were the age of most of my friend’s parents — when I was three years old my brother was coming back from Vietnam and when I was six I remember hearing a huge fight as my sister was leaving for something called Woodstock. But those are different stories.

    Now, there were some challenges with this arrangement; my dad’s health never allowed him to be the rough and tumble father that other kids had and at the age of 54 my mother started Nursing School to bring in some much needed income after my father became disabled; which meant that for a period of time my dad was retired and my mother was a college student. And for those friends that came to our house there was a certain generational language barrier that would often need translation; a davenport is a couch, dungarees are blue jeans and gangershank is someone tall and thin.

    But it also created the amazing opportunity to not only experience my own generation growing up but the other two in my home: my older siblings of the sixties and my parents of the Depression Era, 1930’s.

    Now as a kid, having Depression Era parents created certain challenges — plaid pants were just as good as solid colors that cost more and powdered milk is very tasty. And as an adult it engrained a desire for all things to have value and to have multiple uses.

    Tools are like that. Sure, there are tools that are designed for one specific use, one specific application. But the most use we get out of our tools means the we can not only get more done with what we have but it also justifies paying a little more for the tools that are more versatile and we will be using more.

    An example of a non-versatile tool is a hammer. As soon as you put together a tool box the first thing you grab is usually a hammer but in reality it has only a few uses — and is almost becoming obsolete with the use of cordless screwdrivers. A hammer is used for hammering in nails and pulling them out. That’s pretty much it. Anything bigger than that, a post or a beam, you’re going to pound in with a sledge or a mall. So in actuality you will probably not use a hammer all that often.

    But there are other tools that can be used for multiple uses and will allow you to get more bang for your buck.

    VERSATILE TOOLS
    Cordless drill. The cordless drill is the big daddy of versatile tools. This thing has so many uses and is so handy that if you are going to buy a higher end tool, this is where you might want to spend your money. All a cordless drill is, is a drill with a rechargeable battery with a screwdriver bit but you will use it all the time. My neighbor Eric and I just built a 25 X 15 foot deck in our backyard using only two cordless screwdrivers and a power saw. You can change out a door lock, mix paint, grind metal and, oh yeah, drill holes with this amazing tool. Worth having and worth having a good one.


    Socket set. Socket sets are used to tighten bolts and nuts and some will argue that a set of spanners — the silver wrenches with a closed end and an opened one — is better than a socket set. But I have lost far more spanners than I have lost sockets because I always put it back in the spot in the case. Also because of the gears of the ratchet handle, you will always be able to torque a bolt tighter with a socket wrench than a spanner. Now, unless you are going to rebuild a car or doing some high end stuff, my advice is to go middle of the road to cheap on a socket set. Get yourself a metric and American style and keep them handy.


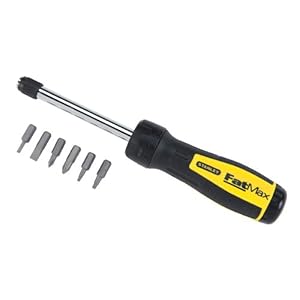
    Multi bit screwdriver. My second favorite versatile tool is the multi bit screwdriver. All this is, is a screwdriver with a hollow magnetic end that allows you to change the ends — flat head, philips, mechanical and a few different sizes — so you have six  screwdrivers in one. These are handy little things and my advice here is to first get the style where the extra heads go into the hollow part of the handle and screw closed. The models where the bits pop into the lower shaft will always get lost. Every time. And the second is to go cheap. Multi bit screwdrivers are great but they are pretty much disposable. Get yourself a few and put in one in your junk drawer, glove compartment, garage. Great little tools to have and you can get them everywhere from Dollar General to Wal-Mart.


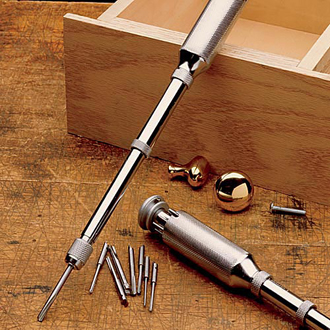
    Mini screwdriver kit. These are also great little kits and have all the very small flathead and phillips screwdriver sizes. They are perfect for fixing a pair of eyeglass, opening up small electronics and getting in anywhere the manufacturer doesn’t want you to go. Again, go cheap here because you will always loose some and every Dollar Tree in the country has these kits.


    Reciprocating saw. Now until recently my reciprocating saw sat on the bottom of my workbench and saw very little use. But once I started using it I saw how incredibly versatile it is. It is so light and portable that you can use them to cut tree branches, metal, PVC, anything. I recently built a large kindling box with leftover wood from our deck and used a reciprocating saw and a cordless screwdriver. Saw-Zall is the big guy here but again unless you’re a pro, go cheap. Harbor Freight has some very inexpensive brands.


    Staple gun. Where you can’t get a hammer, you can get a staple gun. Small, cheap, easy to use, these guys work well for tacking down carpeting, cable, upholstery, any place you would normally use a small hook or nail. They are many different sizes and grade of staple and you can swap out if needed. Go middle of the road here as far as cost. The springs on the cheap ones tangle and snap pretty easily and the cheaper frames are easier to bend.


    The key is if you pretend these tools are all you have in your toolbox and use them as much as you can.

    Have fun.

  • Tool secrets: Loctite and JB Weld

    Tool secrets: Loctite and JB Weld

    loctite

    I have this great workbench in our basement that I built myself — I didn’t like the prebuilt workbenches so for thirty dollars worth of two-by-fours and some planks I built one myself — and on this workbench as well as on the pegboard behind it hang some very cool tools. There are coping saws, drills, laser levels, a miter-box— well, the miter-box sits on a shelf below but I just like saying ‘miter box’ — and a bunch of other cool stuff.

    Now, most of these tools I’ve used, some not so often and a few not at all but they each look amazing hanging there. In fact, sometimes I go down in the basement and just visit my tools — admiring them like a painting.

    Now, it’s not that I’m afraid of these tools or that I just wanted to collect them. The truth is that 90% of the time I do something around the house I don’t need much in the way of tools. I don’t do major construction; I like to putz around the house, tinker with some things, make repairs and small upgrades when needed. So the majority of work I do could be completed with only five items.

    In fact, if I had to keep only five objects from my workbench and only use only them, I’d be pretty safe by keeping …

    • A roll of duct tape
    • A can of WD-40
    • A cheap, multi-head screwdriver
    • A pair of needle nose pliers
    • And Loctite or J-B Weld

    Boom.

    That would get me — as well as the majority of people — through most of the quick fixes and minor repairs that need to be done around the home.

    Because there are many tools that can do many things. it’s like brand names. 80% of the time brand names are not that important — you get the same result from brand B as you would from Brand A — but in that 20% of the time when they are important — they really are. Which brings us to an important brand name difference as far as super glue.

    First, make sure it’s Loctite. Because if you think that by Loctite I’m referring to generic super glue, you would be incorrect. Next to GPS and luggage with wheels, Loctite — the real super glue — is one of the greatest inventions in the last hundred years. It can be used for everything from ceiling a cut, to repairing coffee mugs, to being mixed with baking soda and used like calk.

    Remember that while Loctite might have invented Super Glue, not all super Glue is Loctite. This may seem like a minor point but it’s not. In fact, the next time you are standing at Wal-Mart looking at the super glue, the crazy glue and super bondo and you don’t see the Loctite symbol, walk away.

    Loctite was developed in the 1950’s as a thread locking adhesive. The formula worked so well that they developed other products and Loctite was the industrial staple for decades before branching out to commercial products. Simply put, when you buy Loctite you know it is going to work. Any glue can add the word Super, or Crazy to it and still be just glue. Loctite is a liquid weld and other brands may or may not work, so why take the chance?

    By the way, this is simply my opinion and is not because I am receiving anything from Loctite — or from J-B Weld — or am being paid any referral fees. Nope. It’s simply that when I find something that works I want to pass it on and Loctite works.

    There is one thing I don’t like about Loctite and that is there gel line of adhesives — I guess they were trying to find a way to work on horizontal surfaces where the thinner stuff would run — and I don’t like them as much and try to stay away from it. So I buy the standard Loctite.

    With that said, there are those occasion when Loctite just doesn’t have the fire power you need. And that’s where J-B Weld comes in.

    This stuff is amazing and is used on everything from repairing fuel tanks to patching bathtubs to welding pipes.

    J-B Weld can be found in any hardware store or Auto Parts Store. It costs about five bucks and pays for itself with the first use — I used this recently to repair a fireplace screen that was in five pieces and ready for the dumpster. That one pack saved me over $200.00 and you use such a small amount of it that a single pack will last you for years.

    J-B Weld is a cold weld process in which you take a dab from each container and mix them together to get the reaction started. The contents from one tube is black the other is white and you mix together until you get a solid grey color — there is the odd fishy smell when you first mix it but it doesn’t last long. Once mixed, you apply and wait.

    The downside to J-B Weld is it takes several hours to harden — in some thick applications I’ve gone back ten hours later and it still was slightly tacky. The good news is that when it does harden, it’s there forever. You can even sand and drill though it if needed — like I said they repair gas tanks with this stuff.

    So spend the seven bucks and get a two dollar bottle of Loctite and a five dollar pack of-J-B Weld and you’ll be all set.

    And then you can use the money you saved to buy gas to drive to my place and come look at my tools.

  • How to build a wooden toolbox.

    How to build a wooden toolbox.

    wooden

    There are certain phrases in the English language — and I’m sure in other languages as well — that are spoken so often that they are no longer heard. It’s not that they you don’t actually hear them, it’s more that they become overused; white noise. And we never even question their validity because they’ve been around for so long.

    There are many examples of this, such as — Don’t go to bed angry. What? That’s the dumbest thing I’ve ever heard and is also totally wrong because angry is the absolute best time to go to bed. Since sleep is the cosmic reset button, you go to bed angry, you wake up not angry. Perfect. And you also wake up and realize what an idiot you were for being ticked off in the first place.

    Here’s another one. Let’s give it 110%. Dumb. I mean, I get it. You’re saying let’s give more than we have, let’s push the envelope, —. Yeah. But you’re also stating that we should give an immeasurable, incomprehensible amount that can never be tracked or gauged — and the phrase is so overused that our 110% has been reduced to about 40%.

    How about this one. Well, to be honest here … That great. So it basically it says, okay, I’ll start telling the truth now because everything else I’ve said so far has been total crap.

    And how about this one. The best gifts are the homemade. This is basically false. Because the best gifts are the ones with thought behind them, where we have spent time thinking about the gift and most homemade gifts are usually quickly made, generic items, thrown together without much thought or meaning.

    However …

    There are a few homemade gifts that can be both made pretty quickly, are of higher quality and will show a little thought. And — here is the best part — they will actually be used.

    On the very top of the list is the classic open faced wooden toolbox. These things are great and have been used for generations and even if you have a toolbox — even if you have ten toolboxes — you need a classic wooden toolbox because they are ideal to carry specific tools to a specific project. They are simple to make, quick, have a real charm and will actually be used —- and more importantly they will be remembered.

    Make one for yourself and them make them as gifts.

    HOW TO MAKE AN OPEN FACED WOODEN TOOLBOX.

    1. Get some lumber. The great thing about these boxes is they can be made from any scrap lumber you have laying around — often these are made from pine because its low cost but you can also get yourself a solid piece of oak to give it more of a furniture look. On the other side, I’ve seen some really great ones made out of rough cut lumber that gives it that rustic quality. So there is not wrong answer.

          2. Design the size of the box. There is no standard length and height for these boxes and they range from a few feet long to three or four feet long to hold saws and levels in. But a 24” box is pretty common. So lay out the tools you want to fit in there and go from there.

    I have seen several drawings online for these boxes but the most simplistic and easy is one I found on the handymanwire.com site …

    draw

    http://www.handymanwire.com/articles/toolbox.html

    3. Cut your lumber. (see above).

          4. Assemble the tray. Glue and nail the tray bottom and sides — and remember, you are nailing in the edges of wood so screws and even larger nails will split the wood. Be careful. Use furniture or finishing nails.

         5. Insert the dowel. Slip it in and glue it — you can also add a nails into the edge for support.

         6. Finish. You can leave these boxes unfinished or you can stain or paint. Completely up to you.

  • How to build a workbench.

    How to build a workbench.

    bench

    One of the great ironies of tools and their use is that the absolute best area to work on is a workbench — a high, solid, well lit, structure on which to cut and vise and connect and create. No question. And in order to have the right workbench for you, you’ll need to build one. And in order to build one, you’ll need a workbench. Well … This isn’t completely true. You can build one, without one. But later on when you’re using the bench and you have it exactly the way you like it, you’ll realize that it would have been so much easier to build it if you had it before. Now, in this world of mass produced everything, why would you want to build a workbench? Great question. And there are about a zillion reasons why — well, that’s also not true. There are five. Five reasons why— but they are five pretty good reasons.

    1. Quality. Most workbenches are cheap, mass-produced structures. You can get workbench and workbench kits — where you add your own lumber — everywhere from Lowes to CVS, — yup, I have seen workbench’s at CVS on Father’s Day. And 90% of these are light, poorly designed structures that will not work well with your home, garage, or the type of projects you will be working on. The remaining 10% that are fairly well designed and constructed are not designed specifically for you.
    2. Cost. For a fraction of the cost of the most expensive pre built workbench out there, you can build one yourself — actually, less than that, you can get a high end workbench for almost $1,000 and the lumber for that would be around $100.
    3. Designed specifically for you. What type of work are you going to be doing and how do you like to do it? Because a workbench for wood carving is going to be different than one for repairing old radios. Are there enough outlets? Is there a place for your coffee pot and for all the stuff you like to have around you?
    4. Designed specifically for your location. There are many times that you could find the ultimate workbench — if your garage was bigger. Or your basement had more light. Or you had more space in the shed. You need to design your bench for the real estate it will take up as well as the space you don’t. In fact there are many, fold down workbenches that work great.
    5. Sense of pride. There is something about building — anything, but there is great irony in having a structure to build things on, that you didn’t build.

    HOW TO BUILD A WORKBENCH

    1. Location. Decide where the bench will go — which is actually more important than the design itself. Walk out where it will sit, look all around it, is there enough light, enough storage space? Is it easy to get material in and out? — a bench to finally build that canoe may not work well in your basement where the finished product cant get back out.
    2. Overall design. There are some great sites online that offer overall workbench plans and here is the best one I found that incorporates many of them http://freebies.about.com/od/free-plans/tp/free-workbench-plans.htm Choose an overall plan and then look at the areas you want to personalize such as height of the bench. And if you don’t like any of these, just draw out what you like and add in the two important aspects; power and light. You will want to attach at least one power strip right to the workbench for power needs and you will need at least one flexible lamp for additional light.
    3. Simpson ties. If there is a magic trick in building a solid, rugged workbench, it’s Simpson ties. Simpson is a company that was founded by a man named Barclay Simpson — who just passed away this past November at the age of 93 — that manufactures joist hangers, angles and a bunch of other stuff that strengthen structures. And since a workbench is not a table but a solid work structure that you can vice something to and saw or hammer, you want it to be solid. By using Simpson ties for the corners of your bench and where the lumber fits together, your bench will be rock solid.
    4. Overdesign for material. Like any project, once you finalize you design and make your materials list, add about 25% more of everything you’ll think you’ll need. This is an overall handyman trick that works, because it is far better to make one trip back to Lowes when you are done to return what you don’t need, then it is to make the six extra trips for what your forgot. So buy more than you need and return it.
    5. Take your time. As you get going you may want to make changes or add in new pieces of jewelry to the project. No rush. Take your time.

    … and let us know how it went. Please post photos of your workbench — or of any project you are working on — at the 543skills forum — http://543skills.com/forumpress/

  • How to use a chainsaw

    How to use a chainsaw

    saw

    Well, yeah, it can rip your arm off, sure. And yes, it’s true that with the chain rotating at 60 miles per hour it’s the equivalent of holding a small car engine in your hands. Yes. This is also true. And there is the risk of flying pieces of wood and of the saw bucking and on you and — well, I haven’t even got to the series of films set in Texas.

    Yes, there are many, many cautious warnings to be said about chainsaws. Chainsaws are powerful, formidable pieces of equipment which is part of the reason that logging tops the list of the most dangerous careers.

    TOP 5 MOST DANGEROUS PROFESSIONS:

    1. Logger

    2. Professional Fisherman or Shrimper

    3. Pilot

    4. Garbage Men

    5. Truck drivers and route salespeople

    But there is something very interesting about that list. First, logging as a dangerous industry is only partly due to the chainsaws and other equipment and also due to the twenty-ton tree that has to fall just right — as well as the need to climb high trees and cut limbs. But what’s even more interesting is that if you look at the people who are logging and cutting down trees for a living, the majority of them are doing it by choice. In fact, many of these loggers are highly educated people that take a season off and work in the woods for something different. Whereas the majority of folks that work in the fishing industry will tell you that if they could find something as lucrative close by that was less dangerous, they would probably take it.

    [amazon asin=B001DO1OMK&template=iframe image][amazon asin=B000GQ7IJE&template=iframe image][amazon asin=B00CLL6Z3C&template=iframe image][amazon asin=B000VSDHAQ&template=iframe image]

    In fact, we have a friend of ours, Adam, who completed law school and passed the bar exam four years ago. He paid for law school by cutting down trees and is still doing it full time today. When my wife asks him when he is going to start practicing law, he’ll just smile and say, “I’ll get to it.”

    As adventurous as boats and the open waters are, there is something to be said about the lure of man and the woods.

    So, if you’ve never used a chainsaw before, here is one good reason to consider it.

    Money.

    Although I’m not advocating taking on a large tree removal project on your own instead of paying a professional — absolutely not — but from a purely financial viewpoint it’s hard to argue that the cost of even a small tree project could pay for three chainsaws.

    Also, if you burn wood, there is no shortage of free wood around. Take a look on craigslist and there are many posts on wood that is free to whoever will pick it up and hall it away — and then cut it up and split it. And neighbors and friends are always having trees removed and are eager for someone to use the wood.

    And if you’re looking for a little side business, there is money to be made for those who are willing to take wood, split it, season it and deliver it.

    With a few exceptions, the majority of the firewood we use is free. In fact, I can easily justify using our fireplace instead of investing in a woodstove or insert because even though the fireplace is only 30% efficient — with the majority of heat going up the stack — the fuel is free so it doesn’t matter.

    Now, there are a few rules in choosing a chainsaw and the first is that an electric model doesn’t count — getting an electric chainsaw is like getting an electric lawn mower and that’s just silly. Anything you can cut with an electric chain saw you can do yourself with a six-dollar bowsaw just as quickly. And then there is the cord, and if you have to use multiple cords because of distance the current draw will be significantly weaker, so —. No. Get a gas powered chainsaw.

    But with that said, get a model you are comfortable handling and using. Don’t get the Paul Bunyam 9000 just because it looks cooler. If it’s too heavy to hold it’s going to be too heavy to control. In fact, before you choose a chainsaw, borrow or rent one instead. Get an idea of the size and blade configuration you are comfortable using.

    And FYI, for a beginner, a bar type blade is more practical than a bow blade.

    HOW TO USE A CHAINSAW.

    1. Survey the area where you are going to work. Is it large enough? Are there obstructions, nearby cars and buildings, or things you can trip over? Is there a path to move way if there are falling limbs or debris?

    2. Understand the vernacular.

    Felling — the act of cutting down a tree.

    Limbing — removing limbs from the tree before it’s felled.

    Trimming — cutting back or taking off branches on a limb.

    Bucking —- cutting the trunk of the tree into usable pieces.

    3. Fill the gas tank with the correct fuel — typically this is one gallon of gasoline to 5 ounces of two cycle oil — the equivalent of what you put in your string trimmer.

    4. Understand the kickback zone. The tip upper corner of the chainsaw is known as the kickback zone. If the kickback zone comes in contact with something while the chain is moving, the saw will kick up and back toward you — that’s why modern chain saws are equipped with a chain brake designed to stop the chain if a kickback happens. You want to always cut from the bottom of the bar and avoid the top because with the spinning chain the majority of injuries occur when using this part of the blade. In fact, cutting with the bottom of the bar is the most smooth and natural way to cut and the easiest way to maintain a grip.

    5. Get your protective gear on. A helmet with a face screen is not a bad idea but the required gear would be steel-toed boots, thick leather gloves, ear protection, safety glasses, and long pants —  logging chaps if you have them.

    6. Start the saw. With the saw sitting on the ground, put the toe of your right boot into the back handle loop and grasp the front handle with a stiff left arm. Pull the starter handle to fire up the engine. Push in the choke and take it off fast idle, then pull the chain brake back toward the front handle to release the chain brake for cutting.

    7. Take the saw for a spin. Get the feel of it. Cut only when you are in a comfortable, well-balanced position with your feet about shoulder-width apart. Stand to one side of the saw, never directly behind it.

     RULES OF THE ROAD: 

    •Keep the chain sharp. A dull chain is unsafe, hard on both the bar and chain, and it overworks you and your saw.

    •Understand the bar’s kickback zone and avoid getting into kickback situations.

    •Never cut above shoulder height.

    •Work on the uphill side of trees so they’ll roll away from you instead of over you.

    •Whenever you aren’t cutting, the brake should be in the locked position.

    •Start all cuts with a full throttle before touching the wood.

    •Avoid touching the ground with the chain because even a brief encounter will severely dull the cutting teeth.

  • How to sharpen a knife

    How to sharpen a knife

    knife

    When I was twelve years old, on my birthday, I received my very first pocket knife. It was a gift from my father and it was amazing. It was a Boy Scout knife that had two blades, a can opener and a screwdriver that hurt your thumbnail when you tried to open it — I can still feel the black faux wood handle and the blade as it bit into a stick or a piece of wood.

    Years later, I can only remember two gifts that my dad ever gave me — even though I’m sure there were more. One was the grey tweed overcoat he had tailored for me when I turned 21 — which I still have but can no longer fit into — and the other was the pocket knife I got when I turned twelve — which I no longer have, but wish that I did.

    This pocket knife tradition continued with my two sons and upon each of their twelfth birthdays they received their very first pocket knife from me. And my youngest son kept my tradition going by losing his six months later.

    Pocket knives have been carried by men for a hundred years or more. However this practice was stilted somewhat by the events of 9/11. With stricter restrictions on security and safety, knives were no longer allowed on flights, government building and other institutions and many men who normally carried a pocket knife, stopped in order to be compliant with the new rules.

    However there are no states that forbid pocket knives.

    See the State Knife Laws — http://http://pweb.netcom.com/~brlevine/sta-law.htm#A-H

    [amazon asin=B0009KF4H0&template=iframe image][amazon asin=B000KSCEH4&template=iframe image][amazon asin=B00006IUWM&template=iframe image][amazon asin=B0037F1B9E&template=iframe image]

    In fact, a ‘knife’ and a ‘pocket knife’ — a folding knife with a blade less than 3” — are in two completely separate categories.

    Now, you’re not going to get your pocket knife on an airplane as carry on — but you can throw it in your bag that you’re checking without a problem at all — any certain federal buildings may not allow it, but anywhere else you not breaking any laws by carrying one.

    Pocket knives are a great handy tool to have and you have a right to carry one if your wish.

    HOW TO SHARPEN A KNIFE.

    For here, we’re going to discuss sharpening a knife using a wet stone. Now there are many other ways to sharpen a knife and even more new gadget-ee devices — those that you can cut a tomato and then a nail — and I’ve tried a few of them and there is nothing better than an old fashioned wet stone.

    1. Get a wet stone. These are also called whetstones because the word whet means to sharpen and you can get one at any hardware store, department store or you flea market.

    2. Soak the stone. Sharpening creates heat. Too much heat and it can warp your blade which is why you should never sharpen your knife on a grinding wheel. Also, wet stones are very porous and in order to keep the filings from the blade of filling the holes of the stones you need to create a liquid coating on the surface. You can do this by soaking the stone in water for twenty minutes, or you can use mineral oil or a light dish soap/water mixture.

    3. Identify the bevel angle. This sounds more complicated than it really is and all it means is that the blade of every knife is angled differently. Most pocket knives have a 30 degree bevel angle, whereas kitchen knives and others may be different. So all this means is, match the angle of the blade with the angle you are lifting the knife up to sharpen it. You want to sharpen the very end of the kinife, not grind down the steel around it.

    4. Sharpen first side of the knife. Position the knife at the bevel angle and pull the blade back; glide the knife along the stone. Gently, slowly pulling the blade back against the stone. Sweep the knife down and off the end of the whetstone. Repeat about a dozen times or so.

    5. Repeat on the other side.

    6. Test the blade. You can do this by slicing rhough a sheet of paper — a sharp blade should glide right through — or run it rough side along your thumb — NOT blade side down, but holding the blade horizontally, run the blade across your thumb. The rougher the blade is against your thumb, the sharper it is going across.

  • The Yankee Drill

    The Yankee Drill

    yankee
    A Yankee drill — also known as a Yankee Screwdriver or a Push-Drill — is not only a must-have for every man  who owns a tool box, but is also one of the best kept secrets of hand tools.

    I say this with some amount of verifiable data because when we had our fire a few years ago, the Yankee Drill was the one item that kept flummoxing the Liberty Insurance computers when it was trying to establish a replacement value.

    A what kind of drill?

    The Yankee Drill has been around since the mid 1800’s and is one of the earliest forms of hand held drills. It is a mechanical tool — it looks like a long stick with a handle on one end that has a rotating end that is flat but when you set it against a flat surface and press against it, the drill rotates in the shaft and into the surface.

    Now you won’t see commercials about Yankee Drills. There will not be huge displays at Lowes, it won’t be a NASCAR sponsor and your neighbor won’t ask you to come over and look at his new Yankee drill that he just got.

    Why? Because there’s nothing really sexy about them and they’ve been around forever.

    Which is the second reason you need to have one. Because it’s simple, time tested, reliable and will last you a lifetime — unless you burn your house down — and will also save you an enormous amount of time.

    But if I have a cordless drill, why would you need a 150 year old hand held drill?

    [amazon asin=B000JRDLVY&template=iframe image][amazon asin=B00C625KVE&template=iframe image][amazon asin=B000NHTG5A&template=iframe image][amazon asin=B002JWSNIS&template=iframe image]

    Great question. And here is one answer. Pilot holes.

    Picture this. You are putting up a set of vertical blinds — I’m using this as an example because I hate putting up vertical blinds.

    So here is the normal process.

    1. You place the little white boxes where you need them on the wall.
    2. You mark the holes with a pencil.
    3. You take your cordless drill and place in a drill bit.
    4. You drill the pilot holes in the pencil marks.
    5. You replace the drill bit with the screwdriver bit.
    6. You use the cordless screwdriver to screw in the hardware.

    or …

    1.  You place the little white boxes where you need them on the wall.

    2. You take your Yankee Drill and drill in pilot holes — skipping the pencil step.

    3. You take your cordless screwdriver and screw in the screws.

    Done.

    Think of every time you need to drill a pilot hole — and every time you try to screw in something without a pilot hole because you don’t feel like changing the bit on your cordless drill again and spend ten minutes trying to get the screw to bite into the wood on its own. And now take the Yankee Drill; light, easy to push and bam. Instant pilot hole.

    Now you can use your Yankee Drill for standard drilling as well and it is great for areas that the cordless can’t fit in or if you just don’t feel like dragging it out. But just in drilling pilot holes alone, this gem will pay for itself the first few times you use it and you’ll end up using it more than you think.

    Yankee drills are usually easier to find online than they are in hardware stores — Sears has them on their online store but I have yet to find one in an actual Sears store. They come with double fluted bits — which work differently than the modern twist because it cuts as you push and they clears as you release — and will run you about thirty bucks.

    You won’t regret getting one of these.

  • How to use a soldering iron

    How to use a soldering iron

    soldering

    Soldering irons maintain an interesting place in the male world. Mention the fact that you own one and you may be asked what wattage the iron is or what operating temperature it runs at. Mention it to others and you may get the same reaction saved for discussions on stump grinders or engine diagnostic meters — yes, those things exist and I’m sure they are used by perfectly nice people but I prefer to buy my food from a grocery store and to leave my electronics alone, thank you very much.

    But the truth is that there are several good reasons to own a soldering iron and in having a basic knowledge of using one  — which is all you really need — and the first reason is that it will save you money.

    Almost everything we own or use has some sort of a Printed Circuit Board in it — from toys, to coffeemakers, to exercise bikes, to toaster-ovens. If it has a display or even an on/off switch, it most likely it contains some kind of small PC board. And when these items fail, it’s often due to a loose wire or faulty lead which can easily be repaired with an inexpensive weld.

    The second reason is that there is this, well, inert value in fixing something. It’s true. It’s built in our man DNA. When we can take our kids broken remote control car — lifeless and dead — and come up from the basement with the wheels turning and us smelling of flux and solder, it’s the same as throwing the musk oxen into the cave fire. This isn’t a cheap thrill, it’s not a false sense of accomplishment, but a well-deserved triumph.

    [amazon asin=B0029N70WM&template=iframe image][amazon asin=B000RB38X8&template=iframe image][amazon asin=B00030AP48&template=iframe image][amazon asin=B000IN1B8E&template=iframe image]

    And the third reason is that in our throw it away quick and go buy another one society, we are losing the skills of using a soldering iron — oh sure an electronics guy or someone who repairs ham radios as a hobby can use one, but the average homeowner cannot.

    What’s ironic about this is that our fathers and grandfathers — whose world contained a fraction of the lights and beeps and switches that ours do — owned a soldering iron and knew how to use it. What was different back then was when something broke, you fixed it. And only when you couldn’t fix it — and when your friends or your brother-in-law couldn’t help you fix it — did you buy a new one. In those days having to buy a new one was not a sign of success but one of defeat.

    In our world — where owning a two year old cell phone is a sign that they may be foreclosing on your home — buying a replacement when something breaks is the norm.  But a large part of being a man is that ability to be self-reliant; to take care of you and yours. And being able to fix something when it breaks gives you the option of buying something new because you want to, not because you have to.


    HOW TO USE A SOLDERING IRON.


    DEFINITIONS:

    Soldering iron — a soldering iron is a tool with a metal tip that gets very hot — up to 800 degrees Fahrenheit. You touch the tip on solder and it melts. That’s it. Like anything prices vary but for the once-in-a-while use a $30 soldering iron will probably do you good for years.

    Solder — solder is a silvery metal thread that is made of metal alloys and contains a high content of lead. What the solder does is melt and holds individual components or wire together.

    Flux — flux is a peanut buttery type substance that gets rid of oxidation and helps clean the surfaces of the solder.


    SAFETY:

    The number one fear of using a soldering iron is that you’ll damage the equipment you are working on. But the actual concern should be getting burned —- as mentioned, that tip get up to 800 degrees so take precautions and wear safety glasses and keep all loose fitting clothes and hair away.


    1. Prepare a work space. Lay down a mat or piece of cardboard over your bench — anything that will catch any loose solder.
    2. Warm your soldering iron.
    3. Clean your soldering iron. Because soldering irons get so hot, they oxidize and become dirty quickly. They key to reliable connections is clean components so make sure that your soldering tip and parts you are joining are clean. So heat the tip up and wipe it into a wet sponge — most soldering irons come with one — until the tip is shiny.
    4. Tin. This seems a little ironic, but right after you clean the tip, you get it dirty again. Apply a thin layer of solder to the tip — this is called ‘tinning’— which allows the heat transfer from the tip to the solder.
    5. Apply flux. Flux melts at a temperature lower than solder so that the solder can do its job.
    6. Solder. Using two hands — one hand holding the rolled out solder and the other holding the soldering iron — hold the iron like a pen — place the solder end on the board where you want it and place the tip on top of it. For one or two seconds. Then remove the solder but leave the tip there for an additional second.
    7. Inspect. You want a shiny even joint. If it isn’t what you want feed more solder and do it again. Or if you made a mistake, remove the old solder completely — just place the tip on it until it melts and start over.

    So rescue some piece of electronics that beyond repair from the trash and remove the PC board. Take it down to your workbench and just spend some time desoldering the welds and pulling the various components off — even solder a few back on. By the time you’re done, you’ll be a pro.

    And your grandfather would be proud.

  • How to build a bugout bag

    How to build a bugout bag

    doom

    A few years ago, The National Geographic Channel introduced a new reality series entitled, Doomsday Preppers; a show that focused on individuals who are actively preparing to survive a possible global disaster. With each episode, we are allowed an inside look at the lives of a few preppers who have a specific disaster scenario that he or she believes will occur — worldwide economic collapse, pandemic, megaquake, nuclear war, etc. We spend a few days with these folks, see how they prepare and view the eminent end of the world and then experts determine if their plan is solid enough to survive in that specific scenario.

    When the show’s first season was aired it was met with mixed reviews.

    While some critics saw the series as an accurate portrayal of a worldwide movement, there were others who claimed it was simply another exploitive reality series — a vehicle to ridicule these individuals rather than educate on their beliefs and lifestyles. Also, many viewers objected to what they called the show’s anti-life format — as most preppers have large cashes of firearms and ammunition set aside to protect their food and rations from those who were not as prepared as they were. In fact, most preppers are very open on their intent to kill anyone and anything that plans on stealing from them if said disaster occurs — because in a world where society has broken down and there are no longer laws to protect, it becomes kill or be killed.

    But regardless of your opinion, millions of us tuned in — and 60% of the Doomsday Preppers audience were men.

    Now it’s important to note that this is not a piece on doomsday prepping and I am not a prepper. I am not concerned about the collapse of our banking system, a worldwide virus, or the takeover from the walking dead. I’m not mocking those individuals who are actively preparing for these events — well, maybe a little — but I am simply stating that I’m not worried about it. But just because I don’t believe in the collapse of modern civilization doesn’t mean I don’t believe in disaster.

    In my life, I have had one house burn and another one flood. I have had cars break down on back country roads. I have been lost in the woods. I have been knocked unconscious and I’ve been trapped in the snow.

    These things I do believe in. These things I try to prepare for.

    [amazon asin=B008HHX15Y&template=iframe image][amazon asin=B00K5AH8T6&template=iframe image][amazon asin=B002PEZH3O&template=iframe image][amazon asin=B00H4JDHRS&template=iframe image]

    HOW TO BUILD A BUGOUT BAG

    A bugout bag — or 72 hour bag — has taken on a prepper reputation  because it often refers to that bag when civilization collapses — usually a handgun is the first item in it — but it’s simply a bag that will allow you to survive for three days. 72 hours. Because if you are lost in the woods, stranded in your car, caught in a freak snowstorm, your odds of rescue increase if you can make it through those first three days.

    The bag itself.

    A bugout bag is often kept in a small day backpack. Nothing too large or  too heavy because you want it to be something you will grab for a hike and not think about — if the bag is too bulky you may not take it with you.

    Food.

    Food is the first thing that people think about when putting together a 72 hour bag but in fact it’s the last thing you’ll need.

    Remember …

    You can survive three minutes without air.

    You can survive three hours without shelter — in extreme temperatures.

    You can survive three days without water.

    But you can survive three weeks without food.

    Food is actually the last of the four survival basics that you will need if caught in a survival situation. However, you will need to keep up your strength, your morale and your health. So you will need some food.

    A few Cliff bars are a good idea, or some dried fruit, or trail mix. And you can cover your food needs is by having a few military MRE’s — Meals Ready to Eat. These are simple food kits that the military uses when in  the field. They can be purchased online, at any Military Surplus Store, or civilian versions can be found in camping or outdoor stores. These meals are high in protean — they are broken down into entree’s, snacks and even have coffee and drink mixes inside — and contain a manner to flamelessly cook that require simply a little bit of water to activate. So you can have a hot meal anywhere. One Military MRE — in a survival situation —- is enough protein to get you through a full day.

    But I think the easiest way to take care of food in your bugout bag is simply a small jar of peanut butter — high in protean and high in fat.

    After that here are some basic ideas for your bugout bag …

    Tarp — for shelter

    First aid kit

    Knife

    A few bottles of water — you’ll need a gallon of water per day but since you can’t carry three gallons in a pack you’ll need a way to purify and/or boil water when you find it.

    Cooking kit

    Matches/lighter/way to make fire

    Fire starter — I have one of those fireplace starter bricks in my pack. A small piece of this will get even the wettest wood going

    Space blanket or light blanket

    Water purification tablets

    Rope or cordage

    Whistle – a great way to signal. Screaming will hurt your throat and take up energy.

    Plastic garbage bags — bring a few, these can be used as ponchos, bags, to carry water, etc.

    Emergency literature — books on survival, first aid, distilling water, edible plants, etc.

    Some cash

    Crank radio

    Compass

    Crank flashlight

    Fishing line and hooks — when the food runs out, you’ll have a way to catch additional food

    Additional socks — things go easier if you can keep your feet dry

        There are no set rules to a bugout bag and you can make it as simple or complicated as you want. But for thirty dollars or less — I know some guys who have purchased every item in their bag from The Dollar Tree and done it for much less —  you can have a bag that will allow you to survive for three days.