Category: Automotive & Housing

  • How to jumpstart a car

    How to jumpstart a car

    cable

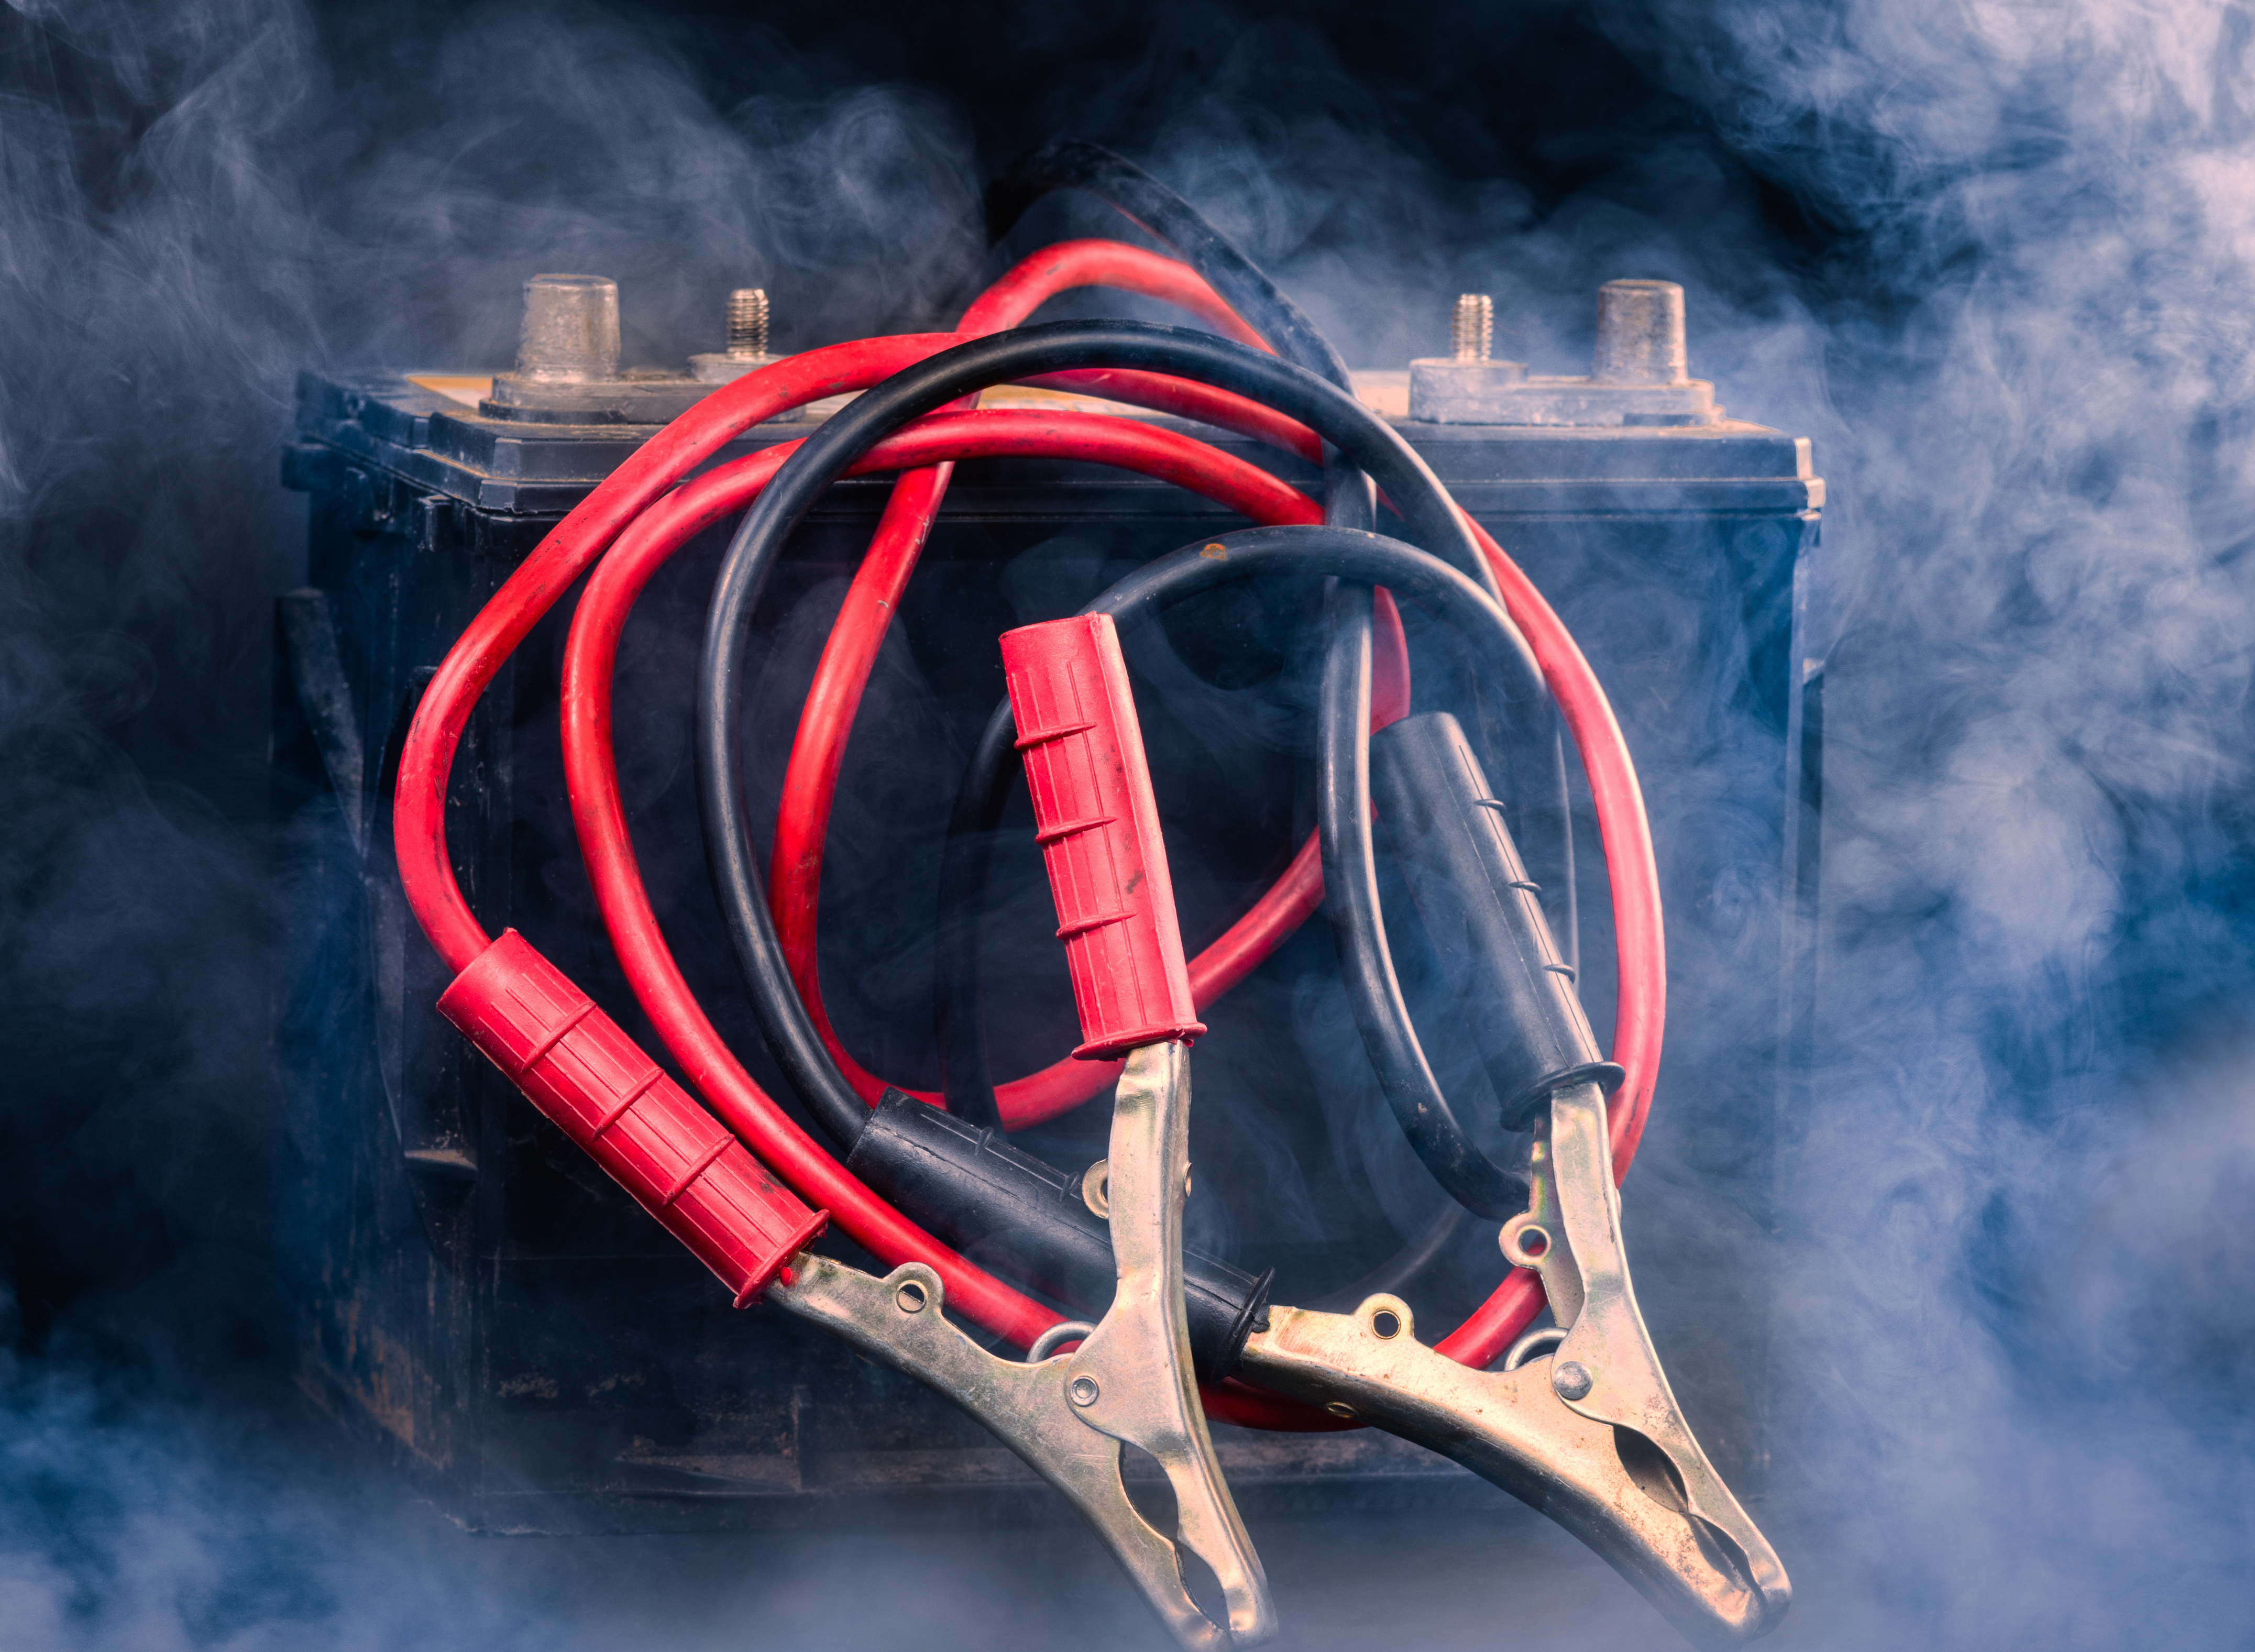
    Now the basics of jumpstarting a car are extremely simple and require only three parts. One, a car with a dead battery — the jump-ee. Two, a car with a live battery — jump-er. And three, a set of large, industrial, jumper cables.

    Now, this is a very simple process that gets complicated quickly if you are lacking or have undersized jumper cables. The reason for this is that it’s always  easier to find someone willing to give your car a jumpstart, than it is to find someone willing to do so who also has a set of jumper cables — or a set sized large enough to actually work. You may find one or you may find the other, but now you need to find both. This is the same as needing help moving, but you can only accept help from friends with red hair — you’ve not only decreased your odds but you have put yourself in a vulnerable position.

    Being men means that we are prepared to take care of ourselves, the people we care about and others who need our help along the way. It’s okay to have a dead battery. It’s not okay to drive around unprepared expecting others to take care of us. A man on the side of the road with a sign reading NEED JUMPER CABLES, is different than that same man with his hood up, cables ready, looking for a quick charge from a willing traveler.

    And don’t think for one minute that those cheap jumper cables that came with the car, or the set that was in the emergency car kit your aunt gave you for Christmas, count. They don’t. They are worthless and unreliable. I have helped more people jumpstart cars that were trying to do so with cheap cables, than those who had no cables at all. They just don’t work. Go out and get yourself a heavy set of jumper cables — 6 gauge or better (remember, the lower the gauge number the better, so, 6 is better than 8 and 4 is better than 6, etc.) — 300 amp or better with rubber handles on the clamps; not plastic ones. Also, a 15’ length is a good length. 12’ cables are often hard to use if you have to pull the cars in at a strange angle and with more than 15’ you risk some current loss.

    [amazon asin=B00ELASYIA&template=iframe image][amazon asin=B0006MQJ0M&template=iframe image][amazon asin=B00167TYHQ&template=iframe image][amazon asin=B003UVCY00&template=iframe image]

    THE PROCESS:

    So, now you’ve got a decent set of jumper cables, a car with a battery that needs to be jump started (jump-ee) and a car that is has a fully charged battery (jump-er). From here it’s pretty straightforward. With the jump-er’s car running — it’s very important that the car jumpstarting from is running — you’ll start the process.

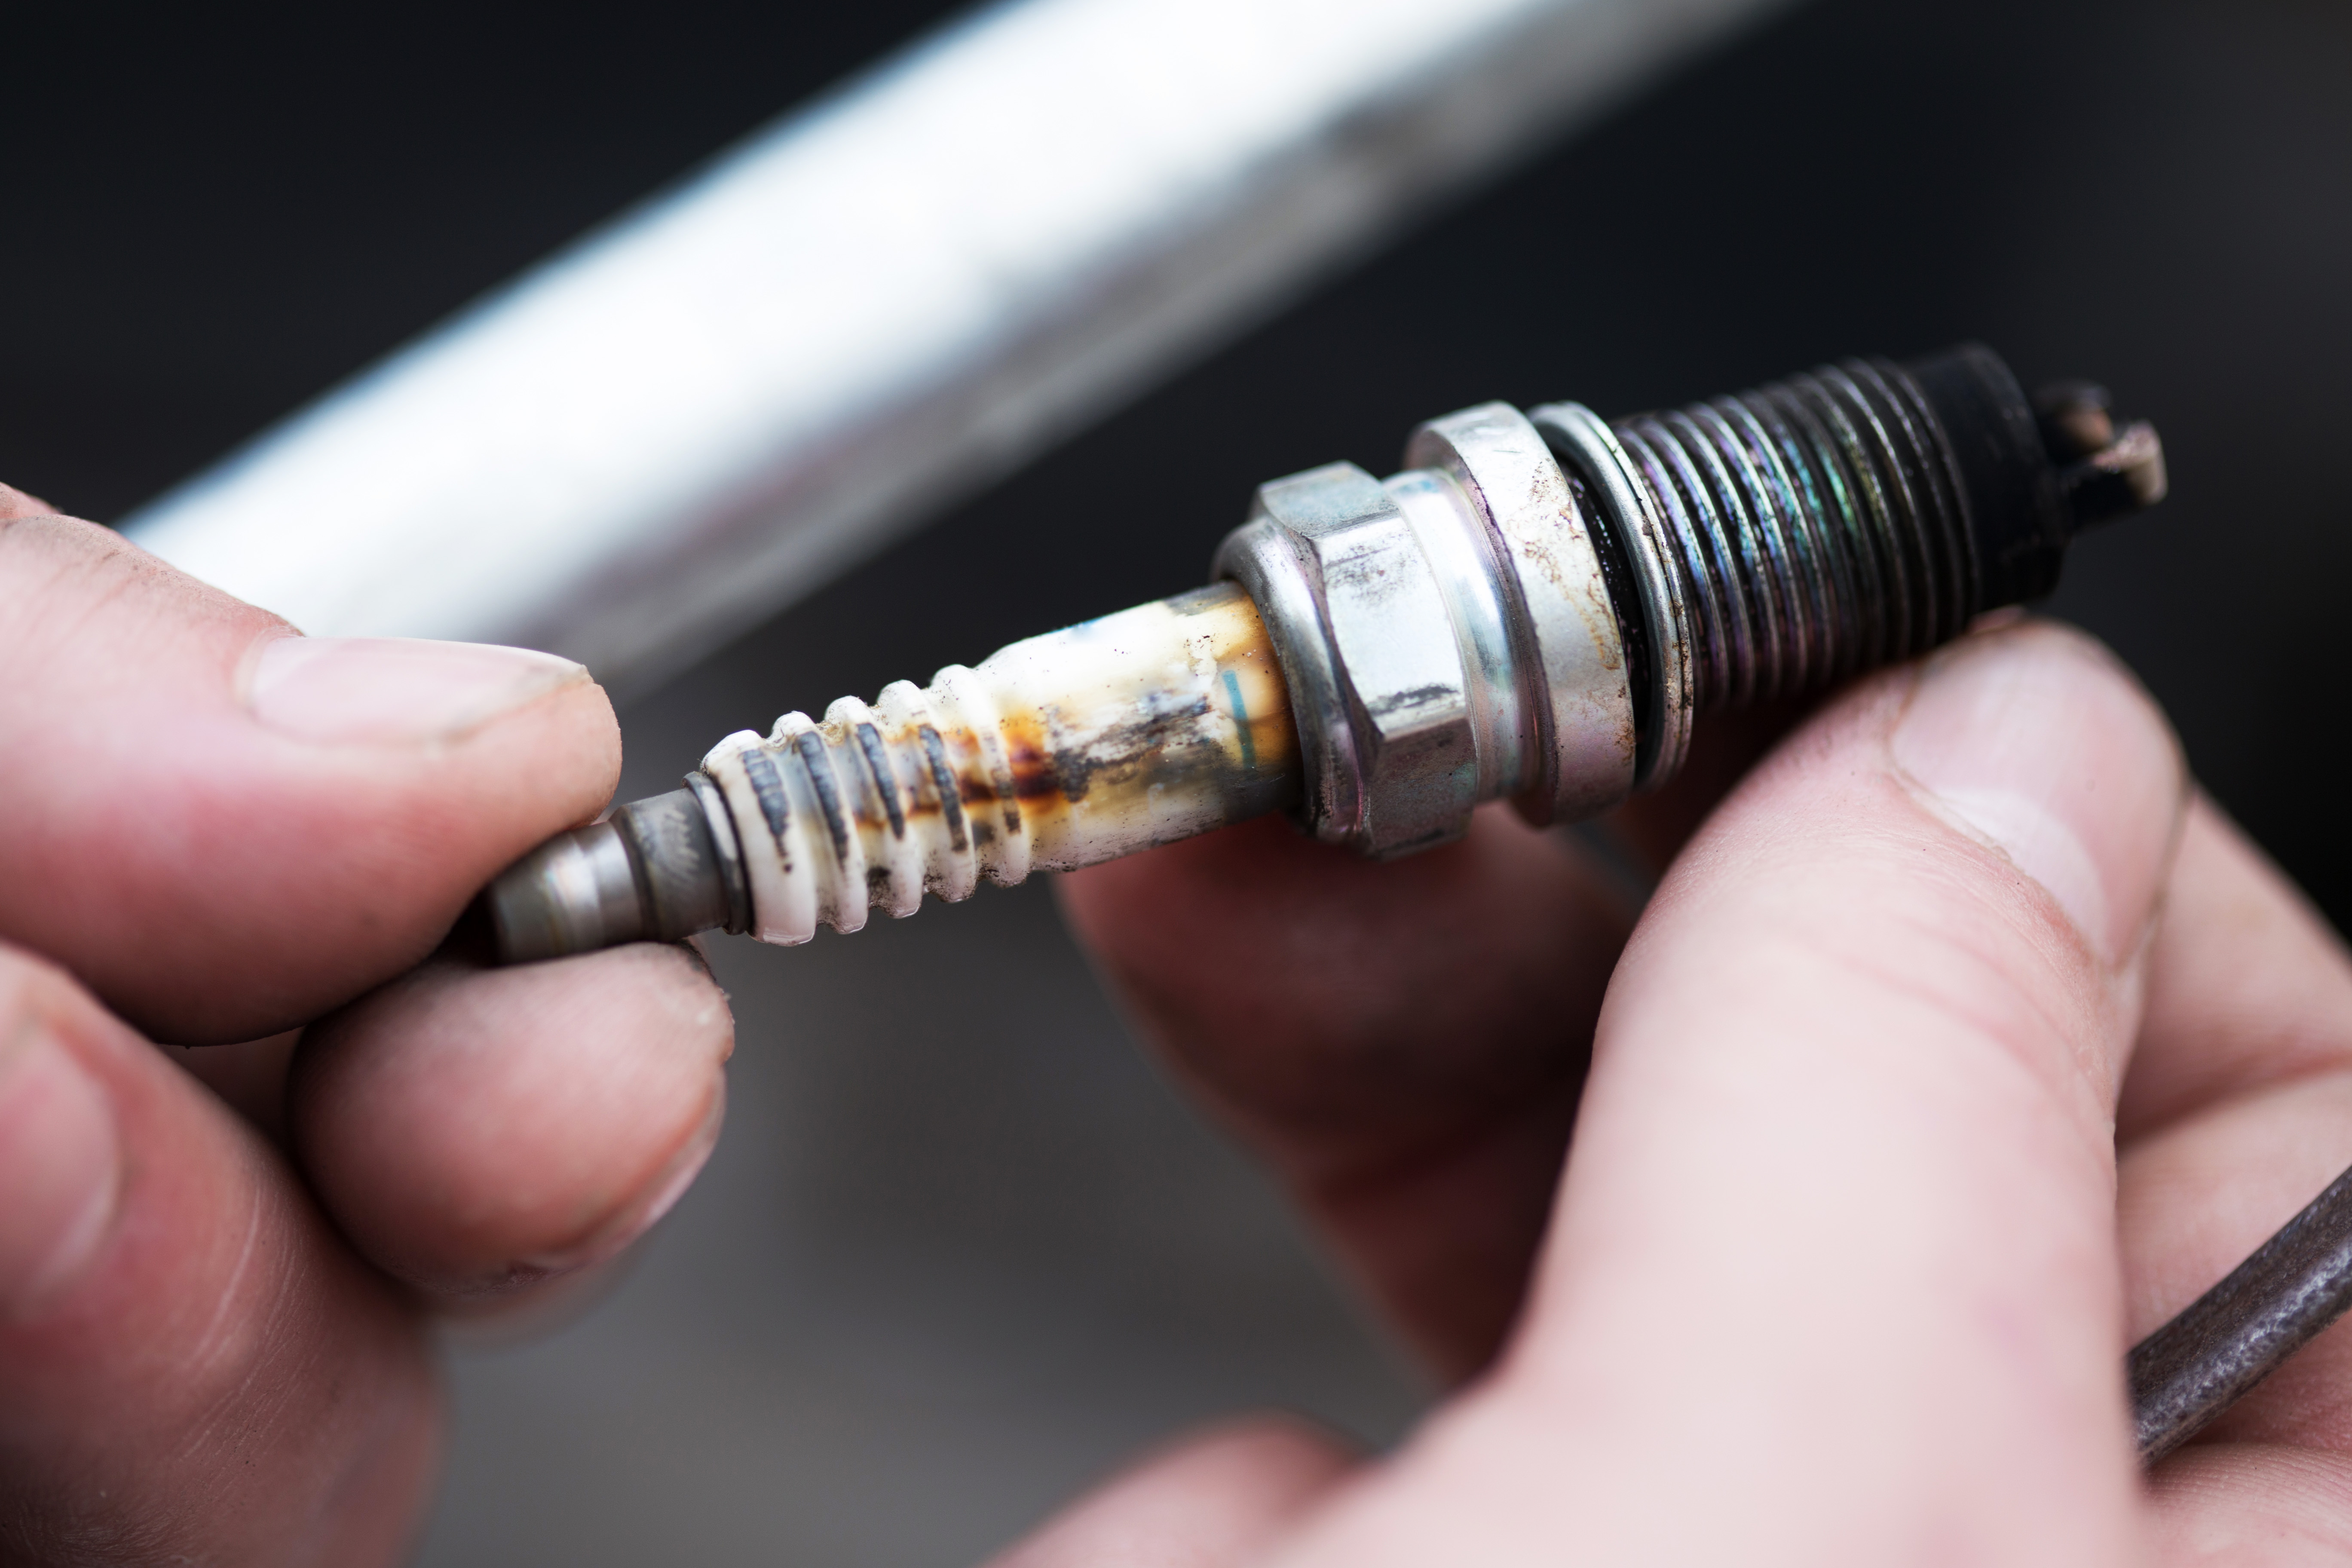
    First you need to determine if the problem with the car is truly a dead battery. So, if when you turn the key and the car does nothing or if it tries to turn over but can’t, it’s most likely to battery. If the dash lights come on and/or there is a clicking sound when you try to start the car, this might be a starter issue instead of a battery.

    The rule of jumper cables is simple. It doesn’t matter which way you connect the cables, as long as they are the same on both cars. So, if the black jumper cable clamp is on the positive terminal on the jump-er, then the black clamp goes on the positive terminal of the jump-ee. The black and orange (or yellow) on the cables does not mean positive or negative, it’s just a way to distinguish a difference between the cables.

    So that means, do not cross the cables. Don’t put the red cable on positive of the jump-er and the other red end on negative of the jump-ee. If you do, bad things will happen. But the good news is, that’s really the only rule of using jumper cables.

    So let’s say you choose to connect red to positive on the jump-ee car, then red to positive on the jump-er. Then go back and do black to negative on jump-ee and then black to heavy metal bracket or frame of the jumper — I’ve connected the negative to the negative, but this is no longer recommended.

    Now, you wait a minute to let the charge build up then try and start the car. If it starts, great. If it does not start, wait a few more minutes and let the charge build up further. Try again. If still nothing, look at the cars you are matching up.

    If you have a Honda Civic trying to jumpstart a Chevy Bronco, you may have an issue. The smaller battery may not be strong enough to charge the larger one. You can wait longer to see if a charge will build, but most likely you will need to find a larger car to jump from. The rule is you want an equal or larger battery as the jump-er.

    So if the battery sizes are equal, and the cables are of heavy industrial strength, you should get a charge and the car should start. Then, unhook the cables — red from the jump-er then red from the jump-ee, etc. — and let the car run to build up a charge.

    That’s it.

    So do you now know how to jumpstart a car?

    No. Because you haven’t done it yet.

    Put a good set of cables in your trunk and wait to find someone you can help and once you’ve actually jumpstarted, then you know how to do it. And when you find someone — walking out to them with your heavy duty cables still in their plastic bag —  be honest. Tell the person that you have never used the cables but are willing to help. And don’t be embarrassed by this. I had a neighbor — he was almost sixty at the time — I found reading his car manual trying to find out how to jumpstart his car. He refused to let me help him because he wouldn’t admit he didn’t know how to do it.

    The worst kind of knowledge is the type that is offered but never accepted.


  • How to change your spark plugs

    How to change your spark plugs

    plug

    History

    Believe it or not, there is actually a great deal of controversy surrounding who actually invented the spark plug — pretty funny, huh?

    In one camp, there are those that believe the credit should go to a man named Edmond Berger, who supposedly created the first device on February 2, 1839. But since Berger didn’t patent this invention and there is very little to document it — or provide verification on why the February 2nd date is always used — the title can’t officially go here.

    Then there are others that give the credit to a Frenchman named Jean Lenoir in 1860, who used an electric spark plug in a gas engine that he had created — but again, no patents were filed and there is little documentation.

    The actual paper trail begins in 1898, when the famed Mr. Nikola Tesla — the creator of the modern AC electrical system — filed a patent for a sparking plug within his ignition timing system. And then another patent was filed in 1902 when Robert Bosch designed a plug for his magneto-based system.

    But there is little doubt that the development of what is today the modern spark plug came from an engineer named Gottlob Honold who was working for Bosch in 1902, and took the plug closer to what it is today. And from there, manufacturing developments were made by Albert Champion in creating the insulator and completing the task in 1930.

    What is a spark plug?

    A spark plug is device that has a metal threaded shell surrounded by a porcelain insulator. It is screwed into the cylinder head of an engine and forces electricity to arc across a gap in order to deliver electric current from an ignition system to the combustion chamber of an engine. That’s it. It provides a consistent spark to keep the combustion going and the cylinders moving so the engine keeps moving.

    Maintenance

    When a spark jumps the gap between two electrodes, it actually burns off small amounts of metal each time. As this continues, the gap widens to a point where the spark cannot make the jump any longer. This is when the engine begins to misfire, your mileage goes done, you have trouble accelerating and the horrible CHECK ENGINE light comes on.

    Which means that it’s time to change your plugs.

    Now if you’re intimidated by changing your own spark plugs, don’t be. If you can change your oil filter and oil — and even if you have never done this, you can — then you can replace your spark plugs. And remember, each time you do yourself, you pocket the hundred dollars in labor that it would cost you to have it done in a shop. And that adds up pretty quickly.

    HOW TO CHANGE YOUR SPARK PLUGS

    So here you go. Nine easy steps to go through to replace the spark plugs in your vehicle.

    1. Buy the correct plugs for the vehicle. At your auto parts store there will be cross reference material for your vehicles make and model and the appropriate spark plug size.
    2. Gently, disconnect one spark plug, from one spark plug wire. There are two important points here; the first is the word, gently — not yanking, but disconnecting — and the second is the quantity of one. By changing one plug at a time you will always get the right plug back with the right wire.
    3. Clean the spark plug area with an air canister. This is important because it will prevent any dirt and crud from falling into the cylinder — which as far an engine is concerned is the same as a human getting a germ.
    4. Unscrew one plug. Using a spark plug ratchet, or the spark plug socket that comes with most socket sets, unscrew the plug by turning counterclockwise. Once the plug is loose enough, just finish by removing it by hand.
    5. Determine the plug gap. Each engine will have a determined gap that the plug point will need to be. You can get this gap from the vehicles owner’s manual, or it’s included in the decal under the car’s hood. Creating the correct gap is important because it will set it at the exact distance it needs for ideal performance and fuel efficiency.
    6. Gap the plug. Take your gap gauge, insert it between the bottom of the plug — the inner electrode — and the hook on top — the outer electrode. With the determined gap, bend the hook lower or higher to match the specific gap
    7. Insert plug. Slowly screw in the spark plug by hand until it’s firmly secure. Finish by tightening with the ratchet.
    8. Reattach the plug wire. Using a twisting motion, position the boot above the plug. When you hear a click, you’ll know the wire is connected to the spark plug.
    9. Repeat these steps with the other plugs.


    That’s it.

  • 10 old technologies to never throw away

    10 old technologies to never throw away

    tv

    There is one thing about consumer technology that has always confused me. Let’s say you have a toaster. It’s a good toaster. It makes great toast. This toaster looks good on the counter, cleans easily and has been extremely reliable for all the years you’ve had it.

    Now let’s say that you just found out that the new toasters are being released. Your version is Toaster-6.0 and the new Toaster-7.0 are now out and being gobbled up as soon as they roll off the assembly line. If you don’t move fast, there won’t be any left.

    So you grab your wallet and run to the store — dropping that boat anchor of a toaster at the curb on the way out — to get your new, improved; Toaster-7.0. You stand in line as they count off how many toasters are left. You wait and —. You make it. You get the new toaster.

    Whew, that was close. And you get home and display the new toaster on the counter proudly.

    Now, as goofy as that sounds, we are actually doing this to items like toasters — not as rapidly as we do cell phones, but that’s the danger in it. It’s more subtle. More gentle of an erosion. And then one day we wake up and we miss our old toaster because this is the third toaster we’ve had since we’ve tossed it.

    So here are the ten old technology devices that fit in that category. Here are the ten items we should never throw out.

    10. Old cast iron

    Yes, you can still buy cast new iron pots and pans. Sure. But it’s pricy and is not as durable as the old stuff. And the thing about cast iron is that it never, ever dies. You can find a cast iron frying pan in a garage sale that is rusty and flaking and looks like it has been through three wars. And within a week you can have it cleaned up, seasoned and ready for eggs on the campfire. These things are great and should be held on to forever.


    9. Battery operated radios

    In our world of cellular access to everything, battery operated radios are becoming harder and harder to find. But that old boom box in the garage will come in pretty handy if you loose power and cell coverage. These are worth keeping — and keep the batteries out of them so they don’t corrode.


    8. Coffee pots

    Not coffee makers, but coffee pots, are becoming very rare. If you have one, keep it. If you don’t have one, get one — and I’m not talking about the fancy forty-dollar camping pot, I mean a real stainless steel coffee pot. It will cost you about ten bucks and since it has very few moving parts it will last forever. These are great for camping and fishing trips, if the power goes out, or just when you want to control how strong your coffee is.


    7. Metal coffee cans

    These are becoming harder and harder to find since most mainstream coffee comes in plastic containers. But if you have the old metal ones, keep them and use them. Display them proudly because they have hundreds of uses.


    6. Old landline phones

    Again, if you lose power, an old landline phone — one that you can plug into the phone line and doesn’t require power — is a pretty handy thing to have. Keep at least one in your house.


    5. Old metal fans

    It’s probably too late for these beauties because they have moved from the hard to find to the collectable. But if you find an old metal fan, grab it. They last forever and the motors are much larger than the modern plastic versions.


    4. Turn tables/tape decks 

    Sometime in your life you will come across a collection of cassette tapes from your talent show in 1970 or some of Uncle Walters old 45’s. You’ll need something to play these on. If you have one, display it and use it.


    3. Small appliances build before 1970

    In my house, I have the milkshake maker from my parents diner in 1956. Besides the constant use it took then, it has been used for decades and still makes amazing milkshakes. These old appliances were replaced by lower quality versions and the old ones will last forever and when they are gone, they are gone.


    2. Old Mason Jars

    You can buy mason jars anywhere but the new design are thinner glass, cheaper fittings and aren’t designed to last as long. If you come across some of the thick old Mason Jars, grab them. They can be used for a thousand different things and they just aren’t making them any more.


    1. Metal fishing reels

    I am still in mourning over giving my brother-in-law my old Mitchel 300 fishing reel when I got my new shiny plastic one years ago. He still has mine and I am four reels down the road. The old metal reels last forever, are rugged and can take a beating.

  • The versatile toolbox

    The versatile toolbox

    tool

    My mother was born in 1922. My dad in 1924. So, if you calculate and then add forward you would think that my age would be — what? 72? Late sixties?

    Well, I guess that makes sense since my brother would have been 70 this year and my sister 66, but no. I’m 52. My mother had me when she was 40 and she had my younger sister when she was 42.

    So I was born in the sixties and my parents were born in the twenties. This is not a generation gap but two generations apart which created some interesting paradoxes. The first was that my brother and sister were the age of most of my friend’s parents — when I was three years old my brother was coming back from Vietnam and when I was six I remember hearing a huge fight as my sister was leaving for something called Woodstock. But those are different stories.

    Now, there were some challenges with this arrangement; my dad’s health never allowed him to be the rough and tumble father that other kids had and at the age of 54 my mother started Nursing School to bring in some much needed income after my father became disabled; which meant that for a period of time my dad was retired and my mother was a college student. And for those friends that came to our house there was a certain generational language barrier that would often need translation; a davenport is a couch, dungarees are blue jeans and gangershank is someone tall and thin.

    But it also created the amazing opportunity to not only experience my own generation growing up but the other two in my home: my older siblings of the sixties and my parents of the Depression Era, 1930’s.

    Now as a kid, having Depression Era parents created certain challenges — plaid pants were just as good as solid colors that cost more and powdered milk is very tasty. And as an adult it engrained a desire for all things to have value and to have multiple uses.

    Tools are like that. Sure, there are tools that are designed for one specific use, one specific application. But the most use we get out of our tools means the we can not only get more done with what we have but it also justifies paying a little more for the tools that are more versatile and we will be using more.

    An example of a non-versatile tool is a hammer. As soon as you put together a tool box the first thing you grab is usually a hammer but in reality it has only a few uses — and is almost becoming obsolete with the use of cordless screwdrivers. A hammer is used for hammering in nails and pulling them out. That’s pretty much it. Anything bigger than that, a post or a beam, you’re going to pound in with a sledge or a mall. So in actuality you will probably not use a hammer all that often.

    But there are other tools that can be used for multiple uses and will allow you to get more bang for your buck.

    VERSATILE TOOLS
    Cordless drill. The cordless drill is the big daddy of versatile tools. This thing has so many uses and is so handy that if you are going to buy a higher end tool, this is where you might want to spend your money. All a cordless drill is, is a drill with a rechargeable battery with a screwdriver bit but you will use it all the time. My neighbor Eric and I just built a 25 X 15 foot deck in our backyard using only two cordless screwdrivers and a power saw. You can change out a door lock, mix paint, grind metal and, oh yeah, drill holes with this amazing tool. Worth having and worth having a good one.


    Socket set. Socket sets are used to tighten bolts and nuts and some will argue that a set of spanners — the silver wrenches with a closed end and an opened one — is better than a socket set. But I have lost far more spanners than I have lost sockets because I always put it back in the spot in the case. Also because of the gears of the ratchet handle, you will always be able to torque a bolt tighter with a socket wrench than a spanner. Now, unless you are going to rebuild a car or doing some high end stuff, my advice is to go middle of the road to cheap on a socket set. Get yourself a metric and American style and keep them handy.


    Multi bit screwdriver. My second favorite versatile tool is the multi bit screwdriver. All this is, is a screwdriver with a hollow magnetic end that allows you to change the ends — flat head, philips, mechanical and a few different sizes — so you have six  screwdrivers in one. These are handy little things and my advice here is to first get the style where the extra heads go into the hollow part of the handle and screw closed. The models where the bits pop into the lower shaft will always get lost. Every time. And the second is to go cheap. Multi bit screwdrivers are great but they are pretty much disposable. Get yourself a few and put in one in your junk drawer, glove compartment, garage. Great little tools to have and you can get them everywhere from Dollar General to Wal-Mart.


    Mini screwdriver kit. These are also great little kits and have all the very small flathead and phillips screwdriver sizes. They are perfect for fixing a pair of eyeglass, opening up small electronics and getting in anywhere the manufacturer doesn’t want you to go. Again, go cheap here because you will always loose some and every Dollar Tree in the country has these kits.


    Reciprocating saw. Now until recently my reciprocating saw sat on the bottom of my workbench and saw very little use. But once I started using it I saw how incredibly versatile it is. It is so light and portable that you can use them to cut tree branches, metal, PVC, anything. I recently built a large kindling box with leftover wood from our deck and used a reciprocating saw and a cordless screwdriver. Saw-Zall is the big guy here but again unless you’re a pro, go cheap. Harbor Freight has some very inexpensive brands.


    Staple gun. Where you can’t get a hammer, you can get a staple gun. Small, cheap, easy to use, these guys work well for tacking down carpeting, cable, upholstery, any place you would normally use a small hook or nail. They are many different sizes and grade of staple and you can swap out if needed. Go middle of the road here as far as cost. The springs on the cheap ones tangle and snap pretty easily and the cheaper frames are easier to bend.


    The key is if you pretend these tools are all you have in your toolbox and use them as much as you can.

    Have fun.

  • 9 older products that are better than their newer versions.

    9 older products that are better than their newer versions.

    radio

    As the great Billy Joel said, the good old days weren’t always good and tomorrow’s not as bad as it seems.

    In 1955, 38,000 people in the country had polio — now there are less than 300 cases in the entire world. In 1960, 30% of Americans lived under the poverty line and that number is now below 10%. And in 1950, almost half of all American homes didn’t have a telephone. Today there are roughly six internet connected devices per household.

    So yes, we’ve come a long way. But still, there are some areas, some products and services, that have suffered from the modern march of advancement. Which means that there are a certain number of areas where the older versions are much better than the new ones.


    9. FANS

    The vintage fans of the 1940’s and 50’s were amazing. They had metal blades, huge motors, moved air around like a jet engines and lasted forever. Modern versions are basically disposable with tiny motors, plastic cages and thin plastic blades.


    8. SILLY PUTTY

    The old Silly Putty was this amazing stuff that bounced, floated, stretched and held any image that you put it to. It fit back in its egg shaped container and unless it got covered in gunk from the floor, could be used for months. The newer version is less pliable, doesn’t bounce and worse yet, does not pick up any image that you press against it. And is this strange purple color now.


    7. FISHING REELS

    In the 1980’s many spinning reel manufacturers went through a process to remove cost from their products. Metal housing and gears were replaced with plastic ones and mechanisms were simplified and redesigned. The result of this was a reel of far less quality. In fact, in 1994 I gave my brother-in-law my old Mitchell 300 reel when I got my new Mitchell. He still uses my old one and I’ve been through four replacement reels since.


    6. CROCK POTS

    About five years ago, the great crockpot cartel got together and decided — for whatever reason — to increase the low cooking temperature on new crockpots. I have no idea why, but the result is a crockpot that cooks higher. So now slow cookers, cook faster. And if you’re not careful it is so much easier to overcook meat in a new crockpot than it was in an old one.


    5. LINCOLN LOGS

    Lincoln logs are great. They were these logs that were etched out at the end so you could build cabins, forts and outbuildings. And of course because they were logs they were made of wood. New ones are not. They are made of — plastic. How can you have a plastic log cabin?


    4. UMBRELLAS

    And umbrella was once a well-crafted, solid, piece of adornment. It had a thick wooden handle, solid metal bracings and heavy canvas to protect you from the rain — in fact umbrellas were coveted by thieves because there was always a market for them. Modern equivalents are made to be replaceable and disposable and in fact you can buy umbrellas from The Dollar Tree.


     3. PAPER ROLL CAPS

    Cap guns came out in the 1950’s and were these guns that shot paper caps that exploded and smoked like real guns. The caps hid large dimples filled with black powder that created this exciting bang. Modern equivalents are completely flat and contain very little powder and make a soft pop — about as load as bubble wrap popping.


    2. CRACKER JACK PRIZES

    The prizes in Cracker Jacks used to be amazing — small pinball games, cars, charms, plastic guns, everything. In fact, that was part of the charm of Cracker Jack was getting to that prize. The prizes of today are not even worth mentioning — usually a piece of paper — and is the equivalent of getting socks for Christmas.


    1. AIR TRAVEL

    Even before 911 air travel had lost its glamour. Gone are the days of warm towels, full meals and a cheery attendant that is only a button push away. Air travel is now no frills, sit down, shut up and keep quiet.


  • How to Change the Oil in Your Car

    How to Change the Oil in Your Car

    oil change

    1971 was a very busy year. Charles Manson was convicted for his part of the Tate-LaBianca murders. Paul McCartney formed a new band called Wings. A man calling himself DB Cooper hijacked a Boeing 727 and then parachuted from the plane with $200,000 in ransom cash. And at Madison Square Garden, Joe Frazier defeated the great Mohammad Ali.

    It was also the year of Edwin Washburn.

    Now Edwin Washburn was man who, when he retired from the military, finally had the long awaited back surgery he had been putting off. And as Edwin was recuperating he wondered how he would get down under his vehicles to change the oil now that his mobility was limited.

    As he was in a tire store, Washburn noticed that there was an outside pit where mechanics could work on campers and RVs. Why couldn’t you do this inside, with cars, and by doing it, drastically reduce the service time? And from this, the very first Jiffy Lube fast oil change shop was created.

    Now these shops would have remained simply a few unique stores in Utah if it wasn’t for another character named Jim Hindman.

    Jim Hindman was a successful businessman and was also the football coach at Western Maryland College. And during a conversation on tenacity and a hard work ethic, one of his players spoke up.

    “That’s great coach, but you already made your million. I’d like to see you make another one.”

    So he did. Hindman purchased the first Jiffy Lube from Washburn and began spinning out franchises.

    Today there are over 2,000 Jiffy Lube locations, and an additional 800 Valvoline Instant Oil change centers, making the instant oil change shop a solid part of our car maintenance landscape.

    [amazon asin=B00BXLUI5M&template=iframe image][amazon asin=B000GHK2IM&template=iframe image][amazon asin=B000JFHMVQ&template=iframe image][amazon asin=B0000AXRH5&template=iframe image]

    Now this is both a good and a bad thing. It’s good because the instant oil change sites probably extended the life of many cars for drivers who would never change their own oil and who didn’t have the funds or time for the oil change at the dealer. It also made oil changes affordable — if you can avoid the constant up-sell that occurs. But the down side is that now the concept of changing your own oil is right up there with grinding your own meat or making your own clothes since today there are generations of drivers who have never owned a car during a time when you couldn’t pull in during lunch for a fifteen-minute oil change.

    But changing the oil in your car will not only save you money, but it is a simple maintenance task that you can master easily.

    HOW TO CHANGE THE OIL IN YOUR CAR.

    Now here is the first rule. Get yourself a good set of car ramps — those metal ramps you see at Walmart — and never, ever use the car jack.

    I mean it. Don’t use the car jack.

    That jack that came with your car was meant to lift the vehicle high enough to change your tire during an emergency. It was never designed to lift it up for maintenance. The higher the car goes, the more unstable it is and the easier it is to get hurt — especially if you’re yanking on a stubborn oil filter on an already unstable three-thousand pound vehicle. Also, if you place the car jack in the wrong place you could do some serious damage to your car.

    You can get a decent set of ramps for forty bucks that will last you a lifetime so don’t use the car jack for anything other than roadside emergencies.

    With that out of the way, let’s cover the 9 steps:

    1. Go to an auto parts or department store and get the oil and oil filter for your car — there should be guides there to tell you or it will also be in the car’s owner’s manual. You will also need: a pan to catch the old oil, a socket set, an oil filter wrench — all inexpensive and easily found.

    2. Open the hood and remove the oil cap. This will allow the oil from the crankcase to drain easier.

    3. Drive the car on the ramps and apply the emergency brake.

    4. Drain the oil. Under the car you will see a flat metal pan with a square plug — the perfect size for the end of a socket wrench to fit in. Place the drip pan directly under the plug and remove it, closer to the engine than the transmission. It should have a bolt or plug toward the bottom. This is the oil plug you’ll need to remove to let the oil drain. When the oil has drained completely — and this could take a few minutes — replace the plug.

    5. Remove the oil filter. The filter is easy to find and the oil filter wrench will fit right over it. Unscrew it and remove, making sure you take off the rubber gasket of the filter as well.

    6. Replace the filter. Dip the tip of your finger in the new oil and run it along the gasket of the new filter — this will help in creating a tighter seal. Screw on the new filter.

    7. Add in the new oil.

    8. Replace the oil cap.

    9. Check. Start the engine and make sure the oil pressure light goes and your oil pressure gauge moves.

    And that’s it.

    Easy. And a home oil change should cost you around twenty bucks or less for the oil and filter. When oil and filters go on sale — and they always do — purchase them and keep them in your garage until the next oil change.

  • Every man needs a garden

    Every man needs a garden

    garden

    Remember when you were a kid and you took the tops of carrots and placed them in in a jar lid of water on the windowsill? Then every hour, all day long, you would run back to check; to see if the carrots had sprouted yet? Then, the next morning, as soon as you got up, you checked again? Then later that day too? Then —. Well then — it would always get a little boring. And by the end of that day you had forgotten it all?

    Remember that?

    Then later, about two weeks, you’d finally think about those carrots and you would run to the windowsill to find one of two things?

    1. Either the carrot tops had completely dried out from neglect and stood there mocking you? Or —
    2. Your mother had watered them, which meant that you had bright green sprouts of success projecting from the top?

    And when that happened, you —. Well, you felt like a —. Well, like a guy who could get carrot tops to grow on a windowsill. Which, at six years old, is about as big a deal as it gets.

    And that — my friends — was your very first garden.

    And for some of us, that was our last one too.

    There are many reasons to have a garden — and when I say garden I mean everything from a few tomato plants to an acre of produce. A garden is just something you grow on your own.

    Reasons to have a garden

    1. No matter where you live, you can have a garden. If you are in the middle of Manhattan or the backwoods of Tennessee, you can grow stuff. On a windowsill, a roof top, the sunny part of an alley or in the many community gardens that are set up. There is no place, no living arrangement, where you can’t grow a few things.
    2. There is little skill involved. Yeah, I know, you don’t have a green thumb. And yes there is an art to gardening. But the basics are incredibly simple. You put seeds in the ground. You water them. They grow.
    3. Cost savings. Just a few tomatoes or squash from the small patch of dirt by the garage saves you money that you would have to pay out. And that’s not even adding in the value of canning or freezing for the winter.
    4. Pride. Yeah, it sounds hokey but there is pride involved. When you take a few zucchini to a neighbor or a basket of tomatoes into work, there is enormous pride in that. A sense of accomplishment.
    5. Health. Whatever you grow in your garden you know how it was grown. You know what pesticides you put on and how much. There are no secrets. And you have the advantage of taking the food at its most peak time and going from garden to table.
  • How to build a wooden toolbox.

    How to build a wooden toolbox.

    wooden

    There are certain phrases in the English language — and I’m sure in other languages as well — that are spoken so often that they are no longer heard. It’s not that they you don’t actually hear them, it’s more that they become overused; white noise. And we never even question their validity because they’ve been around for so long.

    There are many examples of this, such as — Don’t go to bed angry. What? That’s the dumbest thing I’ve ever heard and is also totally wrong because angry is the absolute best time to go to bed. Since sleep is the cosmic reset button, you go to bed angry, you wake up not angry. Perfect. And you also wake up and realize what an idiot you were for being ticked off in the first place.

    Here’s another one. Let’s give it 110%. Dumb. I mean, I get it. You’re saying let’s give more than we have, let’s push the envelope, —. Yeah. But you’re also stating that we should give an immeasurable, incomprehensible amount that can never be tracked or gauged — and the phrase is so overused that our 110% has been reduced to about 40%.

    How about this one. Well, to be honest here … That great. So it basically it says, okay, I’ll start telling the truth now because everything else I’ve said so far has been total crap.

    And how about this one. The best gifts are the homemade. This is basically false. Because the best gifts are the ones with thought behind them, where we have spent time thinking about the gift and most homemade gifts are usually quickly made, generic items, thrown together without much thought or meaning.

    However …

    There are a few homemade gifts that can be both made pretty quickly, are of higher quality and will show a little thought. And — here is the best part — they will actually be used.

    On the very top of the list is the classic open faced wooden toolbox. These things are great and have been used for generations and even if you have a toolbox — even if you have ten toolboxes — you need a classic wooden toolbox because they are ideal to carry specific tools to a specific project. They are simple to make, quick, have a real charm and will actually be used —- and more importantly they will be remembered.

    Make one for yourself and them make them as gifts.

    HOW TO MAKE AN OPEN FACED WOODEN TOOLBOX.

    1. Get some lumber. The great thing about these boxes is they can be made from any scrap lumber you have laying around — often these are made from pine because its low cost but you can also get yourself a solid piece of oak to give it more of a furniture look. On the other side, I’ve seen some really great ones made out of rough cut lumber that gives it that rustic quality. So there is not wrong answer.

          2. Design the size of the box. There is no standard length and height for these boxes and they range from a few feet long to three or four feet long to hold saws and levels in. But a 24” box is pretty common. So lay out the tools you want to fit in there and go from there.

    I have seen several drawings online for these boxes but the most simplistic and easy is one I found on the handymanwire.com site …

    draw

    http://www.handymanwire.com/articles/toolbox.html

    3. Cut your lumber. (see above).

          4. Assemble the tray. Glue and nail the tray bottom and sides — and remember, you are nailing in the edges of wood so screws and even larger nails will split the wood. Be careful. Use furniture or finishing nails.

         5. Insert the dowel. Slip it in and glue it — you can also add a nails into the edge for support.

         6. Finish. You can leave these boxes unfinished or you can stain or paint. Completely up to you.

  • How to build a workbench.

    How to build a workbench.

    bench

    One of the great ironies of tools and their use is that the absolute best area to work on is a workbench — a high, solid, well lit, structure on which to cut and vise and connect and create. No question. And in order to have the right workbench for you, you’ll need to build one. And in order to build one, you’ll need a workbench. Well … This isn’t completely true. You can build one, without one. But later on when you’re using the bench and you have it exactly the way you like it, you’ll realize that it would have been so much easier to build it if you had it before. Now, in this world of mass produced everything, why would you want to build a workbench? Great question. And there are about a zillion reasons why — well, that’s also not true. There are five. Five reasons why— but they are five pretty good reasons.

    1. Quality. Most workbenches are cheap, mass-produced structures. You can get workbench and workbench kits — where you add your own lumber — everywhere from Lowes to CVS, — yup, I have seen workbench’s at CVS on Father’s Day. And 90% of these are light, poorly designed structures that will not work well with your home, garage, or the type of projects you will be working on. The remaining 10% that are fairly well designed and constructed are not designed specifically for you.
    2. Cost. For a fraction of the cost of the most expensive pre built workbench out there, you can build one yourself — actually, less than that, you can get a high end workbench for almost $1,000 and the lumber for that would be around $100.
    3. Designed specifically for you. What type of work are you going to be doing and how do you like to do it? Because a workbench for wood carving is going to be different than one for repairing old radios. Are there enough outlets? Is there a place for your coffee pot and for all the stuff you like to have around you?
    4. Designed specifically for your location. There are many times that you could find the ultimate workbench — if your garage was bigger. Or your basement had more light. Or you had more space in the shed. You need to design your bench for the real estate it will take up as well as the space you don’t. In fact there are many, fold down workbenches that work great.
    5. Sense of pride. There is something about building — anything, but there is great irony in having a structure to build things on, that you didn’t build.

    HOW TO BUILD A WORKBENCH

    1. Location. Decide where the bench will go — which is actually more important than the design itself. Walk out where it will sit, look all around it, is there enough light, enough storage space? Is it easy to get material in and out? — a bench to finally build that canoe may not work well in your basement where the finished product cant get back out.
    2. Overall design. There are some great sites online that offer overall workbench plans and here is the best one I found that incorporates many of them http://freebies.about.com/od/free-plans/tp/free-workbench-plans.htm Choose an overall plan and then look at the areas you want to personalize such as height of the bench. And if you don’t like any of these, just draw out what you like and add in the two important aspects; power and light. You will want to attach at least one power strip right to the workbench for power needs and you will need at least one flexible lamp for additional light.
    3. Simpson ties. If there is a magic trick in building a solid, rugged workbench, it’s Simpson ties. Simpson is a company that was founded by a man named Barclay Simpson — who just passed away this past November at the age of 93 — that manufactures joist hangers, angles and a bunch of other stuff that strengthen structures. And since a workbench is not a table but a solid work structure that you can vice something to and saw or hammer, you want it to be solid. By using Simpson ties for the corners of your bench and where the lumber fits together, your bench will be rock solid.
    4. Overdesign for material. Like any project, once you finalize you design and make your materials list, add about 25% more of everything you’ll think you’ll need. This is an overall handyman trick that works, because it is far better to make one trip back to Lowes when you are done to return what you don’t need, then it is to make the six extra trips for what your forgot. So buy more than you need and return it.
    5. Take your time. As you get going you may want to make changes or add in new pieces of jewelry to the project. No rush. Take your time.

    … and let us know how it went. Please post photos of your workbench — or of any project you are working on — at the 543skills forum — http://543skills.com/forumpress/

  • How to never have a car payment again. Ever.

    How to never have a car payment again. Ever.

    sales

    I have an amazing investment opportunity for you — I mean a killer venture — with big rates, a solid format, the flexibility to choose which particular commodity you want to invest in and an incredibly popular financial method that has been in motion for over seventy years. In fact, last year alone there was 370 Billion dollars currently invested in this security with projections that it will only increase over the next five years.

    For example, in our $20,000 investment package — and we have many price ranges to tailor to your needs — we can guarantee that in just three short years your investment of $20,000 will be worth — are you ready? — that projected out, your investment will be worth — $12,000.

    That’s right. We see a solid 40% depreciation in your investment in just three short years, in each and every investment.

    But this is just the beginning. If you don’t have the initial $20K to invest, no problem at all, (in fact, we would much rather that you didn’t). Because we can set you up with a payment plan where for only $24,000 we will loan you the $20,000 to give to us to start the depreciation on your investment.

    And — and here comes the best part — at the end of five years, you can sell your product for 25% of your initial invested net worth and take on another loan for a new product — and if that product is not completely paid off, just roll the remainder of the old loan into the new investment.

    I know, I know. You’re welcome.

    [amazon asin=1936078333&template=iframe image][amazon asin=0989178412&template=iframe image][amazon asin=0760337969&template=iframe image][amazon asin=B0099ZDJJ6&template=iframe image]

    THE TRUTH ABOUT CARS AND TRUCKS.

    The average American will own 16 vehicles in their lifetime. Estimating car loans and depreciation that means that you will pay somewhere between $175,000 to $350,000 — depending on your tastes — for the privilege of driving those vehicles for a six year period. This will continue until you stop driving somewhere around the age of 74.

    Now 22% of all vehicles purchased are bought for cash. For these people they will pay around $75,000 in their lifetime for the same vehicles. So who are these incredibly wealthy individuals who can afford to pay cash for such a big ticket item?

    Well, they’re teachers, cops, waitresses, landscapers, cooks and salesman. That kind. Smart people. But these smart people know something that you don’t. They know what a car or truck is.

    To them a vehicle is a tool. Period. It’s a device to take them from point A to Point B. It is a reliable method to transport them where they need to go so they can do what they need to do. It’s a disposable utensil. That’s it.

    What it’s not, is a reflection of their personality. It’s not a symbol of their success or of their lifestyle. It is not a statement to the world and it will not change their life, make them feel better, give them confidence or fill in any gaps or holes from their past.

    Trivia question. What is the largest demographic of people that buy the most ultra-high millage Jaguars each year?

    Answer: Those with an income below $28,000.

    In fact, many bad credit, buy here/pay here, lots have stopped stocking Corollas, Camry’s and Taurus because their buyers simply don’t want them. Instead they offer ultra-high mileage SUV’s and luxury cars. The car of choice? A Jaguar S-Type with 150,000 or more miles and a shiny exterior — those babies fly off the lot for $8,000 – $12,000, made on weekly payments.

    And on the other side, many highly successful people drive late model cars that they paid cash for, maintain and keep until it financially makes sense to dump them and buy another one.

    HOW TO NEVER HAVE A CAR PAYMENT AGAIN.

    1). Agree to never, ever, take on a car payment again. Write this promise down. Sign it. Tape it to your bathroom mirror and post it on Facebook. From now on, you will only pay cash for vehicles for the rest of your life.

    2. Take a year. If you have a car now, vow to keep this car for at least one more year, to give you time to build up your car fund. If you don’t have a car then vow to go without a vehicle for that same time. Take the bus, car pool, rideshare, whatever you need to do. You can go without a car for a year — 84% of the people in the world don’t own a vehicle and never will. Remember this single decision can save you $100,000 over your lifetime.

    3. Create a car account. This will be where your car payment, to yourself, and it will be your vehicle maintenance repair and replacement fund. Determine a set amount — an average car payment is around $350 a month — and deposit this in this account, each and every month. You don’t want the amount to be too high that you’ll try to cheat when those unexplained expenses come up but not too low that it takes too long to build up. You will keep this account for many, many years so make it one that’s easy to transfer money into.

    4. Buy a vehicle. Once you hit the $3,000 to $4,000, go on craigslist and get yourself a safe, reliable vehicle. Take your time and remember — you have a choice. So many times we chose a vehicle because we feel limited. No. You have all the time in the world, cash in your pocket and you will only buy the right vehicle for you.

    5. Continue the payment. Once you have your car, you will continue to make the monthly car payment to yourself. This will act as your maintenance, repair and replacement fund. You will take all your oil changes, tires, and repairs from this fund and not buy tires on credit or charge the new muffler.

    6. When to buy another car. The key is, you will continue to drive your vehicle until the overall repair costs exceeds the car payments for four months. So, if you are making a $350 monthly payment to yourself and you need a $600 fuel pump, great. Replace it. But when the $1,500 catalytic converter needs to be swapped out, this probably means it’s time to dump the car and get another one. You can now take the $1,500 you would have used for the repair, add some more and get another safe and reliable vehicle. How much should you spend? It’s safe to use 75% of your car fund for a replacement vehicle but don’t feel that you have to spend that much. It’s your choice. Hey, you’re a wealthy person with cash to spend. You can do whatever you want.

  • A car? Or a truck?

    A car? Or a truck?

    load

    Edmunds, The Automobile Research company, compiles many reports for the auto industry — best car, most researched vehicle, the car safety guide — but one of the most interesting paper they publish is, The 50 worst cars of all time, list. This is a study that looks at every car ever produced and ranks them from the bottom up and is comprised of such lemon legends as the The Edsel, the Gremlin, the Yugo and of course, the Pinto. Remember, the Pinto? The car that blew up if hit from behind at 30 mph?

    Now, the Pinto has a great backstory because when Ford discovered early on that their new compact model had a potentially dangerous design flaw  — the car had no reinforcement between the bumper and the gas tank which meant the tank could rupture upon impact — they decided to go ahead and roll those little beauties out anyway. In fact, there is a very famous memo where Ford amortizes the potential cost of lawsuits — it calculates the number of possible burn and death victims that could occur — and compares it to the cost of making the design change before production. And from this calculation, Ford determined that they would save 70 million dollars by not making the fix.

    [amazon asin=B0057ODG6Y&template=iframe image][amazon asin=B000E1PXES&template=iframe image][amazon asin=B008CC5WCE&template=iframe image][amazon asin=B00MBFBLXM&template=iframe image]

    And so the Pinto rolled off the assembly line and into car history.

    There are other notable goof ups in the auto world — The Bricklin SV1 (Safety Vehicle, One) that had doors that couldn’t open after a crash, there was a Saturn where your foot got caught under the brake and then there are numerous 3-cylinder and even 2-cylinder disasters. But besides these noted lists of bad ideas the truth is that with current safety, emission and quality regulations, all vehicles now remain somewhere upstream of the standards. Which means that your average car or truck, is, well, your average car or truck — so they are all roughly in the same playing field and range from average to great.

    So the model you choose isn’t as important as the type of vehicle you choose. Once you chose the type — car or truck — then the rest is just details. After that, it’s just a question between Coke and Pepsi.

    So before you take the first step in deciding what your next vehicle will be, take one step back to determine the type.

    Are you going with a car or a truck?

    Now, this doesn’t seem like a difficult decision because we should know which type we want?

    Maybe. But in actuality it’s very common for us to simply drive what we’ve always driven in the past — I’ve always had a car so I’ll buy another car — and few of us have actually taken the time to think about what is best suited for us; what makes the most sense or what will make our life easier.

    What if a truck will save you money, better fits your lifestyle and will last longer in the type of driving you do?  What if a car is a better fit for the business lunches you need to host and the type of creative parking you need to do in the city? There are myriads of sources to guide you in deciding which car to buy or which truck, but absolutely nothing to make the decision which one to start with; when that is more important and is the very first step.

    Oh, and by the way, SUV’s are not in this equation. Why? Because SUV’s are cars. Meaning car buyers buy a car or an SUV. Truck buyers buy trucks. It’s true. In speaking to car and truck buyers they both consider SUV’s more of a car than a truck so we will lump them together.

    Now there is no set formula, no piece of software designed to determine that Career-A is best suited for a truck and Lifestyle-B is one for a car. Nope. You need to ignore the emotional and see what makes sense.

    Now the left brain emotional side says to buy something you like. Something you can be proud of and enjoy driving. Well that’s true, but here is the part you may not like.

    As far as pure practical decisions, the truth is that if you don’t need a truck — meaning if you are never, or rarely, going to use the truck part of it — then don’t get one. Because if you do, then you are paying for the gas, tires and repairs for a large part of the vehicle that you’ll never use. Unless you are working on a farm, construction or you head to deer camp for four weeks out of the year, a truck is impractical — it may be cool, macho or fun, but it’s still impractical.

    And on the flip side, if you have ever strapped a sheet of plywood or a chair to the roof of your Corolla, a car may not be the right type of vehicle for you either.

    What do you need?

    Truck owners — who’ve never owned a car — tend to think that cars are weak. Car owners — who have never owned a truck — see trucks as intimidating.

    So don’t think with emotion and simply ask yourself — what do I need?

    Who knows, you could have been driving the wrong type of vehicle for decades.

  • How to sharpen a knife

    How to sharpen a knife

    knife

    When I was twelve years old, on my birthday, I received my very first pocket knife. It was a gift from my father and it was amazing. It was a Boy Scout knife that had two blades, a can opener and a screwdriver that hurt your thumbnail when you tried to open it — I can still feel the black faux wood handle and the blade as it bit into a stick or a piece of wood.

    Years later, I can only remember two gifts that my dad ever gave me — even though I’m sure there were more. One was the grey tweed overcoat he had tailored for me when I turned 21 — which I still have but can no longer fit into — and the other was the pocket knife I got when I turned twelve — which I no longer have, but wish that I did.

    This pocket knife tradition continued with my two sons and upon each of their twelfth birthdays they received their very first pocket knife from me. And my youngest son kept my tradition going by losing his six months later.

    Pocket knives have been carried by men for a hundred years or more. However this practice was stilted somewhat by the events of 9/11. With stricter restrictions on security and safety, knives were no longer allowed on flights, government building and other institutions and many men who normally carried a pocket knife, stopped in order to be compliant with the new rules.

    However there are no states that forbid pocket knives.

    See the State Knife Laws — http://http://pweb.netcom.com/~brlevine/sta-law.htm#A-H

    [amazon asin=B0009KF4H0&template=iframe image][amazon asin=B000KSCEH4&template=iframe image][amazon asin=B00006IUWM&template=iframe image][amazon asin=B0037F1B9E&template=iframe image]

    In fact, a ‘knife’ and a ‘pocket knife’ — a folding knife with a blade less than 3” — are in two completely separate categories.

    Now, you’re not going to get your pocket knife on an airplane as carry on — but you can throw it in your bag that you’re checking without a problem at all — any certain federal buildings may not allow it, but anywhere else you not breaking any laws by carrying one.

    Pocket knives are a great handy tool to have and you have a right to carry one if your wish.

    HOW TO SHARPEN A KNIFE.

    For here, we’re going to discuss sharpening a knife using a wet stone. Now there are many other ways to sharpen a knife and even more new gadget-ee devices — those that you can cut a tomato and then a nail — and I’ve tried a few of them and there is nothing better than an old fashioned wet stone.

    1. Get a wet stone. These are also called whetstones because the word whet means to sharpen and you can get one at any hardware store, department store or you flea market.

    2. Soak the stone. Sharpening creates heat. Too much heat and it can warp your blade which is why you should never sharpen your knife on a grinding wheel. Also, wet stones are very porous and in order to keep the filings from the blade of filling the holes of the stones you need to create a liquid coating on the surface. You can do this by soaking the stone in water for twenty minutes, or you can use mineral oil or a light dish soap/water mixture.

    3. Identify the bevel angle. This sounds more complicated than it really is and all it means is that the blade of every knife is angled differently. Most pocket knives have a 30 degree bevel angle, whereas kitchen knives and others may be different. So all this means is, match the angle of the blade with the angle you are lifting the knife up to sharpen it. You want to sharpen the very end of the kinife, not grind down the steel around it.

    4. Sharpen first side of the knife. Position the knife at the bevel angle and pull the blade back; glide the knife along the stone. Gently, slowly pulling the blade back against the stone. Sweep the knife down and off the end of the whetstone. Repeat about a dozen times or so.

    5. Repeat on the other side.

    6. Test the blade. You can do this by slicing rhough a sheet of paper — a sharp blade should glide right through — or run it rough side along your thumb — NOT blade side down, but holding the blade horizontally, run the blade across your thumb. The rougher the blade is against your thumb, the sharper it is going across.