Category: Food & Recipes

  • The art of the picnic

    The art of the picnic

    Once spring hits and then all through summer, everywhere we go we see people having picnics.

    In movies.

    And on television.

    But in real life — not so much.

    Here, in the actual world, a true picnic sighting is pretty rare. In fact, it’s up there with finding a working payphone or a thriving drive in theatre. I mean, once in a while you will see one. But not all that often.

    Now, we see people eating outside, al fresco, all the time. The office worker driving to a park to eat their Burger King meal #4 on a picnic table with a paperback opened. Sure. And the road crew at a rest stop throwing back a few sandwiches and gallons of store bought ice tea. Yup. But these are what we call — not-picnics. They are just — eating outside. And they don’t count.

    Picnics have been around forever, but they didn’t have an actual word to describe them until the 17th-century. When the French word ‘piquenique’ was formed — which took the verb ‘piquer’, meaning to pick, along with a silly rhyming syllable, ‘nique’. So the alteration of the word followed the same rule and it became — pic-nic.

    Originally, the picnic was a large outside pot luck for the gentry, with each guest expected to bring a dish to share. These were elaborate, society events, which lead to those who were involved in them to be referred to as — the picnic-society.

    From there, the picnic took it’s true form.

    As travel became more common — first with the horse and carriage and later with car — the picnic became a large part of the trip. As you traveled, the need for food on the way would need to be planned in. A trip to visit uncle Earl’s in a neighboring town a few hours away, would require you would to prepare the food — the roads weren’t always paved with drive-through’s and bargain meal deals. So, the picnic became part of the excursion. A piece of the adventure. Halfway through the trip, you find a field or a pond, or a meadow, to spread your blanket out and bring out the basket. The kids would bring a ball, or maybe a kite, and the event, would now have another event in the middle of it. You would stretch your legs, relax and recharge before getting back in the car and continuing.

    And that’s what a picnic is. An event. Not just eating — because we do that all day long while we do something else. We eat while we drive. We eat while checking our phones. We eat while watching television. We eat and don’t even notice that we’re eating.

    So what makes a picnic, a picnic?

    Okay, that’s easy. A picnic has a few fundamental aspects of it.

    1. It has to be outside. An inside picnic is called — lunch. It doesn’t count. And a picnic should be in a unique outside area — a park, a lake, a field and even a picnic area at a rest stop counts.

    2. It is held on a blanket or a picnic table. Period. You can’t have a picnic on camp chairs while setting paper plates on your lap, while leaning against the car, inside a food court, or inside the car. This is called — eating. It’s not a picnic.

    3. It should not contain store-bought food. Picnic food can be extremely simple and easy to prepare, but it has to be yours. It has to have your fingerprint and design on it. The only exception to this rule, is if you bought a rotisserie chicken — not a fast food chicken — and then prepared sides for it. There is something about cold chicken on a picnic that just fits.

    4. It has to be cold food. Cooking a meal over charcoal is incredible, but that’s not a picnic. That’s a cookout. And if you are fussing with the fire and getting burgers to cook just right, then you are missing the very crucial element of the picnic. The people you are with and the area you are at.

    5. And it has to have some recreational aspect to it besides the meal. Picnics are not to be rushed, but to be enjoyed, even if that recreation is just sitting back after the meal and talking, playing cards or a board game, throwing a frisbee or playing a harmonica — which is why free community concerts are ideal places to hold picnics. Because the entertainment aspect is already provided.

    As far as picnic food, you can be as elaborate as you want, but the real aspect of it is to be simple. Simple food to be enjoyed leisurely. Boiled eggs, cheeses, peperoni, hard crusted bread, cold chicken, pickles, olives, pasta salads, grapes, all make amazing and simple picnic food.

    So plan a trip. And a plan a picnic smack dab in the middle of that trip. Make it a priority to skip the eleven-dollar hotdog at the water park and pull the kids over to the picnic area instead and open the basket.

    You heard me.

    Go have a picnic.

  • The bomb shelter diet

    The bomb shelter diet

    bomb

    Klaus Fuchs was extremely smart.

    He was born in 1911, in Rüsselsheim, Germany, and from a very young age demonstrated a clear gift in mathematics and the sciences; breezing through his primary education and then being accepted into The University of Leipzig.

    Klaus studied mathematics and physics at the University, and this is where he first became involved in student politics; joining both the Social Democratic Party of Germany, as well as the Reichsbanner Schwarz-Rot-Gold, the Communist Party’s paramilitary arm.

    Now, while Klaus was still in school, on February, 27, 1933, a Berlin fire station received an alarm for the German Parliament. They quickly responded and found that the entire Chamber of Deputies was engulfed in flames — and because of the size of the fire as well as its political location, arson was suspected. So fireman fought the fire, while the police surrounded the complex to look for evidence.

    What they found, was Marinus van der Lubbe, a young Dutch Communist, inside one of the buildings. Lubbe was arrested and confessed to being involved in the arson. Soon three other men were arrested — Georgi Dimitrov, Blagoi Popov and Vasil Tanev — all Communist Party members and all confessed to the crime. They were tried and later executed.

    The event became known as, The Reichstag Fire, and here is where things really get interesting. Only a month before this, a man named Adolf Hitler had been sworn in as Chancellor of Germany. Hitler was outraged at this attack, and saw the fire as solid evidence that communists were plotting against the German government. Hitler urged President Paul von Hindenburg to pass an emergency decree that would suspend all civil liberties in order to counter this ruthless hostility. He did. And when this occurred — Nazi Germany was born. Almost overnight, the Nazi Party went from a political entity, to a dictatorship. With Adolf Hitler at the wheel.

    So the question is, did Hitler orchestrate The Reichstag Fire?

    Well historians have been trying to prove this for decades without much luck. It’s very possible that he did. And it’s also possible that he only took advantage of this opportunistic moment — to use fear as a vehicle to seize control of the government. But either way, Germany quickly become a Nazi controlled country, as well as one where being a card carrying Communist, could be extremely dangerous. So Klaus Fuchs went into hiding until he could get out of the country later that year.

    In September of 1933, Fuchs fled to England where he worked as a physics research assistant at the University of Bristol, and in 1937 he received his Ph.D. in physics. After this, he worked at the University of Edinburgh, where he earned a second Ph.D. in Science.

    Then World War II broke out.

    After spending some time in Canada, Fuchs returned to England where he began working on The Tube Alloys Project — England’s covert atomic bomb group. And this is where Fuchs began his career as a spy. He immediately began passing detailed information on the project, directly to The Soviet Union.

    In 1943 Fuchs went to New York City, to work on the Manhattan Project and then in  1944 to the Los Alamos Laboratory — where he developed the calculations relating to the first nuclear weapons as well as early models of the hydrogen bomb.

    Then came Hiroshima and Nagasaki and the end of the war. Klaus returned to the UK and worked at the Atomic Energy Research Establishment as the head of the Theoretical Physics Division.

    Five years later, on January 31, 1950, President Harry Truman announced his decision to develop The Superbomb. A hydrogen weapon that would be one hundred times more powerful than the atomic bombs dropped on Hiroshima and Nagasaki — with Klaus Fuchs having a front row seat to the project. And on November 1, 1952, the United States successfully detonated Mike, the world’s first hydrogen bomb. This ten megaton thermonuclear device, was detonated the Pacific Marshall Islands — it vaporized the entire island and left a mile long crater behind.

    Fuchs’ luck ran out later that year.

    While passing some sensitive information to a Soviet contact, American intelligence followed and arrested him. He was questioned and confessed; which led to his trial and eventually lead to him being sentenced to fourteen years in prison. But the damage had already been done — the Soviet Union now knew everything we knew, about the hydrogen bomb.

    On November 22, 1955, the Soviet Union detonated its first hydrogen bomb; based on the same principle of radiation implosion as Mike —- with the same results.

    Which meant that both superpowers were now in possession of what had been called — the hell bomb.

    Two of the most powerful nations in the world, both had a weapon that could kill millions on both sides. And they didn’t like each other very much.

    The US announced that it would use massive retaliation to any Communist aggression, and for the first time in history, the world lived under the threat of thermonuclear war.

    Movies, films, books, television, newspapers — all echoed the fear of nuclear obliteration. And on October 6, 1961, President John F. Kennedy addresses the American people, and asked them to — build bomb shelters to protect themselves and their families against nuclear fallout.

    The President of the United States — one of the most powerful men in the world — asked his people to — dig a hole and get ready to hide in it.

    It wasn’t now a question of — if it would happen — it was now — when would it happen.

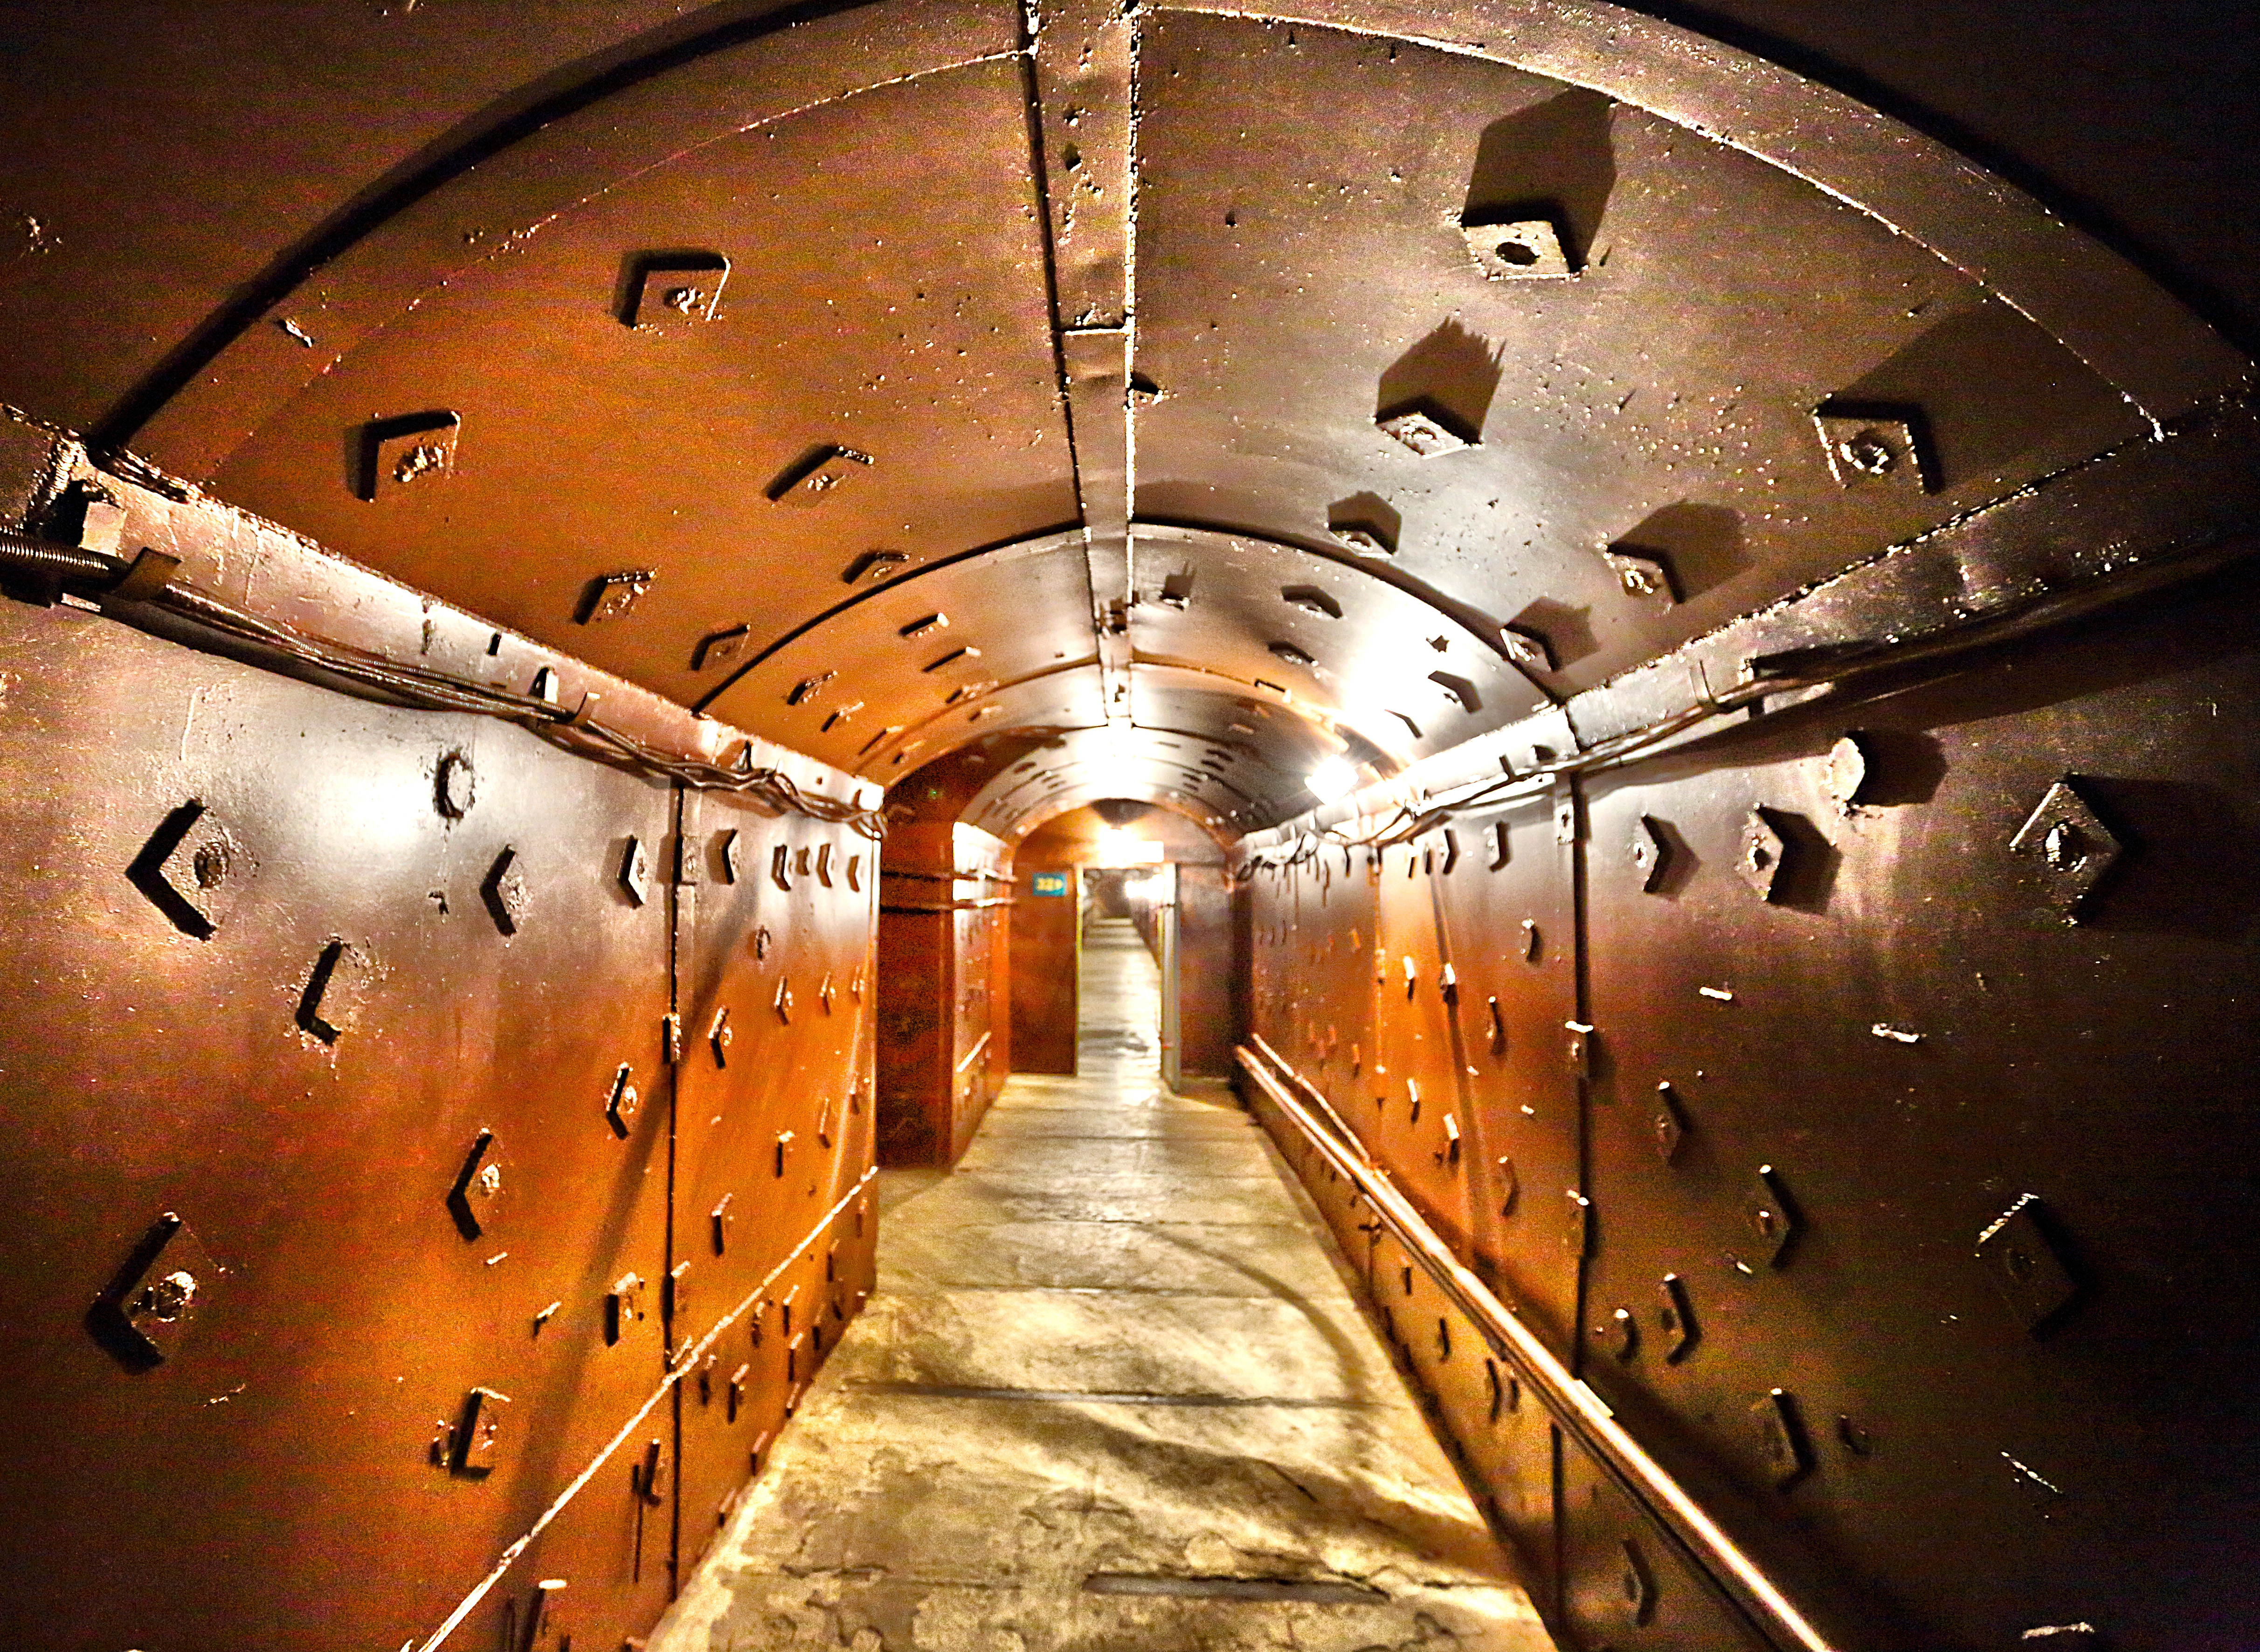
    Bomb shelters began to pop up everywhere. These ranged from a corner of the basement, built up with sandbags and food and water, to elaborate underground rooms with ventilation and water purification systems.

    Civil Defense agencies provided canned drinking water and water packaged in milk cartons, to citizens. Fallout drills were exercised in schools and public buildings. We were preparing.

    We had a plan and we knew where to hide and wait it out. And we had a stockpile of the basics — canned goods, dried goods, food stuffs, water. We just wanted to survive. That’s all. Nothing fancy. We just wanted to — live.

    And we waited.

    And we watched.

    And the bombs — never came.

    And that was good.

    And the bomb shelters remained unused. And then they became root sellers and playhouses and storage. And that was good too.

    But along with all that good —- came one bad thing —.


    WHAT IS A BOMB SHELTER?


    A bomb shelter is a safety net. It’s a place where the basics can be taken care of. It’s the fallback plan. The retreat point. It’s a ready area  where you and the people you care about, can go to get the basics taken care of and to be safe.

    Talk of bomb shelters today are rare, unless you are referring to the trend of Doomsday Prepping or simply Prepping.

    Prepping is similar to the movement of bomb shelters in the 1950’s and 1960’s, in that it is the preparing for a particular disaster to occur — a governmental collapse, massive chemical warfare, an electromagnetic pulse that will wipe out all electronics — but there are two main differences between preppers and those who built bomb shelters during the cold war.

    The first is, that modern prepping is more individualistic and less community based. You see evidence of this in that during the cold war, the list of items to include in your shelter contained many things, but weapons were never one of them. With modern preppers, weapons and ammunition are high on the list — in fact, many preppers have small arsenals set aside to protect their stockpiles.

    And the second difference is, that the modern day preppers are almost hoping that the disasters they are preparing for will occur. They are highly invested in them. So when the government does collapse, when modern currency no longer has value, when the world is left unprotected and vulnerable, then we will be on top of the food chain — simply because we will have the most food, water and guns.

    So bad things can’t happen?

    Oh absolutely they can — and probably will. But you are much more likely to lose your job, than you are of having your home attacked by a biological weapon.

    You are much more likely to be in a car accident, be hurt at work, or have a major health issue, than you are of experiencing a governmental collapse.

    And you are much more likely to go through a career downsizing or industrial shift where your current skill set is worth far less than it once was, than you are of experiencing a nuclear attack.

    But all of these things are life altering — a layoff is not as sexy as an asteroid, but it can still do some damage if you’re not ready for it.

    It was good that cold war didn’t escalate to something far worse. But the casualty of that time period is that sense of preparation didn’t migrate forward. That sense of simplicity, of basic need, didn’t trickle down through the decades.


    MISSIONARIES


    Many years ago, a missionary couple from Africa was traveling through my hometown and was going to speak at our church. While they were there, my parents had them stay with them and while giving them a quick tour of the area, my mother stopped at the small grocery store to pick a few things up. In one of the aisles, the man just stopped talking. He froze.

    “What —?” he asked, pointing at all the colored jars. “Is this?”

    My mother looked to where he was pointing and answered. “Jelly,” she said. “And jams.”

    He stood there. Unable to take his eyes off all the different flavors, styles and sizes of jellies and jams.

    “Why,” he asked. “Would anyone need — twelve flavors of jelly?”

    And he wasn’t mocking her, he wasn’t judging her. He was only asking a question — to something that he couldn’t understand.

    Why would something as luxurious as jelly, something as rare as jam —- not a necessity but a true delicacy — why would you care, what flavor it was?

    But we do. We do care what flavor it is. And we care how much if it we have. And we care what brand it is. And what it looks like and how we look holding it.

    In Africa — food is survival.

    In Europe — food is social.

    In the US, food — has become something so much more.


    FOOD IRONIES


    • 32% of all homeless people, are obese. (Boston Health Care Study, 2008).


    • In a 2012 study, 42% of the time that we eat, was done because we are — afraid of being hungry later


    • 27% of all the food we buy, we end up throwing away — 160 Billion pounds of food each year in the US alone. And still, 75% of us are overweight and 36% of us are obese.


    • The average American spends three hours a month, staring into a refrigerator; trying to determine if he is hungry or not. And during peak times, we average fifteen to twenty minutes wait time to get into a restaurant. Yet — ‘not having enough time’ is listed as the key issue for most Americans.


    • A dinner in France averages two hours, and a dinner in the US averages forty minutes. Yet the obesity level in the US is twice of that in France.


    • A 2011 University of Michigan study asked, how long could a person live without food? The most common belief was — 37 hours. (With water a person can live three weeks or more without food).


    • The cost of eating one (1) lunch out, is equivalent to the cost of six (6) packed lunches from home. Yet the most common reason listed for people that don’t bring lunch to work is,I don’t want to look poor.


    • A Cliff energy bar has 280 calories. A Snickers candy bar has 215.


    • 23% of all high income homes, eat at a restaurant once a day. 78% of all low income homes eat at a restaurant once a day.


    • The average food markup at a restaurant is 300% — for a meal priced at twenty dollars or less. The average food markup for fast food is 400% — for a meal priced at six dollars or less.


    • We are seven times as likely to eat at a restaurant, then we are of inviting someone to our home for a meal, or to going to someone’s home for one.


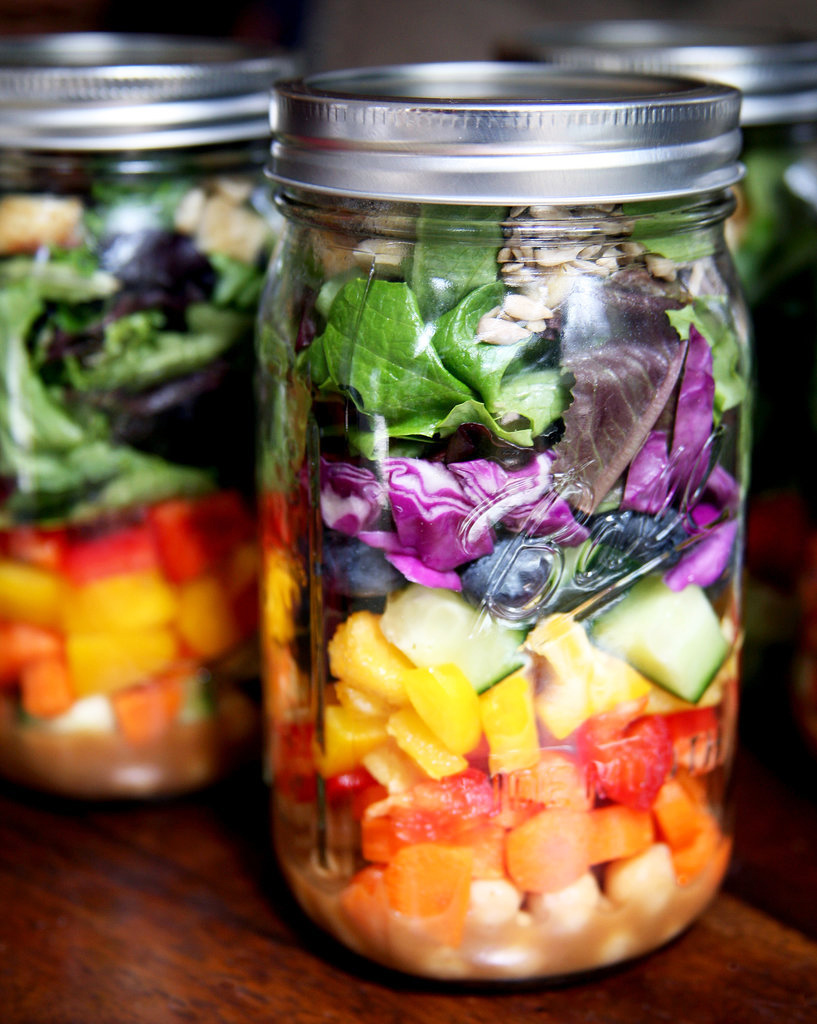
     THE BOMB SHELTER DIET

    A bomb shelter is safety. It is a vessel that contains the basic needs — food, shelter, water, medical supplies.

    The food in a bomb shelter will have several things in common.


    • It will be able to be stored for a long time — rice, pasta, oats, dried beans, can all be stored for thirty years or more.


    • It will require no refrigeration.


    • It will be able to be cooked in a creative and unique way.


    • Each meal will cost pennies.


    • It will contain little chemicals and preservatives since it will contain the basic food groups.


    STEP ONE: The Bombs fall


    The alarms sound. The bombs are coming. This is it.

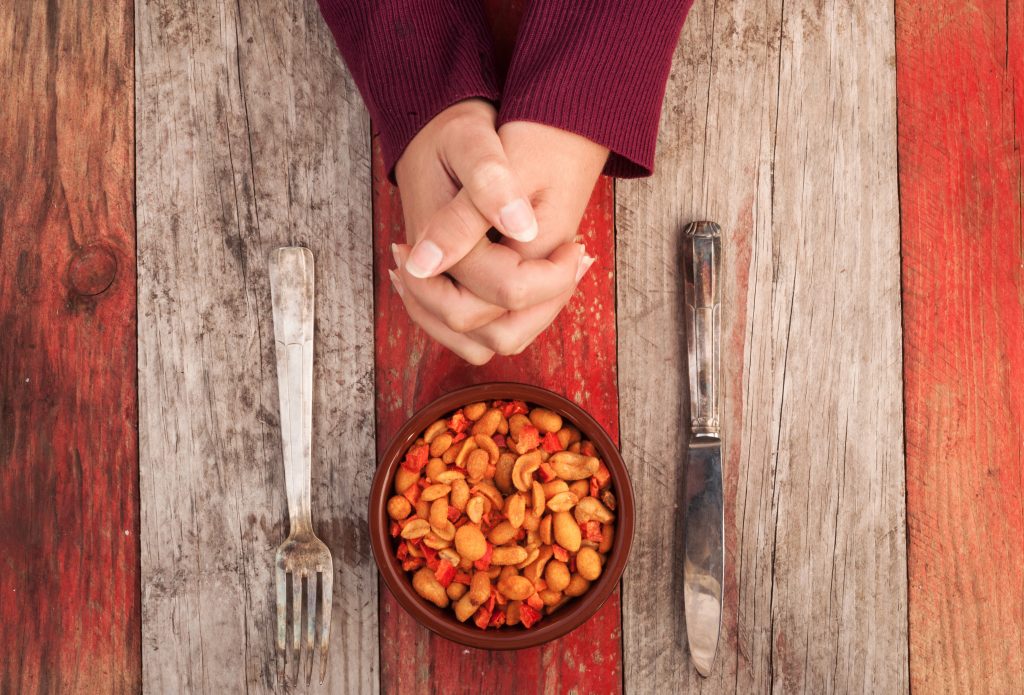
    When crisis occurs — when something bad happens — we react. We get the people we care about to safety and we get out of danger. At that point we are focused on survival and protection and we will allow nothing to get in our way.

    Think of a time when a crisis unexpectedly occurred to you — the sudden death of someone close to you, a fire, a car accident, a layoff; any catastrophe that happened s quickly and without warning. When this happens — in the heat of the battle — were you thinking about food?

    You could be starving only a minute before the truck veers into your lane — thinking you can barely wait until you get to the drive thru — and then wham. Six hours later you remember that you haven’t eaten.

    What happens when you realize that you haven’t eaten? You are suddenly hungry again. Starving.

    How many times do you see photos of people outside of their burning building with a cheeseburger in their hands? Or being treated by paramedics as they grab the last of their fries? Never. Because at that point, food is not important. At all.


    • Make a list of ten (10) things you are worried about, trying to get to, concerned with or trying to achieve. These can be work goals, financial worries, family situations, or aspirations. When you have this list, keep it close to you; on your phone, in your bag — so you can get to it quickly, review, edit and add to it.


    • When between meal hunger hits, take thirty minutes — this will seem like a lot at first, but it will fly by later — and work only on this list. Make phone calls, contact whoever you need to, create options, but for thirty minutes you are only focusing on these bombs; these goals, these little issues that could become large, or these large issues that you have been avoiding.


    • Don’t set a timer — because you want to keep this flexible — and allow your focus to shift to what is truly important. But don’t stop until you have done at least one thing, one action, towards everything on that list.


    •  A few things are going to happen here. First, you are forcing yourself to see what is important, as well as what isn’t — getting food quickly into your mouth. The second is that you are reducing your appetite — which gives you freedom, which takes away the anxiety, which diffuses the food bomb.


    Now this goes directly against what many nutrition experts recommend — suggesting five or more little meals a day as opposed to three larger ones. But we’re not focused on nutrition, we are looking at why we do things. And the majority of time we overeat, we do it out of reflex or boredom.

    Sure there is the Thanksgiving dinner that we push ourselves back from the table and vow to never, ever eat again. But more often there are the dozens of times we finish an entire bag of potato chips in the car and not only don’t remember eating it, but are still hungry.

    We have made food important in our lives. We have made it more important than our families, than our homes, than our careers and then our goals. We need to analyze things every now and then, so we can prioritize.


    STEP TWO: Protein pack


    In a bomb shelter you will see a lot of rice, grains and pasta. That’s true. These are inexpensive, easy to store and last forever. But you will also see plenty of dried beans,   canned tuna and Salmon — because you need the protein. The starches are largely there to stretch out the meal — to make it last and to fill you up.

    Sugars and starches are cheap — that’s why they are in everything. These are the foods that stimulate insulin, which sends the signal to store fat in the body. The more starches and sugars you take in, the more fat that gets produced. And when insulin levels goes down — when we take in less sugars and starches — then more fat gets burned than is stored.

    The irony here is, sugars and starches make you hungry and proteins make you full. So you can actually eat less protein and feel better.

    We have bought into the fact that we need to stretch meals — to add in the majority of pasta, rice or grains to make it last. We feel like we are spending too much money if at least half of the meal isn’t a starch.

    So reverse the trend. Instead of the majority of the meal being starches or rice, make the majority of them the beans, eggs, fish or chicken. Eat more protein than you eat anything else.


    STEP THREE: Bomb shelters are for many


    The majority of time that we eat — we eat alone. Even if we’re in a separate room in a house full of people, we are still eating alone. And eating should always be a communal event.

    Add to that that we eat less — when we eat with others. European meals last for hours, with the majority of this time is spent laughing, visiting, talking and having fun. The smallest part is actually the eating part.

    So don’t eat alone. And I mean — ever.

    That may seem crazy, but think about it.

    If food goes back to being a communal event, something we do with others, then a major shift occurs. Instead of saying — what do I want to eat? We begin saying — who do I want to eat with?

    And remember, a meal is simply food shared with others. It doesn’t have to be a five course meal on Waterford china, it can be a few tuna sandwiches on paper plates.

    Take two weeks and vow to eat every single meal with someone else — and this includes eating in front of a TV alone, in your car alone, or picking out of a refrigerator alone.

    If you can’t find someone to share a meal with — then don’t eat until you do.


    STEP FOUR: Stock the bomb shelter


    When the bombs of life do fall — health issues, layoffs, downsizing, family crisis — having a stockpile of basic foods takes a financial and time burden off of you. For less than a hundred dollars, you can have a several months’ supply of dry goods stored and ready.

    The basics would include:

    • Dried beans — lots and lots of them. These are extremely inexpensive, easy to make and loaded with protein.


    • Canned tuna


    • Canned salmon


    • Canned chicken


    • Pasta


    • Rice


    • Cornmeal


    • Flour


    • Canned vegetables


    • Canned fruit


    Stock these things and leave them. Use them when the end of the month rolls around and you’re creeping up on your budget, or when the bombs fall.


    AND REMEMBER …


    A bomb shelter is a plan. This plan can take any form; a room, a group of people or an idea. But it’s a plan to give you freedom and allow you to think while the basics are taken care of.

    Food is not our bomb shelter.

    Food is just one of the many things we put in it.

  • How to clean a fish

    How to clean a fish

    fishie

    The Colonel — his real name is Frank but we all know him as The Colonel — lives across the street from us. He is a 93 years old but no one has really taken the time to explain to him how a 93 year old man is supposed to act so you can’t blame him for his ignorance. Frank is healthy, active, sharp as a tack and lives alone in the same house he has owned since he and his late wife bought it in the 1970’s — well, that is saying he lives alone for those rare occasions that he’s actually at home. Because even when he is home — referring to being in town — he’s rarely at his house. Frank hates staying home and when he is actually in the area he’ll pull out of the garage early in the morning, wave goodbye, pick up his sixty year old girlfriend and head out for the day. I would say in a given year Frank spends possibly four, maybe five months of it even in town and when he is, he only sleeps at his house.

    It’s a depressing fact The Colonel has a far more active social life than anyone else on the street. Bar none. And most of us are four or five decades younger than he is.

    Now, Frank is known as The Colonel, because that’s simply what he is. A retired World War II Air Force Colonel and he is only given this title behind his back. If you do slip up and refer to him as The Colonel to his face, he will quickly correct you.

    “Please,” he’d smile. “Just call me Frank.”

    Frank drives his own car. He plays golf — he actually participates in several senior golf tournaments every year — he competes in poker tournaments and he skeet shoots. But Frank’s true passion, what The Colonel truly enjoys more than anything, is fly fishing. Frank loves fly fishing and he goes on several major fly fishing trips a year. For weeks at a time he will fly into Maine or New Hampshire or Alaska and meet a friend or one of his sons and fly fish.

    Trout and Salmon fear The Colonel.

    [amazon asin=B000QAS14G&template=iframe image][amazon asin=B002VYWWKO&template=iframe image][amazon asin=B002OFJ578&template=iframe image][amazon asin=B000Q89MCS&template=iframe image]

    Now fly fishing is a gentlemen’s sport and is somewhat different than the hook and line variety the majority of us barbarians practice. There is an art to fly fishing, a grace, that is missing in conventional fishing. And once I asked Frank if he kept that fish that he caught.

    “Naw,” Frank would say. “I just like giving them a sore mouth and sending them on their way.”

    But occasionally, if they have a large group of people that are fishing with that  need to feed, The Colonel will end up eating a few of the salmon or trout that he catches.

    Even if you fish occasionally, even if you fish once in a great while, there will come the times when you will want to keep a few of the fish you catch. And when I say keep, I mean eat. So you’ll need to know how to gut a fish.

    HOW TO CLEAN A FISH.

    Go outdoors. Cleaning fish is messy business. Even with a skilled fisherman the smell will remain so this is done outdoors, preferably where you have water available. A makeshift table —- even a piece of wood between two saw horses with a garden hose works well.

    Scale the fish. Hold the fish by the head and with the back end of a knife — you can also use a butter knife or a spoon — scrape against the scales to remove them. You want these strokes to be smooth and even otherwise you’ll cut into the meat of the fish.

    Rinse the fish. This is also a good time to check and verify that all the scales are off.

    Cut open the fish. With the fish belly up, make a clean cut from the bottom of the mouth to just below the tail.

    Open the fish and remove the entrails. This is the messiest part of the process but it doesn’t last long. Simply pull everything out and then cut anything remaining. When you think it’s complete, rinse the fish.

    Remove the head. Depending on the type of fish you caught as well as the type of cooking you’ll be doing, you can remove the head. If you’re cooking over the fire, it might make sense to leave the heads on. A simple stick placed through the inside and mouth of the fish will make for a great way to smoke the day’s catch over a fire. Also, trout cooks well with the heads left one — as well as the scales left on. Pan fish or anything deep fried you’ll want the heads and tails off.

    And that’s it. Once you’ve done this a few times you’ll be a pro.

  • How to Make Acorn Pancakes

    How to Make Acorn Pancakes

    acorn

    When I was a kid, my all-time favorite book — and I mean all-time favorite — was a novel entitled My Side of the Mountain. I loved that book and I read it at least a dozen times. It’s the story of a boy named Sam — I think he was around twelve years old — who runs away from his New York City home and heads for the Catskill Mountains to live off the land. The book actually takes place in Delhi, NY, which is sixteen miles from my hometown of Walton.

    Now Sam isn’t the typical runaway. He doesn’t hate his parents. He’s not in trouble with the law. And he is not being abused by his family. Sam just wants to be on his own and wants to live in the mountains

    So he does.

    And while surviving alone he hollows out the base of a tree to live in, raises a baby peregrine falcon that he trains to hunt for him, and has some other amazing adventures.

    For food, Sam survives on the rabbits and squirrels that Frightful — Sam’s trained Falcon — brings him, as well as the occasional stolen deer that he would poach from the illegal hunters who shot them out of season. And of course, there were acorn pancakes. Sam lived on piles and piles of acorn pancakes.

    Now, when I was a kid I asked my mother if we could make acorn pancakes, and she told me that this was impossible. She said that My Side of the Mountain was simply a story; you couldn’t make flour from acorns and therefore you couldn’t make pancakes from acorn flour.

    I was heart broken. The author had lied to me! Everything else had seemed so real… Years later, when I had finally come to grips with forgiving author Jean Craighead George for her deception, I discovered that she was not the one lying. (Sorry, Mom!) There are acorn pancakes.

    Acorn pancakes and acorn biscuits were actually a staple of the Native American meal. Acorns hold some valuable proteins and carbohydrates and also hold a good deal of saturated fats. In the modern world they are fun to collect, fun to process, and add a unique nutty flavor that can’t be found anywhere else.

    How to Make Acorn Pancakes

    Gather. The first step is to collect your acorns, and the rule of thumb here is to harvest a third more than you need. The acorns should be perfect specimens — if they are rotten or have been infiltrated by bugs, they can’t be used.

    1. You need to crack the acorns and get to the meat. This is where you’ll do your final inspection. If the nuts are dark, chipped, or look as if bugs have gotten in, chuck them.
    2. A coffee grinder works well for this. You don’t want to get the acorn meal down to a flour consistency, but more like the consistency of ground coffee beans.

    Wash. If you were to taste the acorn meal right now you would notice one thing: it’s horrible. That’s because it’s loaded with tannins. Native Americans would take the acorns and fill them in baskets and leave them in streams. It’s difficult to get this tannin out, but crucial. The method I’ve found that works the best is using a stocking. Take a stocking and fill it with the acorn meal. Tie it off and run it under cold water, all the time kneading the stocking. You’ll need to do this several times — a dozen or so — to make sure the tannins are all out. A good way to check is to taste the water that comes out of the meal you are rinsing. If it’s clear and has no taste, you’re good.

    Some people bake the acorn meal, but I find this gives it a more bitter taste. Just spread it out and let it dry.

    Now, there is no yeast in acorn meal so it is best used to add into other meals — I like using buckwheat flour or corn meal. This gives it a unique nutty and sweet flavor.

    Knowing how to make acorn pancakes is not a mission critical skill to possess. It’s not up there with being able to change your tire or tie a tie. But it’s a fun thing to do with your kids as a fall project or as just a very creative way to zest up foods.

    Enjoy.

  • How to cook a pizza on the grill

    How to cook a pizza on the grill

    pizza

    My backyard grill is one of my all time favorite personal possessions. In fact, if I could keep only three items that would be mine and mine alone, they would be;

    My bike.

    My Swiss Army watch — yeah, I have a Swiss Army Knife too, but my watch is great.

    And my grill.

    And as long as my family was safe and they had all they needed, I would be extremely content with just owning these three things for myself.

    [amazon asin=B000077CPK&template=iframe image][amazon asin=B00CZ5VF84&template=iframe image][amazon asin=B00BC3UVDK&template=iframe image][amazon asin=B0000E2GYL&template=iframe image]

    I have a Weber Spirit. It’s a great grill. With the three burners I can do pretty much anything and one of my favorite things to do on the grill is pizza. It’s fun, unique and with the high heat of the grill you can get that brick oven crunch — also we are ex-New Yorkers who now live in Delaware and there is no decent pizza here.

    Now the method I use for pizza is based on trial-and-error of a three burner grill like the Weber Spirit. I have tried other grilled pizza techniques and this works really well, but experiment with your particular grill.

    HOT TO COOK A PIZZA ON THE GRILL.

    Purchase a 1 pound bag of commercial pizza dough or make your own pizza dough. Pizza Bud is the brand I buy and it costs only eighty-eight cents and I can get two pizzas out of one bag of dough.

    Cut a 16 oz dough ball in half

    With a rolling pin, roll out the dough. Yes, the pizza tossing thing is very cool but you need to be good at that and I am not. So a rolling pin is a great way to get an even crust. Also, roll your dough out long ways instead of the traditional round pie. This allows you to get up to four on your grill and reduces the chance of burning. And don’t worry about making the shape perfect. The more imperfect it is the more authentic it becomes.

    On a low heat — now this is based on a three burner grill —- place the dough directly on the grill.

    Wait three minutes or so and flip the dough. Wait another three minutes and pull the dough from the grill. This will be your pizza crust.

    So here, with the most cooked end up, cover lightly with some olive oil and now build your pizza —- cheese, sauce pepperoni, spices, whatever you want — and place back directly on the grill.

    Close the grill and allow to cook. Check every few minutes and look at the bottom of the pizza — this will not only tell you how the pizza is cooking but keep in mind there is a thin line between getting that perfect brick oven crunch and burning the bottom of the pizza. When you’re not sure, pull the pizza early.

    Let cool and cut.

    Enjoy.

  • REVIEW: Texas Roadhouse Restaurant

    REVIEW: Texas Roadhouse Restaurant

    texas

    In 1993, a man named Kent Taylor opened a restaurant named Texas Roadhouse in Clarksville, Indiana. His idea was to merge a steakhouse with a barbecue joint and create a family place that you could relax in, have a good meal, and throw your peanut shells on the floor. Since then, 400 other Texas Roadhouse locations have popped up and the number is still expanding.

    As you walk into a Texas Roadhouse, you’ll be surrounded by the standard window dressing for a steakhouse/barbecue joint: rough wooden beams, barrels of peanuts, roadhouse signs on the wall, and a general fun and warm feel. You’ll be shown to your table, brought free peanuts and baskets of rolls with sweet butter, and given a menu.

    Now, having had some amazing barbecue in my life, it’s difficult to judge a franchise on the same level as some of these hole-in-the-wall greats.

    (My all-time favorite by the way? A little beauty in Bluff City, Tennessee called The Original Ridgewood Barbecue, where the walls are bare, the waitresses are rude and the food is the best you will ever have — this place has their smoker locked in a separate building so no one can copy their design.)

    The bad news with barbecue franchises is that there is a flatness that’s bound to occur when you try to mass produce a road food like barbecue. The chains — Famous Dave’s, Smokey Bones, Rod Hot and Blue —  can never play in that space that the great independent barbecue joints do. And in fairness, Texas Roadhouse is a steakhouse as well, so they need to be judged in both arenas.

    With that said, the food at Texas Roadhouse is pretty good. Steaks are savory, sides are flavorful, rolls are soft, (even though they’re a little on the sweet side for me) and the barbecue is both moist and tangy. It’s probably about as good as a franchise can get to, with prices that are fair.

    But there is no sense in wasting time on a review of a chain restaurant unless there is something to be said that hasn’t been said already. And there is.

    [amazon asin=B00004RALL&template=iframe image][amazon asin=B002UKPTVI&template=iframe image][amazon asin=B00BC3UVDK&template=iframe image][amazon asin=B002UKPTRM&template=iframe image]

    If you go to any Texas Roadhouse, anywhere, and you sit at the bar, you will notice something very interesting. First of all, the bartender — usually a woman — will shake your hand, and ask your name. Then, the bartender — no matter how busy — will begin to talk to you. She’ll ask questions. She’ll add insight. She’ll respond, and before you know it you will be in a real conversation with a real person. It’s not forced, it’s not phony, it’s just a natural give and take.

    Now the evidence that the customers are responding to this is to look around the Texas Roadhouse bar while you’re sitting there. Do this and you’ll notice that many of the people there are not drinking alcohol. They’re drinking ice tea, coffee, water, or soda, while they eat. And if you go to a Texas Roadhouse the same time a few nights in a row, you will see the regulars come in for dinner, be greeted warmly by their friend behind the bar — often with a hug — and sit down for a nice meal.

    Texas Roadhouse hires very specific people behind their bar with extremely specific skill sets with an agenda to be naturally but quickly engaging with the guests. Sound sinister? It’s not. Probably every bar in the country strives for this, but Texas Roadhouse gets it. At every franchise.

    My proof? Well, it’s not very scientific, but once I noticed this trend I wanted to verify it. And since I travel a great deal I will often seek out a Texas Roadhouse for dinner or lunch and sit at the bar to eat. I can contest that this phenomenon exists at every franchise I’ve been to — which is probably a few dozen — across seven states. Every one of them. Bartenders are more friendly, more engaging, and are generally more interested in what you have to say at Texas Roadhouse than any other place I’ve seen.

    So the question is how to build such an entity into the process? How do you find the specific people that not only have this ability to draw out strangers but actually want to, and connect with them? And once you find that person, how do you find enough of them for all your locations?

    I have no idea. But they do. I’ve seen it.

    Now, in researching the official stand on this trend, I can find no documentation that Texas Roadhouse acknowledges or promotes it — so if I am blowing a corporate trade secret, I apologize. But in order for it to exist in such a mass way, it would have to be something built in, expected, and designed. It would need to come from the top down.

    So if you’re going to a Texas Roadhouse with someone, get a table and enjoy each other’s company over some good food. But if you’re going alone, sit at the bar, have a beer or an iced tea, and spend a relaxing hour over a pleasant meal with some nice conversation.

  • How to make homemade hot sauce

    How to make homemade hot sauce

    hot sauce

    Around 6,000 years ago — I think it was on a Wednesday — the early people of South America first began to cultivate and plant crops. And one of the first — one of the very first plants they placed into the ground — was the chili pepper; a spicy and flavorful morsel that quickly spread from The Bahamas all the way to the Andes.

    So by the time that Christopher Columbus got to Caribbean in 1492, the pepper was well established throughout Latin America. When the famous explorer found the pimiento — the Spanish word for the chili — he shortened the word to pepper because the taste reminded him of the heat that came from the black peppercorns of Europe.

    But as impressed as Columbus was, he did not take any peppers back with him. It wasn’t until the next voyage that a physician named Diego Álvarez Chanca — who became fascinated with the medicinal possibilities of the pepper — brought these little beauties back to Spain for the first time in 1494.

    In Europe, the chilies were grown but only as curiosities until the monks began to experiment with their culinary potential and soon discovered that their heat offered a very inexpensive substitute for black peppercorns — which were so incredibly costly at the time that they were actually used as currency. From there the popularity of chili’s spread through Europe and then to India, Japan and China. We were now a world of spicy food — when the peppers were in season.

    In 1807 the very first commercially bottled cayenne pepper sauce appeared in Massachusetts. Then in 1840, J. McCollick & Company of New York, produced a Bird Pepper Sauce, and in 1870, Edmund McIlhenny obtained a patent on his well-known Tabasco Brand sauce.

    Between 1918 and 1928, the first battle of the hot sauce wars had begun and this lasted until The Great Depression slowed things down in 1929. All was quiet until 1980, when The El Paso Chile Company was created and began to mass produce salsas and hot sauces. This took off and the 1980’s quickly became known as the decade of salsa — which during that time made the condiment more popular than even ketchup. And with that popularity, many of the staple hot sauce companies were created — Panola, Franks, Montezuma, etc.

    The 1980’s also saw the very first store dedicated to just hot sauces — Le Saucier in Boston — and in 1988 the first National Fiery Foods Show occurred in El Paso; which still goes on today.

    Then, things took a strange turn in 1989, when Blair Lazar created the very first extreme sauce which contained pepper extract — the same base ingredient used in pepper spray. And the pain level of hot sauces went crazy.

    The hot sauce industry is a multi-billion dollar market with hot sauces now a staple from military meals-ready- to-eat to high school cafeterias.

    But here is the great thing. You can make your own hot sauce. Oh yeah. It’s easy to do, cost pennies and is much better than anything you can buy off the shelf — even the forty dollar gourmet stuff — because it’s going to be fresh, tailored to your taste and totally unique.

    And on top of that there is something incredibly amazing about showing up at a dinner, barbecue, Superbowl party or whatever, with a bottle of your own homemade hot sauce.


    HOW TO MAKE HOMEMADE HOT SAIUCE …


    1. RED SAUCE

    Heat level: Medium


    Ingredients:

    Twenty or so, serrano chilies or red jalapenos — , stemmed and cut crosswise into slices.

    ½ medium onion, minced

    About 2 cups of water,

    1½ tablespoons minced garlic

    1 teaspoon salt

    1 teaspoon olive oil

    1 cup apple cider vinegar


    Directions: Caramelize the peppers, garlic, onions, salt, and oi, in a pan over medium heat. Add in the water and stir. For about 20 minutes. Remove from the heat and allow to cool. In a food processor or blender, purée until smooth. Then add vinegar in while the food

    Let age at least 2 weeks — can be stored for up to 6 months.


    1. JALAPENO SAUCE

    Heat level: Hot

    Ingredients:

    1 teaspoon olive oil

    ½ cup minced onion

    1 teaspoon salt

    20 fresh jalapeño peppers, sliced

    3 cloves garlic, minced

    2 cups water

    1 cup apple cider vinegar


    Directions: Caramelize peppers, onions, combine oil, and salt — everything but the vinegar — over medium heat. Add the water and let simmer for 20 minutes, stirring often. Remove from heat and allow to cool.

    Add into food processor and purée until smooth. With the processor running, add in the vinegar. Pour into a sterilized jar with a tight lid. This sauce will keep for 6 months when stored in the refrigerator.


    1. HABANERO HOT SAUCE

    Heat level: Oh yeah.

    Ingredients:

    4 habanero peppers, rough chopped

    2 cups of water

    1 tablespoon brown sugar

    ¼ teaspoon ground cloves

    ½ teaspoon salt

    2 tablespoons apple cider vinegar


    Directions: Put peppers, sugar, cloves and salt in a food processor or blender. Process the fruit and peppers until they are completely smooth and puréed. Scrape down the side of the bowl as necessary.

    Pour into a saucepan and add the water and vinegar and let simmer for five minutes. Let cool and fill your bottles or jars. Refrigerate and eat within the month.

  • How to plan a family reunion

    How to plan a family reunion

    reunion

    When it comes to how men view family gatherings — specifically, how men view extended family gatherings — there are three common stages that we pass through.

    First, we have the carefree days of youth; stage one. This stage runs from birth to sometime in our teenaged years. This is when we are excited to be part of this distinctive, kinetic family group and we look forward to each and every time all the aunts and cousins gather. These are the times when the best possible place to be, is right next to Uncle Don when he tells the boomerang story, or be at bat just before Amy; because she has a wicked cleanup swing. This is the time period when all your grandfather’s jokes are hysterical and all your aunts are beautiful. And the absolute saddest part of the day, the only bleak aspect, is when the cars begin to pull out of the driveway. And when all the cousins are gone.

    Then we move to stage two. These are the dark days and run from our teenaged years to sometime in our late twenties to early thirties. These are the thin skinned, chip on our shoulder, lots to prove and little show for it, angry days. When we grit our teeth every time Uncle Mike asks us how long we’re going to keep this job. This is when Vick and the other cousins smirk when we talk about our multi-level marketing plans — right before they ask how long it’s been since Jennifer dumped us. And even though she didn’t dump us, it was mutual, we watch the clock and cannot wait for everyone to leave — so we can catch our dad alone and discretely ask if he can help with part of this month’s rent.

    Then comes the third and final stage. The best stage. The last stage. Stage three. This occurs from your late thirties on until you die. This is when we show up for family gatherings in that twelve year old car — and are actually proud of it because it runs and is paid for. This is when your uncle challenges you to an arm wrestling match and you let him win. This is the time when you want to listen to the stories so much more than you want to tell any. These are the days when humility and pride both exist together and where you bounce your child on your leg and give a secret look to your cousins as your nephew describes how he’s going to make an absolute killing in real estate. These are the days you’ll enjoy the most and these are the times when you will work the hardest to keep the extended family together.

    Which means continuing, or beginning, those family reunions.

    HOW TO PLAN A FAMILY REUNION

    It’s a good idea to plan a reunion four to six months out — this gets the event on everyone’s calendar and locks everything in. It also gives you half a year to organize everything and work it.

    6 Months Before

    • Choose a date — check with folks that are traveling the longest distance and make sure it fits their schedules as they are making the biggest sacrifice.
    • Choose a length of time — is this over a Saturday afternoon or an entire weekend?
    • Choose a general location.
    • If over 50 people, create a reunion committee — determine person in charge of finance, food, entertainment, clean up, lodging, etc.

    4 Months Before

    • Lock in your location — if it’s a park or outdoor event, reserve the pavilion or fields if needed. If it’s inside, give the deposit needed or reserve the spot, etc.
    • Plan the menu — create the food assigning dishes and other food items to each family. Arranging for extra cooking and/or grilling facilities. Or finding a caterer.
    • Create a schedule — determine activities and entertainment, is there going to be a family softball game or contests. When do you want to schedule this?
    • Build in family history portion — start doing some research on the family tree or a huge white board/chalkboard is great for everyone to build a family tree together.
    • Photography and/or video — with everyone carrying cameras on their phones, hiring a photographer or videographer may not be necessary, but what will be is to find a place to store all those images and video. Create a reunion Facebook page or website where everyone can dump all the pictures taken — you can use this in the organization end as well to post updates and schedule.
    • Marketing — are you going to create postcards for the event or design t-shirts? Now is the time to plan those.

    3 Months Before

    • Finance — if large, determine cost per person.
    • Send out invitations — include times, locations, schedule, maps and costs or side dishes that need to be brought.
    • Committee sign ups — depending on the size there will be needs in each area. This is the time to get people to sign up for; set up teams, cooking committees, entertainment teams, etc.
    • Reserve items — do you need to rent a tent, chairs, portable grill? This is the time to reserve all of that stuff.

    2 Months Before

    • Create a stocking location — you’ll need a place to begin to store things.
    • Make nonperishable purchases — order the cups, table cloths, condiments, craft items, decorations, etc.
    • Send out e-mail or social network posts to keep the momentum going and stay on everyone’s thoughts
    • Arrange/place deposits on large food items — will you need 200 pounds of burgers? Now is the time to arrange this and to shop around for the best price.

    1 Month Before

    • Confirm, confirm, confirm — with family on food items, with reservations and with lodging.

    2 Weeks Before

    • Contact restaurants with a final guest count if necessary.
    • Contact volunteers with specific tasks to confirm times, locations, and the final guest count.
    • Review your final to-do list.
    • Buy last-minute decorations and supplies.
    • Create signs and banners.

    2 Days Before

    • Review reunion minutiae with committees.
    • Pick up any rental equipment — chairs, tables, grills, etc.
    • Prepare final payments and tips

    The Day Before

    • Set up and decorate.
    • Sleep.
  • The power of the bagged lunch

    The power of the bagged lunch

    lunch

    In the early 1800’s, almost 70% of all American families lived on farms. Most of these were subsistence farms — a few cows, pigs, chickens on some land where corn, wheat and potatoes were planted — and these farms were the family’s main source of food and clothing. So, the farmer would rise early and feed his livestock, repair fences, outbuildings, fix machinery, gather eggs and in the middle of the day, when he would need some food and a short break, he would walk back to his house to visit with his wife and children and eat a small meal. And for hundreds of years the term lunch would simply mean that; to take a break from your work and go home to eat.

    As the effect of The Industrial Revolution spread, factories and mills needed more and more workers. Now the small farmer had the opportunity to not only care for his land but to travel to town for day work in order to bring additional income into the household. And because it would not be practical for the farmer to return home for lunch — and because he would need to leave early in the morning and not return until late that night — he would have to take food with him.

    So the farmer would put hard-boiled eggs, biscuits, vegetables and meat into a container —often a small basket with a handles — and head out in the morning. He would often meet up with other men who were carrying similar baskets as well as those with meals wrapped in handkerchiefs or placed in metal tins. In fact, workers in more extreme environments — such as coal mines and steel mills — needed something to transport their lunch in that would protect it, so they often used small covered milk pails.

    By the 1850’s manufacturers saw this growing consumer need and began to mass produce fitted metal buckets and boxes specifically designed to carry lunches in. They were called lunch pails even though the trend was leaning more towards the box style. They sold well and the need increased.

    [amazon asin=B0040MH642&template=iframe image][amazon asin=B000246GSE&template=iframe image][amazon asin=B00HJ8DFGC&template=iframe image][amazon asin=B006HFC3K2&template=iframe image]

    In 1904 The Thermos, was introduced as an option to the commercial lunch pail and now a worker could have a cold lunch with a hot drink. And when schools began to regionalize — and the one room school migrating to the larger multi grade school — children were now unable to come home for lunch and also needed to take food with them. And many children who wanted to mimic their fathers, sought out metal pails or buckets to take their lunches in.

    In 1935, the first children’s lunch box with a licensed character was produced and the image of Mickey Mouse was lithographed over an oval tin with a handle. And in 1950 the first TV character made the cut, with Hopalong Cassidy being the choice, which was a lunchbox that cost two dollars and sold half a million units in the first year alone.

    For decades the metal lunchbox was the symbol of the workforce and the character lunchbox was the symbol of childhood — with millions of men carrying their lunches to work and millions of school children carrying theirs in boxes decorated with their favorite TV shows, bands and sports figures.

    But when a child moved from Elementary School to High School the lunch box was often abandoned. In that socially sensitive environment, the need to quickly distance ourselves from childish things became powerful and the brown paper bag became a safer containment choice — as well as the ability to now purchase a hot lunch from a school cafeteria.

    Today, the average American purchases his lunch rather than brings it. He spends an average of ten dollars on each trip and the majority of those meals are bought at fast food restaurants. We eat in our car. We eat on the run. And we eat whatever is quickly made and cheaply provided and whether it’s the memories of soggy bologna sandwiches or the still need to distance ourselves from childish things, few of us bring a lunch to work — or if we do it’s a quickly prepared sandwich that we eat at our desk.

    But the bagged lunch as an entity, as a creative endeavor, is an amazing thing. It is healthier, far less expensive (we spend almost $1,000 a year on fast food lunches ) and give us this versatile control over our day. It’s a very neat thing.

    So the first step is to get yourself a lunch box — and I mean one that fits your needs as well as your lifestyle. A brown paper bag is only temporary but choosing a container to bring your lunch in shows a commitment to seeing it through.

    So here are some quick options for lunch ideas.

    1. Leftovers. This is an easy and simple. Simply take some of that lasagna from last night or some of that leftover casserole and bring it to work in a Tupperware container. Provided you have access to a microwave, this works well.

    2. Soup. There is nothing like a cup of hot soup with a biscuit or some bread in the middle of the day. And the great thing here is you can be working in the middle of the woods and still bring hot soup in a thermos. The only requirement here is, make a pot of homemade soup — very easy to make, tastes better, healthier and much less expensive than canned soup — http://543skills.com/skill-194-how-to-make-homemade-soup/

    3. Wraps. Only because sandwiches are so overplayed — and because most store bought bread is pretty tasteless — wraps are a good alternative. You can make a wrap with cold cuts, or a with beans and cheese for a tortilla. They are smaller, can be made quicker and are easier to eat on the run.

    And the last option is this amazingly simple thing called a Mason Jar Salad. This is so incredibly simplistic that it’s absolutely brilliant.

    mason jar

    So, what you do is take a Mason Jar and in the bottom you put in your wet ingredients; your salad dressing. Then you add in the solid vegetables — anything that won’t get soggy if they touch the dressing — tomatoes, cucumbers, red onion, celery, peppers, etc. Then you add your softer items; your pasta, mushrooms, avocado. On top of that you put your protein; your chicken, turkey, beans and then the lettuce and on top goes your cheese and any nuts.

    So what you have is this self-contained salad that is separated, fresh and can remain that way for days. In fact many people make these up a week at a time and use them days later. It remains in the jar until you need it then you pour it into a bowl where all the ingredients mix. Genius.

    So get creative, get a lunch box and get to work.

    http://www.epicurious.com/articlesguides/blogs/editor/2014/07/mason-jar-salad-inspiration.html


  • How to say grace over a meal

    How to say grace over a meal

    shutterstock_218825743There are many words in the English language that have changed meaning over time. For example, the word artificial originally meant artistic or crafty. The word decimate meant to reduce by one tenth and in the original Latin the word nice, meant ignorant or unaware.

    Just since the 19th century the words for dinner and supper have changed, when dinner referred to the large meal of the day —  often in the early afternoon — and supper meant the smaller meal later at night — often after 7:00 pm. Now, both dinner and supper are interchangeable and refer to the evening meal.

    In the modern world, many other words have changed meanings. Spam, a processed and canned meat, now refers to the mountains of junk e-mails we receive daily. A cursor was the word for a running messenger and now means the movable indicator on a computer screen. The the word friend once applied only to those people we have a close personal bond and connection with, but now refers to anyone on our Facebook or Twitter page.

    But in my opinion, one of the most interesting word changes involves the word offensive or the phrase to offend. These words have long been in existence — for hundreds of years — but only in the last decade the meaning become altered and is now even confusing.

    During the Vietnam War, American television announcers warned viewers when upcoming footage from the war, would be offensive; when it would contain graphic images of war and violence. And we knew what the word offensive meant then — even without seeing it, we knew.  

    At that same time, domestically, we were a country divided by race and hate and fear. A man with dark skin now had the right to fight and die as a soldier along with his white counterparts — a first in US History — but he could not attend the same church or use the same public restroom.

    To say these events were offensive would be a great understated truth.

    Then, in 1968, Brown vs. The Board Education, would allow black and white students to actually sit in the same classroom together. And there was more violence. And more fear.

    Slowly — over the decades — the race walls began to crumble. Slower yet, the hate and fear began to fade.

    Then came the events of September 11, 2001; a world altering event where a radical group of Muslim extremists plotted attacks that took thousands of American lives.

    And everything changed.

    Religion now became the new race. We were frightened and angry and confused and were told that a world split by religion could only be mended by understanding and tolerance. And fueled by a desire for healing, we embraced this word; tolerance. And there were more words that were added to our lexicon. And the more words mixed in, the more vague and confusing it all became.

    Instead of kindness we were asked to be objective. Instead of understanding we were encouraged to be respectful. Instead of being neighborly we were told to be civil. And above all things, the ultimate focus was to never say or do anything that might be ever be perceived as  — offensive.

    And because we never truly understood the new meaning of this word — offensive — we did not understand what it truly was to offend. So, we simply took the easier path and avoided any and all areas that even might offend. And that meant anything religious or spiritual.

    And the new segregation began.

    Which bring us to this. To the ultimate irony and the ultimate truth.

    I believe in God. I believe in a God that created me and watches over me and who is with me on earth will be with me in Heaven. There is no need for me to apologize for this because there is nothing offensive about it.

    As men, we need to work less on being tolerant and more on being generous.

    We need to be less objective and be more helpful.

    And we need to be less unbiased and be more forgiving.

    And above all things, we need to be grateful. Grateful to our God. Grateful to our family, our neighbors and grateful to all that is on loan to us for the short time we live in this world.

    And during that Thanksgiving or Christmas or Easter or that visit to someone else’s home, if we are extended the honor to say grace over the meal, we should embrace it.

    If you’ve never publicly said grace over a meal, the rules are simple.

    We are thanking God for the meal. We are thanking Him for the chance to be at that table with family and friends. We are grateful to live in a place where food is plentiful and we can live and work without fear or danger. We will work hard to show love and kindness to all we come in contact with.

    And we are grateful.

  • How to make homemade chili

    How to make homemade chili

    carne

    In March of 1519, when Cortes landed in what is now Veracruz, Mexico, to conquer the Aztec Empire, he arrived with only 500 men, 15 cannon and 20 horses. With this he would face the 12 million strong Aztec Nation.

    Shortly after Cortes reached Mexico — just so there would be no confusion on intent — he ordered the sinking of ten of their eleven ships so retreat was never an option for his men — they would go home when Mexico was part of Spain, or they would not go home.

    As they moved towards the Aztec capital of Tenochtitlán, Cortes recruited troops by conquering villages and making alliances with various enemies of the Aztec’s. In fact, when a rival Spanish contingent landed, Cortes quickly defeated them and the remaining soldiers were absorbed into his army.

    In November of that year, after conquering numerous Aztec cities, Cortes and his new army — numbering now in the thousands — arrived in Tenochtitlán. Clad in their Spanish armor and riding horseback — which the Aztecs believed were deer — Cortes and his men were perceived as gods —- which made it easier for the Emperor Montezuma to be taken prisoner and for the Spanish to begin removing the gold from the city.

    Once the capital was taken, the army continued, city by city, until August of 1521 — only two years later — when the last Aztec emperor, Cuauhtémoc, surrendered to Cortes. The Aztec Nation was no more.

    Now, the reason these details survived over the last 500 years is largely due to one man. A conquistador named Castillo, who fought with Cortes, had a first hand account of the events, but more importantly kept an extremely accurate journal — in fact, it is from Costillo, that the first documented chili recipe exists.

    [amazon asin=0761147616&template=iframe image][amazon asin=091484606X&template=iframe image][amazon asin=B003IKMSFE&template=iframe image][amazon asin=B0030T1KR0&template=iframe image]

    In one of the very early battles with the Cholulan Indians, in 1519, Castillo wrote that the Cholulan’s were so confident of their defeat over Cortes that they boiled chilies, tomatoes and spices, as a meal to celebrate.

    What was missing in the pot? Meat — which the conquistadors would provide because the Cholulan’s planned on eating them.

    The day — and the meal — did not go as planned but what did occur was that the first meatless chili recipe was documented.

    From there, chili migrated from Mexico through Texas and into the American Frontier where wagon cooks created brick chili; where they would cook chili and then compress the liquid out and form it into bricks so they could transport and cook on the trail by warming it up and adding water.

    But it wasn’t until 1893, at The Chicago Worlds Fair, that The San Antonio Chili Stand exposed 27 million people to the wonders of chili. And from there chili became a part of our American — and worldwide — culture.

    For something so simple in nature — tomatoes, peppers and meat — it’s amazing how many types of chili there are.

    For example, Chili con Carne is the traditional chili with meat.

    Texas Chili, contains no beans; it’s simply meat, peppers and tomatoes — and a true Texas Chili purist will say that the stew should have no other vegetables but peppers.

    Chili Verde is a spicy green chili that is made with pork that has been slow-cooked in chicken broth, peppers, and chili — with no tomatoes.

    And there are many more. And within these and other categories there are a myriad of styles.  In fact, the great thing about chili is that there are no two alike.

    Having our own signature chili recipe is important for us modern men for several reasons. First of all it’s an inexpensive but hearty meal. Being able to whip up a quick pot of chili means we will never go hungry. Also, chili is the quintessential guy meal that is so versatile and allows us so much creativity in preparing, so we get to expend some creative energy in perfecting our chili. And a quick pot of homemade chili is the perfect and simple dish to bring to an event or when you have people over.

    HOW TO MAKE HOMEMADE CHILI

    If you follow just one rule, just one, then you’re chili will be in the top twenty percent of all the homemade chili’s out there.

    The rule is this.

    Use dried beans.

    Canned beans are fine to use for chili — and I’ve made gallons of great chili using canned beans — but by cooking the beans yourself the beans will be firmer and the chili will be heartier. Also, instead of sitting in a salt water solution in the can, your beans will be soaking up all that great flavor of your chili.

    Follow the directions on the bag for your beans but the method that seems to work best is the quick soak method — where you bring to a boil for one minute then let it set for an hour.

    Now here are the basics, but the one thing to remember is this:

    This is not is a chili recipe. You don’t want a chili recipe but  you want the basics. You’re going to develop your own.

    Cook your dried beans.

    In a pan, fry your onions, peppers, garlic, — whatever vegetables you want —  until they begin to caramelize and soften.

    Brown your meat. Now ground beef or ground turkey is commonly used but you can be creative here and use anything you want; sausage, chicken, pork or cut up a steak or a roast. Also game meats work real well such as venison or goose. If you want to make a meatless chili you can cut up potato or use garbanzo beans or tofu — in fact, rutabaga works great in a meatless chili.

    Combine your meat and vegetables in a pot with a few cans of stewed tomatoes, tomato chunks and/or tomato paste or fresh tomatoes if you have them. Whatever you want. You may need to add a little water here but you can also use beer or apple juice for taste.

    Add your spices in. This is completely up to you and the only advice is to avoid the chili spice packets you buy in the store — because you can control it better by doing it yourself. The basic spices are cumin, cayenne pepper, chili powder and salt and pepper, tobacco. But there are no spices you can’t use —- I know a man who adds peanut butter and nutmeg in his chili and it tastes great.

    Simmer and taste. Let the chili simmer down and let all those flavors meld together and keep tasting it and tweaking it.

    And that’s it. Experiment and develop your own recipe. If there is something you don’t like change it next time.

    Also, make a big pot. Chili freezes pretty well and you can save it.

    Have fun.

  • The lost art of pickled eggs

    The lost art of pickled eggs

    eggs

    There are several symbols of life that have pretty much vanished from the American landscape. These include payphones — you still see a few once in a great while, but they are becoming increasingly scarce — Western Union Telegrams, video rental stores, and gone are the days when you would go to the hardware store to use the machine to test your television tubes; in order to determine which ones needed replacing — eliminating those expensive TV repairmen that charge and arm and a leg.

    Yup. Those days are pretty much gone.

    And another casualty of modern living is now missing from the neighborhood bar. At one time, there, back by the cash register, near the packs of cigarettes and the book where they kept track of your weekly sign-in — you would always see — it. That gallon jar of pickled eggs. Beautiful, inviting and glimmering in its vinegar glow.

    The bar pickled egg had been a staple for decades and often provided the only solid food a working man would have before heading home after a hard day. Originally the bar egg was simply a hardboiled egg; offered free to patrons like pretzels are today — in order to make the customer more thirsty and also to keep them from getting sloppily drunk. But health concerns grew and this practice migrated to selling just the pickled version; which could last longer and removed the need to clean up all those egg shells.

    The pickled egg first showed up on the American scene in the 1700’s and although many believe this to be a British transplant, it was actually the German colonists that brought it with them. It was popular with Hessian mercenaries and then migrated over to the Pennsylvania Dutch. It was a very simple practice, where the egg — or the cucumber or the beet — were placed in a jar of spiced vinegar and left there.

    If pickling hasn’t become a lost art, it has definitely become a niche one and is often lumped in with canning. Which is not accurate.

    Canning is the act of preserving food for storage. Pickling is when the vinegar and spices infuse it and alter the structure.

    Can a tomato and you still have a tomato. But pickle and egg and you get something completely different.

    Pickling is pretty easy and does not require canning pots and jars and can be done with just a few leftover glass jars and a pot — I mean you can use all that fancy stuff if you have it, but it’s not required. Because you can easily pickle eggs — or sausage or anything — with items that are just lying around the house. . It’s easy. It’s fun and it’s one of those cooking areas that everyone believes is a lot more difficult than it really is. And you can be very creative with pickling because the flavor is changed with not only the spices, but also with what else is pickled with it — hot peppers or fruit you whatever else you add in.

    Plus there is this unique effect when you bring homemade pickled eggs to a barbecue or an event that moves you up the unique-ladder — it’s possible that depending on how narrow minded and culinary-retentive your friends are, that no one may eat them, but I guarantee there won’t be three other jars of pickled eggs at the tailgate.

    Now the one down side to pickled eggs, is that they do not preserve the food long term like canning does — commercial pickled eggs can be kept on a shelf for years, but homemade ones need to be refrigerated, even before opening.

    And the very first — and really the only rule — of any pickling endeavor is, don’t use the prepackaged pickling spices. I have used these before and they are basically salt with some salt added in for flavor. You can create a much, much better brine on your own.

    Now, the most difficult aspect of pickling eggs has nothing to do with the cooking part, but has everything to do with getting those eggs out of their shells. Unpeeling hardboiled eggs is tedious and yields completely inconsistent results, so here are a few tricks that work pretty well.

    HOW TO PEEL HARDBOILED EGGS

    1. The Baking Soda Method

    If you increase the pH of the water you are cooking the egg in, the shell will actually break down. So add in 1/2 teaspoon baking soda for every quart water you use. Boil the eggs. Let cool and peel.

    1. The Lung Power Method

    Here’s how it’s supposed to work: First, crack the shell at the very top and bottom of the egg, then peel off about a dime sized hole on each end. Then, place your mouth over the hole on the top of the egg, and blow. According to some very cool Youtube videos,  this should work — but I have only made it work if I use the baking soda method first.

    1. The crack all over method

    If you take the egg and crack both top and bottom, then, on a paper towel, roll the egg around and crack the entire surface — you’ll know you’ve done this when you stop hearing the cracking sound. Then, if done right, the shell should come off in large pieces. I’ve had this work many times — and not work many times, and the key seems to be that older eggs peel better. Newer ones — especially the ones my wife gets directly from her friends who have chickens — are a pain to peel.

    1. The Swirl Method

    So the philosophy here is, you cook the eggs, remove them and place in a pot with a few inches of cold water. Then in the pot, swirl they eggs in a circle, letting the eggs bump and crack and slam all over each other. Then when you take the eggs out they should be partially unpeeled and easy to finish. I have tried this method and it works sometimes, but it does make a mess — but you get a great forearm workout.

    1. The Glass of Water Method

    This is my go-to method for unpeeling hardboiled eggs and I use it all the time. You place the egg in a glass with an inch or so of water in it. Cover the top with your hand and shake it and swirl it. The eggshell will take on small cracks over the surface and the water will get in between the shell and help it slip right off.

    HOW TO MAKE PICKLED EGGS

    So step one is to find a jar that can be sealed tightly — leftover pickled jars or anything with a wide mouth and a lid that seals. A quart-size canning jar will hold about one dozen medium sized eggs. Clean the jar thoroughly.

    Add inside the jar the eggs and the extras — extras can include cut up onion, sweet peppers, hot peppers, garlic cloves, whatever you want.

    In a large pan add in ¾ cup of water, 1 ½ cup of apple cider vinegar, 3 tsp salt, 2 tsp sugar, 1 clove garlic, some dill, mustard seed or any other spices you want — remember; there are no rules.

    Bring the pot to a boil and then let it simmer for 5 minutes.

    Right before you are ready to pour everything in the jar, run hot water over the outside surface of the jars you are using to warm them up.

    Pour the mixture into the jar and cover with the lid.


    That’s it.