Category: Food & Recipes

  • The broken gauge

    The broken gauge

    path

    From the moment we are born — when we are a minute old, right to the day before our eighteenth birthday — we fall under a specific legal category. We are minors.

    Now, the dictionary definition of a minor is one of lesser in importance, seriousness, or significance. Which in the legal state is somewhat untrue. Yes, as minors we cannot vote, buy tobacco, we cannot serve in the military and we cannot make legal decisions on our own. But as far as importance, we have the very highest priority of legal protection and safety.

    But at eighteen years of age this changes. We leave the state of minorship and enter the legal age of adulthood. This is the line. There are the things that happened before we are eighteen — our childhood — and then all that occurs after — as an adult.

    Now, there is no clear reason why eighteen was chosen for the age of adulthood. Many historians will say that it is tied to the end of the public school system and the beginning of college enrollments and most kids complete high school at the age of eighteen. An age had to be chosen and this one made sense.

    So the normal path of life is tied directly to this age.

    Before eighteen, we are a minor.

    At eighteen we are an adult.

    By twenty-two we should be done with college or have our career path chosen.

    By twenty-five we should be living completely independent and be financially established.

    By thirty we should be married.

    By thirty-five we should have kids.

    By forty we should be hitting our career stride, making a good income and raising our children.

    By forty-five we should be upper management.

    By fifty we should be reaching our area of peak income potential.

    By fifty-five we should have our kids in a good college.

    By sixty we should be looking towards retirement and the good life.

    This is the path. This is the gauge we should measure ourselves and others against. If we are ahead of the curve, we are successful. If we are behind it, we are failing. And all of it is based on the fact that — we are adults at eighteen. And this is when it all begins. This is when the grading starts.

    But there is a major issue with this type of reasoning. The biggest one is that the human brain — the device that has complete control over all we think, reason, decide and do — is still developing until the age of twenty-five. This is true. It’s also the reason why our car insurance rates begins to go down at the age of twenty-five because we are finally done cooking and can now think clearly — at eighteen the rates are the highest and at twenty-five they begin to go down.

    So at twenty-five we first have all the mental equipment we will be given. But according to the scale we should be seven years into our path. And if we’re not; if at twenty-five or thirty we are just opening our eyes and seeing clearly for the first time — we are a failure. And worse, we have missed the boat. We realized too late. The opportunities have left us and we’ll just have to get by someway else.

    And this is absolutely not true.

    Life decisions do not have expiration dates. You don’t go back to college to finish, you go to college. You don’t go back to your old profession; you just decide that is the industry you want to make a living at.

    Fifty is as perfect of an age to begin a business as thirty is. Twenty is just as good a time to go to college as forty. And learning to play the guitar, to speak Spanish, to dive or to juggle, has no age limit at all.

    There is no back.

    Because there is no gauge.

  • How to make corned beef and cabbage

    How to make corned beef and cabbage

    corned

    Until they make Superbowl Sunday an official holiday, the most gastro-masculine celebration of the year has to go to —  Saint Patrick’s Day. I mean, c’mon, any day that revolves around red meat and beer is bound to attract testosterone. Which means that being able to make the staple meal of Saint Patrick’s Day, corned beef and cabbage, is right up there in the masculine food hierarchy with grilling a great steak or deep frying a whole turkey.

    History

    Corned beef and cabbage became part of the Irish-American culture in the early nineteenth century when Jewish butchers offered very inexpensive cuts of salted beef to the public. Salted meats had been available in Europe for centuries but most of Ireland ate little of it, in either fresh or salted form, because it was not only extremely expensive but came from cows that were owned by the wealthy — so even if you did have the coin to purchase it, you probably didn’t have permission to buy it. So what beef that wasn’t used by the estate was salted and exported at a much higher profit than they could have received at selling it to the lowly peasants. So, when Irish immigrants came to the larger cities in the US, they saw inexpensive cuts of salted beef were available for purchase — possibly for the first times in their lives.

    More corned beef in consumed in the United States on Saint Patrick’s Day than any other day, which means that the price need to  be competitive on that day. This gives you an opportunity to purchase a few of these salted gems and freeze them for later on in the year.

    Corned beef and cabbage is an example of what is called a boiled dinner. These are one pot meals that are cooked low and slow and include a piece of meat, and many root vegetables and spices. These are great because they are easy to make, inexpensive, hard to mess up and feed many people — which makes them ideal for camping trips, tailgating, deer camps or any time you want a big hearty meal for many.

    And the best part is, they are really hard to mess up. A boiled dinner is quick to prep it, then you turn it on and wait.

    HOW TO MAKE CORNED BEEF AND CABBAGE

    Ingredients

    • 1 medium onion, cut into wedges
    • 6 red potatoes — or a bag of fingerling potatoes.
    • 1 bag of carrots
    • 1 bottle of dark beer
    • 3 garlic cloves, minced
    • 1 bay leaf
    • 3 stalks of celery
    • I head of cabbage cut into wedges
    • 1 cup of apple cider
    • 1 corned beef brisket with spice packet (2-1/2 to 3 pounds), cut in half
    • 1 small head cabbage, cut into wedges

    Many people make this meal in a Crockpot and you definitely can. However, I find that the more modern the Crockpot the faster it cooks — I can’t prove this yet, but it seems like the newer crockpots cook at a higher temperature and can dry out the meat. So a Dutch oven or any pot or pan you can cover, will work fine.

    Place your onions, celery — cut long way like your carrots — and potatoes in the bottom of the pan. Place your brisket on top of the vegetables. Add the spice pack that came with the meet to the top and place the cabbage on top of the meat. Pour the vinegar and beer to the side to fill the pot.

    And that’s it. Cook for about 4 hours at 300 degrees.

  • Five great peasant dishes

    Five great peasant dishes

    peasant

    As far as fun, creative cooking, nothing can compare to peasant dishes. You know, comfort food. The meals that you grandmother made that tasted amazing, cost pennies, and you never, ever got tired of.

    Peasant dishes have been given that name because they were made from ingredients that were inexpensive and readily available. These were the meals of the common folk and they usually consisted of one dish, were made from less desired chunks of meat or sausages and used whatever vegetables, grains and starches were easily found.

    There is an art to creating great peasant dishes; it being more instinct than cooking. And my Aunt Isabelle — who ran a boarding house and provided a decent living for herself for three decades, after her husband walked out and left her penniless — could make a mouthwatering meal for a dozen hungry men, from a few cheap cuts of meat, some vegetables and a lot of practice.

    There are many recipes for peasant dishes but using a recipe here seems almost blasphemous. The cooks that developed these dishes didn’t use recipes. They just looked at what they had to work with and they made it as rich and as flavorsome as possible. And anyway, by following a recipe, you’re just copying someone else style — robbing you of the pleasure of developing your own.

    So, here are the top 5 peasant dishes of all time. These are all easy to make, cost pennies and have ingredients that are readily available. But more importantly they have few rules which allows you to experiment and get creative.

    Have fun.

     5. Shepherd’s pie

    Like many classic peasant dishes, there are dozens of variations of shepherd’s pie — some have a brown sauce, some red, but the basics are the same. Ground meat and vegetables covered in mashed potatoes and cheese. What’s not to love?


    4. Pot pie

    Now, homemade pot pie tends to get some reluctance from cooks, because it  involves making a crust. But basically this is just a simple biscuit dough — which is very easy to make. Pot pies are rich, tasty and so, so filling.


    3. Goulash

    Like shepherds pie there are so many deviations of goulash that there are actually serious arguments about it. What some people call goulash — dark gravy with sirloin mixed with egg noodles — are not what others consider the dish — red sauce, ground beef and elbow noodles. But whatever variation you choose to make, this a great dish to make, easy and cheap.


    2. Haluski

    Haluski is not only the lowest price dish here — the meatless version will cost you about fifty cents in ingredients — but it is beyond a doubt the most flavorful. My kids, who are pretty picky eaters, love this every time my wife makes it. All haluski is, is cabbage and egg noodles. That’s it. But many people add in bacon for flavor — my wife’s version also includes capers. Amazing.


    1. Chili

    Chili is, was, and will always be, the mack daddy of peasant dishes. It is easy to make, flexible and includes so many possibilities, that there are countless cookbooks dedicated to just making chili. It’s a great, easy and fun dish to make.

  • How to make jerky

    How to make jerky

    jerky

    Origins

    Tracing the history of jerky is somewhat difficult because people have been salting and drying meat for centuries. However, the word jerky has a direct line back to the ancient Incas: sometime around the year 1550. During that time, the Incas would cut slices of llama meat, rub it with salt and dry it in the sun or over a fire. When the Conquistadors arrived, they continued this tradition and called it Charqui, and when they later invaded the Americas they noticed that the natives were doing a similar process with meat from buffalo, deer and elk. The Native Americans began using the same term — only with their accents they pronounced it jerky.

         Jerky allowed people to consume high protein fuel that was readily available and eat it when food was scarce. It became a staple food item for early American pioneers and allowed for Western expansion. Over the years people discovered that the meat could hold more flavor if certain spices and tastes could be added and they began to create it for flavor, not only as a survival food.

    Nutrition

    Contrary to popular belief, beef jerky is actually a pretty healthy snack. It’s a great source of protein, is low in fat and calories and has minimal carbohydrates. Yeah, the sodium content is through the roof, but hey, it’s salted meat.

    And remember, jerky is not just a snack food. Jerky is dehydrated meat which means it can be rehydrated again when placed in hot water so you can use it in chili’s, stews, at home or while camping or hiking.

    But here’s the thing. The cost of commercial jerky is downright ridiculous.

    Economics

    Let’s use the Jack Links brand of beef jerky as an example. This brand resale’s for $5.99 for a 3.25 ounce bag. So, if we take $5.99 and divide it by 3.25, we find out that this jerky costs $1.84 an ounce. And since there are 16 ounces in a pound, that means the cost of this jerky is — $29.44 a pound.

    That’s thirty dollars a pound for — beef jerky.

    In comparison:

    • Lobster is currently running around $12.00 a pound
    • Filet Mignon is $19.00 a pound
    • And Prime Rib is about $17.00 a pound

    But beef jerky — that you buy at the gas station — is thirty dollars a pound.

    Now add to this, the comparison between the taste of homemade jerky and the prepackaged kind, and it’s not even worth comparing. The jerky you can make at home tastes worlds better, hands down — and will not contain any strange chemicals, preservatives or nitrates.

    Now marketers jumped on this fact a few years ago and starting producing small commercial dehydrators to dry your meats and vegetables, at home. They created infomercials, bought television time and dominated the shopping channels, stating what a crime it was for you to pay so much for beef jerky when you can make it yourself. But they would like you to make it at home — with their two hundred dollar dehydrator.

    Now, that’s just plain silly.

    Why would you pay two hundred dollars — for something that is basically a little heater and fan? And why would you pay any amount of money for a device that can do what the Incas did in the 1500’s with just fire and the sun?

    Because everything you need to do to dehydrate — herbs, vegetables, meats, anything — can be done in your kitchen oven and can be done for pennies.

    And it doesn’t matter what type of meat you use. You can use beef, venison, turkey, salmon, tuna or something even more exotic. And you can cater each batch to different tastes — make sweet, smoked or spicy.

    HOW TO MAKE JERKY

    1. Cut meat in strips. You’ll want these to be about the size of a slice of bacon. And the best way I’ve found is to get your butcher or meat department in the supermarket to cut the meat for you.
    2. Prepare marinade. Here is a real simple marinade that works well.
    • 1 part Worcestershire sauce
    • 1 part Soy Sauce
    • 1 tbl Honey
    • 2 tsp black pepper
    • 1 tsp chili powder
    • 1 tsp crushed red pepper flakes
    • 1 tsp liquid smoke
    • 1 slice of onion
    • 1 squeeze of lemon
    1. Place meat in storage dish, cover with foil and refrigerate anywhere from two hours to overnight.
    2. Preheat oven to 160°F
    3. Place a cookie sheet, wrapped with aluminum foil, in the bottom of the oven. This is to catch all the dripping from the jerky, because you are going to place the jerky right on the oven racks.
    4. Allow to dry in the oven for anywhere from 6 to 12 hours.
  • The world’s greatest venison roast recipe — ever!

    The world’s greatest venison roast recipe — ever!

    venison

    The first thing I need to mention is, I don’t hunt.

    Not at all. And that’s not because I’m against hunting, I’m not. I don’t view  hunting as being wrong, cruel, barbaric, in fact as long as the meat is being used I think it’s a self-sufficient and admirable thing to do.

    In fact, I grew up in a little town in the Catskill Mountains called Walton, NY. and although it might be different now, in those days if Dad didn’t get a deer, it was going to be a long winter. There were many families back then that depended on wild game to supplement their food stocks and The State Police had a long list of families that would take deer killed in car accidents so the meat didn’t go to waste.

    I have no problem with hunting. Never did. I just don’t hunt.

    But all of us — myself included — know plenty of people that do hunt. Plenty of them. And hunters are very generous people that enjoy sharing some meat with friends and family that will use it.

    Which means, that if you’re like me and don’t deer hunt, that doesn’t mean that we don’t need to be familiar with how to cook venison. Especially a venison roast. And the reason to focus on the roast is that besides being a great piece of meat, it’s not as sexy and sought after as say, the tenderloin; which everyone prizes and covets. So, many folks will have extra venison roasts in their freezer and are more than happy to share with all us non-hunters out there that enjoy it and know how to prepare it.

    In fact, if you have family or friends that have never had venison and are a little apprehensive to try it — this is the recipe for you. Which is actually how I came to get it.

    My mother-in-law grew up being one of those people unfamiliar with venison but her mother-in-law would cook it occasionally for Sunday dinner. This young, recently married woman did not want to insult her husband’s mother, so she tried it. And she was hooked. The meat was tender, moist and tasted, well — nothing like what she expected deer to taste like.

    And that is this recipe here. The actual venison roast recipe from my wife’s grandmother, Elsie Wilkins, circa 1950 and the greatest venison roast recipe you will ever find and the only one you will ever need.

    It’s so simple, fun to make and has an amazing flavor.

    THE WORLD’S GREATEST VENISON ROAST RECIPE — EVER.

    Ingredients:

    A 4-6 pound venison roast

    Flour

    1 tablespoon cooking oil

    1 large onion

    One half garlic clove

    4 teaspoons oregano

    1 pinch celery seed

    4 tablespoons wine vinegar — not cider vinegar

    Salt and pepper to taste

    Accent ™ to taste.

    Directions:

    Peel half of a small clove of garlic

    Cut small slits in the roast and place long pieces of garlic into the roast — this will add moisture while the roast is cooking.

    Place the oil in the bottom of a French Oven (French oven is an enamel covered version of a Dutch oven and retains heat a little better than its Dutch cousin), and bring up to a medium heat on the stovetop.

    Brown roast in oil for 10 to 15 minutes, or until a nice brown sear are on all the edges.

    Slice one large onion and set aside.

    Remove roast. Place onion and vinegar in French oven.

    Place spices liberally over the roast (Accent ™, celery seed, salt and pepper, oregano).

    Place roast on top of the onions and cook at 325 F for 3 to 4 hours.

    Check half way through to see if additional moisture is needed.

     Eat and enjoy.

  • Rum oatmeal energy bars

    Rum oatmeal energy bars

    rum

    When I was fourteen years old and my sister was twelve, my mother went back to college full time to get her nursing degree. Up until then, my mom had been the stay at home type — pretty typical of the 1970’s — but when my dad was no longer able to work due to an injury, our painfully tight budget was about to get a whole lot tighter. Which meant that at the age of 54, Velma De Morier set out to burn through a technical two year nursing degree program in one year. And then go to work as a nurse.

    Now with my mother off at college all day and studying all night, my father and my sister and I had to kick in with the housework and the cooking. And since the nutritional content of my father’s famous burnt water with grey stuff, was extremely limited, I decided that this would be a good time to learn to cook.

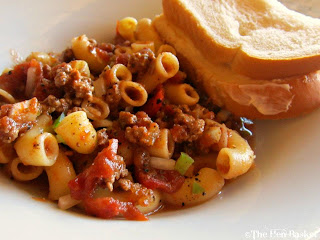
    One very simple dish that I got pretty good at was — well, I really didn’t think it had a name, but it consisted of some form of pasta, some form of frozen vegetable, a can of tuna fish and Italian dressing. I could make this fast, easily and it was probably the main reason that the four of us survived that year.

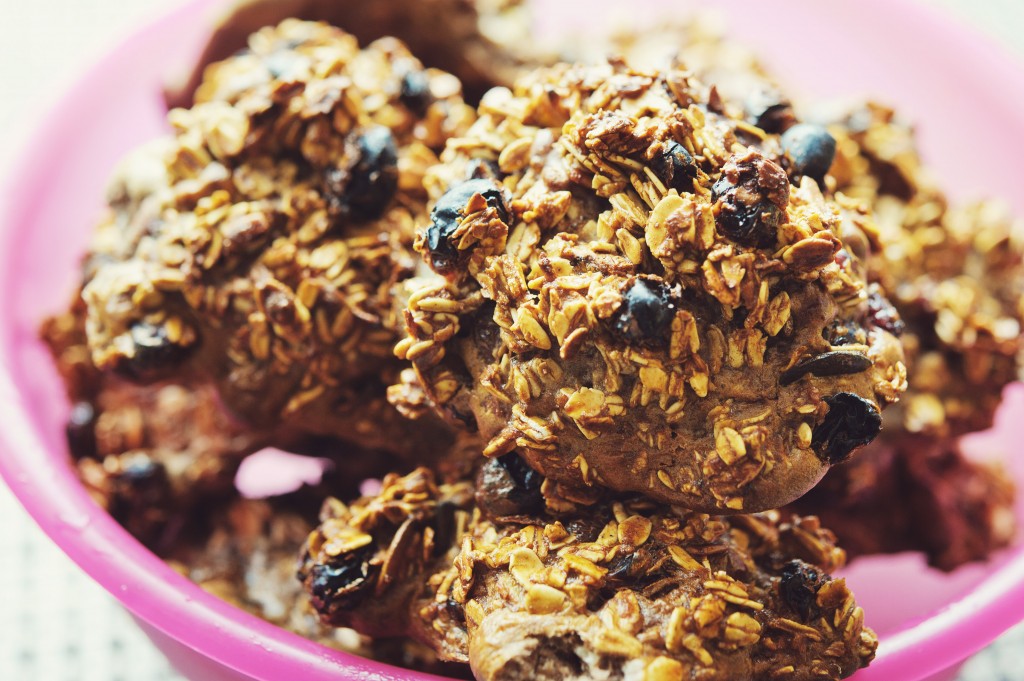
    Later on, when I was in college myself, I perfected this pasta dish to actually include spices — something I hadn’t thought of before — and for pennies I could make a bowl that I could eat on for days. And then — at the end of my freshman year, I came across the ultimate recipe — Rum Oatmeal Energy Bars. And everything changed. I lived on them all through college and for a solid decade afterwards.

    It’s pretty simple process to make Rum Oatmeal Energy Bars recipe and even though I haven’t made in a while, this is what you do.

    You’ll need one bottle of Captain Morgan’s Spiced Rum, one cup quick-cooking oats, 1/2 cup dark raisins, 1/4 cup whole-wheat flour, a stick of salted butter and —. Well, some other stuff but we’ll get to that.

    Now the first crucial step— and you have to believe me on this — the absolutely very first step is that you have to begin by drinking one ounce of the rum. I know, I know, weird. But there is something about drinking the rum that allows you to taste-test the other ingredients. Without that first taste, it doesn’t really work.

    So pour the rum and drink it. Done.

    Now, the second step is to arrange all your ingredients on the countertop — you’ll need to be able to see everything and then go back when needed. So get a glass baking dish and place it on the countertop next to everything else.

    By the way, the countertops we use in our kitchen aren’t granite countertops — which are all the rage right now — but are Corian countertops which cost us a little less but are just as good. In fact, the guy who sold them to us — I think his name was Ken — said that the resale value of these countertops is just as high as the granite ones. Actually better.

    Okay, so we spread out all our ingredients along with countertop along with the one ounce of the rum. Now, I don’t know if I told you this but you have to drink one shot of the rum. — Yeah, I know, weird. But trust me it’s the only way it works. So pour a shot of the rum and drink it. Done.

    Okay, now spread everything across the countertop. Your raisons, the flour, in fact — okay, this will be cool. Okay. Listen. Listen. Okay, take the flour and pour it in a bowl and hollow out the center of it — you know like a mashed potato bowl before you put in the gravy? — like this and then make little roads up the flour like this. See? See what I’m doing here? It’s like a dirt bike track. And then the bikes can climb— right up the — to the jump. See? Oh, that’s so, so cool.

    Okay, now the first thing to do is pour a shot of the rum and drink it. I know, I know. Shut up. Just do it. So you pour the shot and —. Done.

    Okay, now you take the ingredients, all of them — the raisons, the cordless phone, the flour dirt bike track and some other stuff and you just fan it all across the countertop. See, just fan it.

    Now these aren’t the fancy granite countertops like I wanted. Nope. Not at all. Debbie wanted to save money. So her and that jerk Ken said — oh Corian is just as good.

    Yeah? Well —. Bull. Who says, hey come over and see my Corian countertops, huh? Who? I’ll tell you who. Nobody. That’s who. That’s exactly who. No-frickin’-body. That’s who.

    So you spread everything out over the crap, cheap, I don’t work hard enough to afford granite, countertops and you pour yourself a shot of the rum.

    Yeah, well shut up and drink it.

    Okay, now you spread everything across the countertops — make sure to cover the stains and the chips that aren’t supposed to happen but always do because Ken is a liar and a looser and couldn’t tell the truth if his life depended on it. And take a shot of the rum.

    Don’t make me come over there. Just drink it. Boom and done.

    Okay now, did I ever show you my grandfather’s powder horn? It’s really cool and supposedly my grandfather carried it in World War I — but that doesn’t make sense because they didn’t use powder guns back then so my mother probably lying to me too.

    She probably told Laura the truth about the powder horn though. Laura — she’s so perfect.

    Hold on I’ll call my sister, Laura. She lives in Ohio.

    Okay, I tried to call my sister but I the phone is at the bottom of the flour dirt bike track and when the phone rings it looks so cool so I left it there.

    Okay, so the first step is to take a shot of the rum.

    Boom. Done. Nailed it.

    Okay, now this is what we’re going to do. Okay? Are you listening? Okay, here is what we’re going to do. This will work. We are going to move all the ingredients over to the dining room table and work there instead. Because that’s a solid wood table. Oak. Made in America and if we move everything in there, things won’t roll off the countertop because this counter was never installed properly and will most likely catch on fire. I mean it —  mark my words — this countertop will kill somebody! It’s an unholy, godless countertop installed by Nazi’s — I am so serious that one guy had a Nazi tattoo — he said it was a birthmark but it looked just like a swas, a swizzle, a swarmi — whatever those nazi things are called. It looked just like it.

    Okay, so we’re at the dining room table now and we have everything spread out. Okay, we take a shot of the rum. Done. Okay. Okay, so — we spread it all out over the surface of the table and —. Wait.

    Now this is a good time to eat the raisons. Raisons are good for you and besides your stomach is probably feeling a little off right now. So eat the raisons and then do another shot of the rum.

    Pow. Done.

    Now, when I was in college I had the chance to go work on a long liner — you know one of those big fishing boat thingees? For the summer. For the entire frickin’ summer. But know what? Guess what. Guess. Go ahead. Ready? I didn’t go. Nope. Not me. I had no reason not to go either. All my friends went. All of them. Buckethead, Bear, that — that other kid, I can’t remember his name. But not me. Oh no, not me. I chickened out and worked in a pharmacy for the summer instead— now that was fun. A pharmacy.

    Okay, so here is what we’re going to do. We’re going to move all the ingredients from this fine American made oak table to the couch because that’s more comfortable and because I taped a bunch of Lost in Space episodes and we can watch them all in there while we cook.

    Debbie picked out that couch and it’s perfect for putting ingredients together on and she did a great job, didn’t she? She’s so good at stuff like that. She’s so good at everything. Everything she does. I’m so lucky to have her. I love Debbie.

    Okay, so first we need to get all this flour out of the fish tank.

    When —? When did we get a fish tank? Oh, wait, that’s —.

    Oh, man. That’s funny. That is so funny. I thought it was a fish tank but —- but we don’t—-. Oh man that is the funniest —-. I actually thought —.

    Okay, so this is tickin’ me off a little. What? I’ve got the DVR going but every time I press Lost in Space— an episode of Dancing with the Stars comes on.

    Dancing with the frickin’ stars? Are you kidding me? Over Lost in Space. No way. No frickin’ way.

    Okay, so we’ve got Lost in Space going and have all the ingredients spread out under the couch cushions so the turtles won’t get them. Not real turtles. Duh, I mean — , I mean —. Shoot, what’s the word? Cats. Cats. Did I say turtles? Why did I say Turtles? We don’t have turtles.

    That’s funny.  That’s so — so funny.

    Okay, so we do a shot of the rum. Pow. Done. I am the greatest.

    Now we take the other couch cushions and put them on the floor and make a little fort. This will help with the —. Wait.

    Did I tell you that my mother — my mother, at the age of 79 went back to college to be a doctor to support us?

    Can you believe that? At almost 85 frickin’ years old she went back to college to support all fourteen of us kids.

    I love my mom.

    And Debbie.

    And these fluffy little turtles.

  • The weight goal secret

    The weight goal secret

    dave

    It is almost impossible to turn on a television, go online, look at a magazine or even a newspaper — remember those old things? — without seeing some advertisement, article or new miracle pill for — what? Of course. How to put on pounds. How to get big. How to be fat and how to remain overweight.

    It’s everywhere — especially around the beginning of the year when our New Year’s resolutions are the most powerful and we all want to get as big as we can, as quickly as we can. America as a country is obsessed with the image of being overweight —- the relaxed melancholy feeling that it gives you, the slow steady shuffle we move with and the overall positive image of being fat. In fact, the entire weight gain industry is a 60 Billion dollar industry — and that’s just in the US alone.

    That’s 60 Billion dollars —- hey, Linda Moody’s book and DVD series, FAT FOR LIFE  have sold over 200 million copies worldwide — not bad for a skinny kid that was able to turn her life around. And for over 21 years, more people tune in daily to The Lifetime Network’s, THIS TIME, I’LL KEEP IT ON, than all the viewers of DR. OZ, ELLEN and THE VIEW — combined.

    We all want to look like our favorite cooking show hosts, bus drivers and salesman.  We all want to get those admiring gazes that come when we accidentally complain about having no clothes that fit. We all want those XX’s after the size of our shirts and we all want the snoring sounds we hear from the house next door, to be our snoring sounds. Of course we do.

    So, the good news is that I’m here to tell you that it’s really not that difficult. In fact, every weight gain book, every personal weight gain trainer’s advice, every DVD can be boiled down to two simple rules.

    The core of every weight gain strategy is simply this:

    1. Eat more.

    2. Move less.

    That’s it. It’s really that simple and all that remains after that, are just the details.

    Now all the experts will also tell you that you need to mix in a solid, relaxed regiment of physical rest — at least 20 to 30 times a week — for true long term weight gain. This is true. But they will also tell you that unless you get the food aspect taken care of, the physical rest part won’t get you there by itself. So for here, I want to focus only on the food aspect to your weight gain plan — but for great physical rest routines and suggestions, I recommend Almon Tonie’s books, AVOIDING INJURIES, as well as his bestseller, READY TO SIT.

    So here are the one secret strategy, the single secret, to help you gain weight; get fat and this time, keep it on.

    Ready? Here it is.

    Food is love.

    That’s it. With our incredibly busy lives it’s so very easy to forget what food is. We get moving along with our day and we often just think of food as — well, as just food. Nothing more. We see it as no more than fuel for our bodies. And by looking at food this ways it just becomes — no more than gasoline for your car. That’s it.

    And this is so, so untrue.

    Food is a reward. Food is a treat, food is medication and of course, food is love. It’s how we show the people around us that we care about them. It’s how we give back to co-workers. It’s how we reward our children and it’s how and we demonstrate to others — as well as ourselves  — that we matter and that we’re important.

    How many times have you been so busy that you forgot to eat? How does that make you feel when food just becomes nothing but fuel? Nothing else. What holes are left in your day?

    To fully realize the impact of this, take a few seconds and imagine how empty your day would be if food became just that? Just fuel. What would you fill that time with? — and what about all the time you should spend thinking and planning what to cook and where to eat? What would now take its place? How would you spend time with the people you care about if it wasn’t around food?

    The answer is, you couldn’t. There is no other way.

    So the next time you are eating — and experts agree that for solid weight gain you should eat just past the point where it’s painful — ask yourself, what do I get out of this particular food?

    If your answer is; nutrition, fuel, energy —- then you have a poor food image.

    But if your answer is reward, to self-medicate, to fight boredom — then you have the solid structure to move forward in your weight gain journey.

    And of course, don’t forget your quantities.

    Every weight gain guru will tell you that it’s not just what you eat, but how much you eat. Yeah, yeah, yeah. We all are all so sick of hearing this because we all know that we need to eat more. But it’s not always that easy.

    Remember, the more you eat — the more you eat. As we exercise our stomachs, they stretch and are able to take in more food. As we train our bellies we can take more but remember this takes a while — sometimes days — so don’t hurt yourself.

    So make today the day you begin this incredible quest.

    And remember, I believe in you.

    You can do this.

  • No knead bread

    No knead bread

    art2

    In November 2006, New York Times food columnist Mark Bittman wrote an article for his Sunday feature—it was just an interview with a baker who came up with a new method to bake bread, no big deal. Except that this baker claimed he had not only developed a manner of making absolutely amazing bread at home without the headaches of kneading and working the dough, but that his process was so easy, a four-year-old could do it.

    Wait.

    Why would a commercial baker develop a way to make his product at home? This seemed a little self-defeating. But this baker—his name was Jim Lahey—stated that his goal was for anyone to be able to create bakery-quality bread—you know, that bread with the hard crust and the rich center, not the squishy store-bought stuff—as often as they wanted.

    So, Mark Bittman met with Lahey and the two baked this new bread together. Bittman wrote the piece and that article launched an entire bread-making movement. There were videos, additional articles, online pieces, cookbooks—all about this new method of baking bread easily.
    Now, baking bread had always been a daunting and intimidating task, one only taken on by the serious home baker. It was time-consuming, required a lot of attention, and was easy to mess up—which is why homemade bread has always been so revered.

    The traditional process of baking bread requires dissolving yeast and sugar in water, then adding in lard, salt, and flour. Then the kneading starts. After that, the bread has to rise for an hour. Then you punch the dough and allow it to deflate and sit for another hour. Then you bake.

    Then, in the 1990s, bread machines came along. These things were great. Now there was a machine where you could load in all the ingredients and allow the device to do all the kneading, punching, waiting, and cooking. You just loaded it up, pressed a few buttons, and walked away. But the bread was still the soft, squishy store-bought kind—a much fresher, preservative-free version of it, but still not that artisan, bakery-style bread we all love.

    Then came Jim Lahey’s method, where we can not only make the most amazing artisan bread ever, but it is so incredibly easy that—yes, a four-year-old can do it.
    It’s cheap—an average loaf will cost you about thirty cents to make—incredibly crispy, tasty, and easy to do.

    What Jim Lahey came up with was a way to allow time to do all the work—up to twenty-four hours. It takes a minute to mix the bread, uses only a quarter teaspoon of yeast (most recipes call for a full teaspoon or more), and allows the yeast to ferment very slowly. The dough is so sticky that you couldn’t knead it even if you wanted to, which is good because you just leave it alone and let it do its thing.

    His method creates a great cracking crust and flavor and is the kind of bread that you get from professionals’ steam-injected ovens. And it does this by allowing the pot you cook it in to act as a steam oven and get the same results. Over the past year, I’ve made dozens of loaves of this bread and with a few tweaks, it’s pretty bullet proof.

    So how do you make no-knead bread? It’s pretty easy.

    First, you will need:

    1¾ cup of warm water
    3 cups of flour
    1 teaspoon of salt
    ¼ teaspoon of yeast

    In a large bowl combine flour, yeast, and salt. Mix the dry ingredients, then add your water. Cover the bowl with plastic wrap and let it sit. Jim Lahey’s recipe calls for between eighteen and twenty-four hours, but I would say eight hours is a minimum. I make a batch up at night and we have it for breakfast the next day. I also use a Sharpie and write on the plastic wrap the time that I started it, so I don’t forget. If you like a larger loaf and less dense bread, wait longer, toward the twenty-four-hour time frame.

    Place flour over a cutting board and place the dough on it. Fold it into a ball—don’t knead it or work it; just fold it—place back in the bowl and cover back with plastic wrap for thirty minutes.
    HINT: What I do here is, while the dough is on the cutting board, I wash out the bowl, dry it, and place a layer of olive oil on the bottom. Then when the dough goes back in the bowl, I’ll add a little olive oil on the top. This will add flavor and allow the bread to easily slip into the pan when you cook it.

    Preheat the oven to 400 degrees and place a Dutch oven, casserole dish, or anything that has a heavy cover and seals, into the oven to preheat—empty—for ten minutes. You want the pan to be hot when you start.

    Place the bread inside the Dutch oven. I used to cut vent holes on the top of the loaf, but found that they don’t do much and the look of the bread is nicer without them. Cook for thirty minutes.
    Remove the lid and cook for an additional five minutes or so to get the top get crusty.
    It’s tempting to cut it right out of the oven, but you get a better result if you let it cool for ten minutes or so.

    Now, I might add that with this recipe is everything depends on the Dutch oven or pot that you use to cook it in. With mine, I can’t get the crust extremely crusty, without burning the bottom of the bread, so I settle for a medium crust. I’ve seen others do it where they can cook and extra five minutes or so and get it crusty all over. You can try adding parchment paper to the bottom of the pot; that will give you some additional cooking time.

    And that’s it. No-knead bread. Fast, easy, fun, and costs probably around thirty cents a loaf. Obviously, there are no preservatives in it like there are with store-bought bread, so it won’t stay fresh for more than a week or so, but you won’t have to worry about it. This bread goes fast. We’ve never had a loaf make it to three days.

    Two days is our record—two days, five hours, and sixteen minutes.

  • Austin

    Austin

    pizza

    There are many people in the world that are nice, once you get to know them. Once you peel back a few layers. After you coax them out, develop some trust and gain access to the true individual. But rarer are those souls that are nice — genuinely nice — from the moment you meet them. From the very second you walk into their lives you know you are standing in front of the pure, unguarded, essence of the individual. They have no agendas or desires to impress. These are just balanced and happy and the pleasure of life just spills out. They can’t help it. They are content which makes them nice.

    Al Santillo is one of those truly nice guys. Al owns Santillo’s Brick Oven Pizza, which is located in a small house tucked between a church and an apartment building in Elizabeth, New Jersey — in fact, when I was first trying to find it, I walked in the front door and walked back out; this could not be the place with three pages of raving Yelp reviews for it. It was so small, so —- so, not what I was expecting. I walked in, saw Al, his back to me writing something down at a cluttered table, I didn’t see any lines of people clambering for what I was told was the best pizza in New Jersey, I didn’t see any banners, posters or signs telling the customer how amazing their pie was. So I left.

    When I got to my car I went back to the Yelp search — because this pizza was for Austin and it had to be great. This was going to be his last dinner with us before he moved and I wanted it to be — well, amazing. Austin had had now had his first taste of good pizza a few weeks before this when we had taken him to New York City for his first time, his going away present. So this had to rival that pizza and since I had a meeting in New Jersey— which is close to New York, the capital of Pizza — this is where I would find it. Hopefully.

    Now, we had known Austin was leaving us for a while, several months actually, but denial is a wonderfully comforting thing when you call upon it. And we did. But the day rudely came anyway. On Saturday morning, Austin and his family would begin the 1800 miles trek from Delaware to Colorado to begin a new life.

    Austin came into our lives seven years before this. I had walked into the family room one day and there were three warm bodies in there, instead of only the two male dependents that share my last name.

    “This is Austin,” Nick introduced from behind him. Not taking his eyes off the screen or taking his hand off the controller.

    “Hi,” Austin said, while killing Nick’s character in a blaze of digital gunfire.

    And from that time he was a fixture at our house. But it wasn’t until the first time that this shy and quiet kid looked into our refrigerator and screamed out, “We’re out of ice tea.” And Debbie yelled back. “I’ll get some in the morning.” — was he officially part of the family.

    Over the past seven years Austin would go on family trips with us, vacations and most weekends either he was sleeping at our house or Nick was sleeping at his. In fact, Austin and Nick were in my car when I learned our house was on fire and I broke every speed law in Delaware to get to it. And they both took dates together to the prom.

    With all the electronic gizmos available, Nick and Austin will keep in touch. They’ll face time and game together and do a bunch of other technological miracles that I don’t understand. But first, I had to get him pizza.

    After I had conformed with Yelp that I was at the right place, I walked back into Al’s place. He spent the next thirty minutes telling me about the difference between cheese from Romania and cheese from Wisconsin. Without ever meeting me before, he brought me behind the counter to try a pizza type he was experimenting with, he asked me about my family and where I grew up and he showed me how his huge brick oven works.

    Al is a genuinely nice guy.

    Just like Austin.

    And, oh yeah —. Al’s pizza is absolutely amazing.

  • REVIEW: The Anchor Bar, Home of the Original Chicken Wing

    REVIEW: The Anchor Bar, Home of the Original Chicken Wing

    wings

    Dover, Delaware — the smack-dab center of The First State — is a small city of about 40,000 people. It’s the capital of Delaware, the home of the monster mile NASCAR track, and is part of the Delmarva Peninsula — a massive stalactite of land that hangs down between the Delaware Bay and the Atlantic Ocean.

    Now, if you have ever have the chance to visit our fair town, you’ll be able to see all of it pretty quickly — visit the nearby beaches, take pictures of the track, walk through the historical sites. Those are fine and dandy, but what truly makes Dover great are the subtle cultural differences of our city.

    For example, the law that requires a driver to pull over when an ambulance, fire truck, or police car have their sirens and lights on, doesn’t apply here — I mean, the law does apply, but it’s a silly law and no one knows about it. In fact, if you are ever in Dover and do see an emergency response vehicle behind you  — sirens flashing and horn whaling — just do what we do. Bear down and protect your road space — that obnoxious truck can go around you if he’s in such a gosh darn hurry.

    Because in Dover, we have our own way of doing things. For example, we never say goodbye. In fact, we don’t ever end a conversation at all. Let’s say you run into someone you know in a store or on the street. You’ll stop. Say hello. Talk for a while. And then, when the conversation is slowing down — this is the part where you other people say, talk to you soon, or see you later — we just walk away. Then months later, when we run into that person again, we can start the conversation right where we left it.

    And because Dover is a military town, if you are ever at a Little League game or a Caesar Rodney Basketball or Football game, you will experience a reverence during the national anthem like you have never seen. Once the sound of the swoosh of hats being pulled off is over, the silence that will fall will simply hold you.

    But one of the great paradoxes of Dover life involves the food. It’s…well…it’s bad. No that’s a lie, it’s gawd-awful. But this actually turns out to be a good and a bad thing. It’s a bad thing that it’s so terrible. But it’s a good thing because no one knows it.

    We have very few independent restaurants in Dover, and we have every franchise that’s ever been in existence. It’s all we know and it’s all we compare to. Is the pesto grilled chicken at Olive Garden better than the pesto grilled chicken at Applebee’s? Hmmm?

    [amazon asin=B006UU07MA&template=iframe image][amazon asin=B005Z492PU&template=iframe image][amazon asin=B0000DDU2S&template=iframe image][amazon asin=B000V1H0D8&template=iframe image]

    Which brings us to the chicken wing. Many people believe that a chicken wing — simply a wing, deep fried and covered with sauce — is a chicken wing. Many people believe that these are easy to make and hard to screw up. They’re all the same, right? Worse yet, people even believe that wings at Buffalo Wild Wings, Hooters, or TGI Fridays are real wings.

    Well, I’m here to tell you that these people are wrong — and probably communists.

    If you have never been to a little independent bar or restaurant — and this is where the magic happens, a place where the kitchen can be creative and not follow a franchise recipe — and you have never tasted a great chicken wing then it’s easy to think this. Sure, there is some comfort in not knowing. But, you have a hole in your life that needs to be filled.

    When I was twelve years old I got glasses for the first times. I was sitting in my mother’s car after the doctor’s appointment and I put the glasses on. I can still tell you — forty years later — how my world went from fuzzy and foggy to crisp and in Technicolor in seconds. Pow. But before this moment, I never knew the world was like this. I didn’t know what I was missing. It’s the same with a great chicken wing. Your world will never be the same.

    The history of the chicken wing began on a Friday night in 1964 in a place called The Anchor Bar in Buffalo, NY. Now the story is a little unclear of whether Dominic Bellissimo — the son of the owner, Teressa Bellissimo — was returning from college that night or was actually working the bar. But what is known is that when Dominic’s friends got there, they were all very hungry. So Dominic asked his mother to cook them something. Teressa went into the kitchen and found some chicken wings that were there to make stock. She deep fried them, covered them with a hot sauce mixture, and served them. They were a hit, and Buffalo chicken wings were born. (No, the name has nothing to do with the endangered, horned animal of the great plains.)

    And now, fifty years later, you can have Buffalo wing potato chips and Buffalo wing pizza.

    So the question is, does the birthplace of the chicken wing make the best chicken wing?

    The answer is yes. Yes it does.

    And no.

    Being brought up in upstate New York I have had some great chicken wings in my life, made by some great chicken wing masters. And I will tell you that the wings at The Anchor Bar — the original site on Main Street in Buffalo — are absolutely the best I’ve ever had. Bar none.

    They are crispy, but moist. Flavorful and rich. And the sauce…all I can say is wow.

    Yes, The Anchor Bar makes the best wing.

    But, big stipulation here, only at their original location.

    Recently, The Anchor Bar has expanded and now has several locations; at the Buffalo Airport and other locales across Western New York. I’ve eaten at a few of them and the magic is just not there.

    Now if you travel to Buffalo, you will hear some smack about a place called Duff’s and there is a pretty heated rivalry between Duff’s and The Anchor Bar for the best Buffalo chicken wing. So, I’ve eaten at both and my vote goes to The Anchor Bar, hands down. The sauce at Duff’s is hotter — and I always order my wings suicide-style — but making a sauce hot is not a difficult trick since there are so many pepper extracts on the market.

    So the best chicken wing in the country — and possibly the world — goes to The Anchor Bar.

  • How to Make a Real Cup of Coffee

    How to Make a Real Cup of Coffee

    how to make coffee

    Electric coffeemakers are wonderful things. We take cold water and ground coffee and put them in a machine. We push a button and even before we’ve read through our morning emails, there is a fresh pot of coffee waiting for us. Ding! Depending on the brand of coffeemaker, the overall brew time is between 4 and 7 minutes. Not bad. The modern coffeemaker can trace its roots back to 1972 when Mr. Coffee came out with the first commercially successful automatic drip coffeemaker. Before that, every kitchen in America had either an electric coffee percolator or a coffee pot that was placed on the stove.

    The electric coffee percolator is that device you’ve seen in every episode of The Brady Bunch and Leave it to Beaver. It’s a metal pot that you fill with water. Inside, a long stem fits in the bottom of the pot and a basket attaches to the top where you place the ground coffee. As the temperature rises, the water in the bottom of the chamber boils and travels up the stem to the basket. The hot water is distributed over the dry coffee  and leaches back into the pot. Depending on the brand of percolator you use, a full pot of coffee in an electric percolator should take anywhere from 7 to 11 minutes to make.

    The newest coffee innovation is the K-cup style coffee machine. This was created by Keurig — the ‘K’ in K-cup — who in 1998 introduced a single cup coffee maker designed for office use. In this machine, a K-Cup — a sealed plastic cup of coffee, hot chocolate, tea, etc. — is placed in the machine, water is added, you push the button, and you have one cup of the very coffee you want. Then your cubicle mate can get another cup of a different flavored coffee. It was a success and the company branched out into home style units and now everyone from Folgers to Dunkin’ Donuts offers their coffee in a K-cup option. The time for one cup on a Keurig coffeemaker is just a couple minutes.

    [amazon asin=B004978NKY&template=iframe image][amazon asin=B000RK4GNA&template=iframe image][amazon asin=B000IBLBS6&template=iframe image][amazon asin=B00006IV0Q&template=iframe image]

    The average American consumes 19 gallons of coffee a year, which doesn’t seem like much except that it is second only to milk and beats soda and energy drinks by a wide margin. And the coffee market is such that you can now get a mocha latte at McDonald’s and have twelve different types of coffees to choose from when you pump your gas. But real coffee — simple and classic coffee — is easy to make, takes about the same time as the other methods, and costs pennies compared to your $12 Venti triple mocha.

    How to Make a Real Cup of Coffee

    So the rules here are simple. Get yourself a classic coffee pot that sits on the stove — the electric kind won’t work here because you need to get the water to a rolling boil. Also you want a standard coffee pot that is a cylinder, not one that is tapered and larger on the bottom — you’ll see why in a minute.

    1. Take out the coffee stem and basket and set aside — you’ll need these later.
    2. Fill your coffee pot with water and add a pinch of salt — this takes some of the bitterness out of the coffee.
    3. Bring the pot to a rolling boil.
    4. Now, remove the pot from the heat and wait thirty seconds — this is important because if you add the coffee right after its been boiling, it will flash up and the grounds will cling to the inside of the pot and you’ll not only have grounds in your coffee when you pour but you will waste coffee.
    5. Add the coffee directly into the water, stirring it in if needed. This is to allow the coffee to brew in the water and not get burned by the constant boiling if you use the coffee pot as it was intended.
    6. Cover the pot and let sit for 6 minutes — 10 minutes creates this dark, richer coffee many people like, but 6 minutes is where I like it.
    7. Take the basket and drop it into the pot, then take the large stem with the large part down and drop it into the pot — you would think the stem could fit the other way but it is slightly smaller to allow the basket to sit on the stem.
    8. Slowly press the basket down, pressing the coffee and keeping the grounds on the bottom.
    9. Hold the stem down and pour. Now when you try this for the first time the coffee may taste weaker than what you are accustomed to. And this could be because coffee is very easy to burn and often that rich taste we’ve gotten used to at the gas station or the diner is actually burnt coffee. This could also be because  bolder coffees are often perceived as having more caffeine and therefore we want our coffee to be as dark and bold as possible — when in actuality the light roasts coffees have the most caffeine.

    And that’s it. Enjoy.

  • How to make homemade soup

    How to make homemade soup

    soup

    The concept of soup is as old and established as the act of cooking itself. In fact, the very first item cooked — and I’m not referring to tossing pieces of a raw buffalo or venison over a fire but the first meal — was most likely some kind of soup.

    Soup dates back to primitive man and there is evidence of soup as far back as  6,000 BC. Now, this was the days long before waterproof pots were around to boil liquid in, so rocks would be heated in a fire and then dropped into a hollow log, goard or reed basket full of water. Then meats and vegetables were added. And boom. You have soup.

    Now, the word soup comes from either the French word for broth, or the German word for soak — no one is really sure. But the experts do agree that the word restaurant is from another French word, originally meaning a place to buy soup.

    In the hobo jungles of the 1930’s there was always a pot of soup simmering over the fire. There, the hobos could jump on and off the freight trains and add whatever they found along their travels — a few carrots, an onion, some potato — into the communal pot.

    To us men, knowing how to make homemade soup is crucial. First of all, it gives us a low cost food source. We can make soup for pennies and in fact the cost to make a pot of homemade soup is roughly half the cost of canned soup —- http://juliemcm.blogspot.com/2010/11/canned-soup-vs-homemade-cost-comparison.html . Soup is also a great way to reuse leftovers as well as a method to stretch food farther. And if you hunt, soup is the perfect way to mellow the gaminess of meats. And like all peasant dishes — chili, ratatouille, shepherds pie — homemade soup is easy, hearty, fun to make and feeds many.

    HOW TO MAKE HOMEMADE SOUP

    There are many methods to make homemade soup but this is the method that I have been using for years. It’s simple, basic and allows you to add or change anything along the way.

    The trinity. Onions, garlic, celery. In a pan with some butter and olive oil, fry some sliced onion, garlic and green pepper. You want to sweat these bit — soften them up — but not brown them.

    Into the pot. Place the Onions, garlic and green pepper into a stock pot and set aside.

    Meat. It’s not required to use meat or chicken in soup. In fact, I often think the meat takes away from the flavor of a really hearty soup. If you do not want to use meat, potato is a great substitute because it is so dense but a little known secret is rutabaga. Rutabaga is extremely dense and cooked over long times in a soup it softens up but still remains firm — it also gives the soup a strong flavor. But if you are going to use it, this is where you do. Brown your chicken or you beef in a pan. Once they are browned place them in the stock pot.

    Vegetables. Now you want to add in your core vegetables in — carrots, green beans, peas, whatever you want. The only rule is, fresh not canned. I know it may seem like an extra step but fresh vegetables are actually less then canned and the flavor will be noticed.

    Liquid. Add your liquid to the stock pot, completely covering everything and there is only one rule here. No water. You can use anything — and I mean anything — but water. Beer or wine works great and so does apple or tomato juice — I even know one guy who saves the leftover coffee as his soup stock. And of course, you can use beef, vegetable or chicken stock. Now store bought stock is okay — and I mean just, okay — but nothing beats stock from scratch — the next time you cook a chicken or a ham, save the bone. Toss it in the freezer and make your own stock — and remember, stock can be frozen and saved and thawed out when needed.

    Here is a great stock recipe —-

    http://southsidermagazine.com/2012/10/homemade-stock-is-the-backbone-for-any-soup/y that saves

    Spices. Remember to spice in layers, not all at once. And keep tasting until you get where you want to be.

    Simmer. Once everything is mixed in let the soup simmer. How long is up to you but the longer it simmers the more the flavors marry.

    Experiment and enjoy.